Coil ceramics is one of the oldest and most creative pottery techniques in the world. Long before the invention of the pottery wheel, ancient artisans used coils of clay to build functional and decorative objects. Even today, coil building remains a popular method among beginners, hobbyists, and professional ceramic artists because it is simple, flexible, and highly expressive.
The coil technique involves rolling clay into long rope-like pieces and stacking them to form shapes. These coils are then blended or left visible depending on the design. The beauty of coil pottery is that it allows artists to create almost any shape, from small bowls to large sculptural vessels. Because the process is done by hand, every piece becomes unique and carries the personal touch of the artist.
To begin coil ceramics, a few basic materials are required. The most important material is clay, usually earthenware, stoneware, or porcelain depending on the desired finish. Other useful tools include a wooden rib, needle tool, sponge, slip, and a small knife for trimming. A flat surface for rolling coils and water for smoothing joints are also necessary. Once the piece is built and dried, it is fired in a kiln and often glazed to create a smooth, colorful, or textured finish.
This article explores ten creative coil ceramics ideas that beginners and experienced artists can try. Each idea explains the preparation process, materials used, and the artistic possibilities involved.
1. Coil Ceramic Bowl
A coil ceramic bowl is one of the easiest and most practical projects for beginners. It allows artists to learn the fundamentals of coil building while creating a useful everyday object.
To begin, prepare the clay by wedging it properly to remove air bubbles and make it smooth. Roll a slab of clay and cut a circular base using a knife or template. This base will support the entire bowl. Next, roll long even coils using the palms of your hands on a flat surface. Try to keep the thickness consistent so the bowl walls remain stable.
Place the first coil along the edge of the base and gently press it down using slip, which is clay mixed with water. Continue stacking coils on top of one another while slightly pressing them inward or outward depending on the desired bowl shape. A wooden rib or finger can be used to smooth the inside and outside walls.
Once the shape is complete, refine the rim and remove excess clay. Allow the bowl to dry slowly under plastic to prevent cracking. After it reaches leather-hard stage, you can add simple carved designs or textures.
Finally, the bowl is bisque fired in a kiln and then glazed. A simple transparent glaze highlights the natural beauty of the clay, while colored glazes can add decorative appeal.
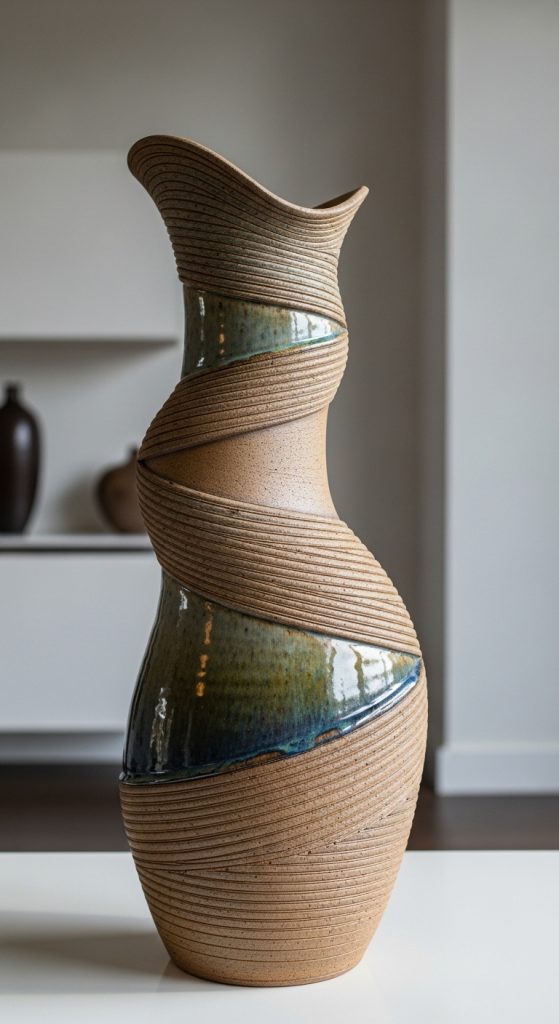
2. Decorative Coil Vase
A decorative coil vase is a beautiful piece that combines artistic expression with functional pottery. Unlike a simple bowl, a vase allows more freedom in shaping curves and vertical forms.
Start by preparing a thick circular base similar to the bowl project. Because vases are taller, the base must be slightly thicker for support. Roll medium-thickness coils and attach the first coil to the base using slip.
As you stack coils upward, gradually adjust the direction of the coils to shape the vase. Pushing the coils outward creates a wider belly, while bringing them inward forms a narrow neck. A rib tool or fingers can help smooth the joints and maintain the structure.
For decoration, artists can leave the coils visible instead of smoothing them completely. This creates a rustic and handcrafted texture that many ceramic artists appreciate. Another option is to press small patterns or stamps into the clay surface.
Once the vase reaches the desired height, refine the rim carefully so flowers can be placed easily later. Let the piece dry slowly to avoid cracks caused by uneven moisture.
After bisque firing, glazing becomes the final artistic step. Matte glazes often highlight texture, while glossy glazes create a more elegant and reflective surface.
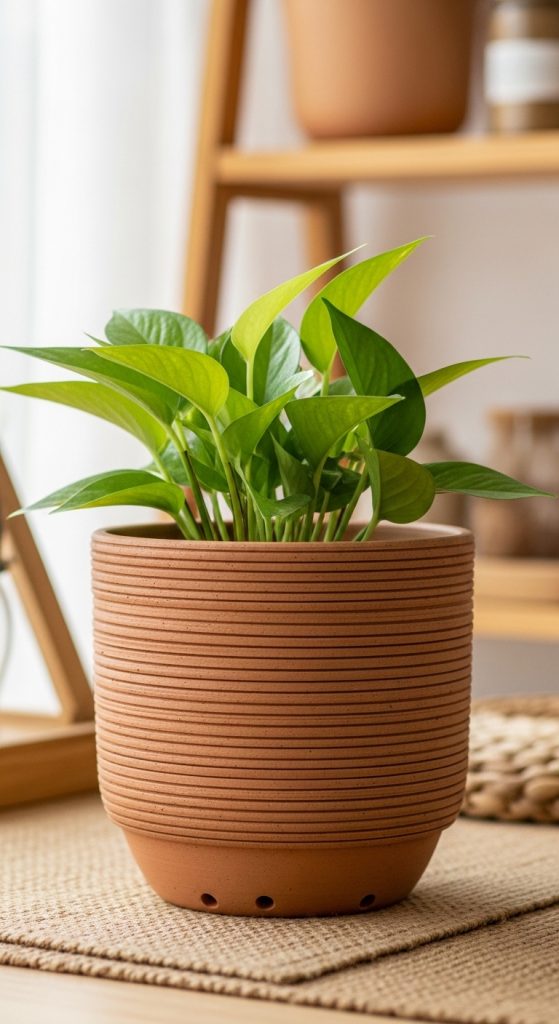
3. Coil Planter Pot
A coil planter pot is a practical ceramic project that can be used for indoor plants, herbs, or small flowers. It also provides an opportunity to experiment with thicker walls and sturdy structures.
Begin by wedging the clay and forming a strong base. Since plants require drainage, remember to create one or two small holes in the base before attaching the coils. These holes prevent water accumulation that could damage plant roots.
Roll thick coils and begin building the walls of the pot. Planter pots often have straight or slightly curved walls, making the construction process straightforward. Press the coils together firmly and blend the inner joints to strengthen the structure.
Texture plays an important role in planter designs. You can create horizontal grooves by leaving the coils slightly visible or add decorative elements such as carved leaves, geometric patterns, or stamped designs.
Once the pot reaches the desired height, smooth the rim so it looks clean and balanced. Allow the piece to dry slowly to prevent cracks, especially because thicker clay retains moisture longer.
After firing, apply glaze only to the outside surface if you want a natural clay interior. Many ceramic artists prefer earthy colors such as brown, green, or terracotta tones that complement plants and natural environments.
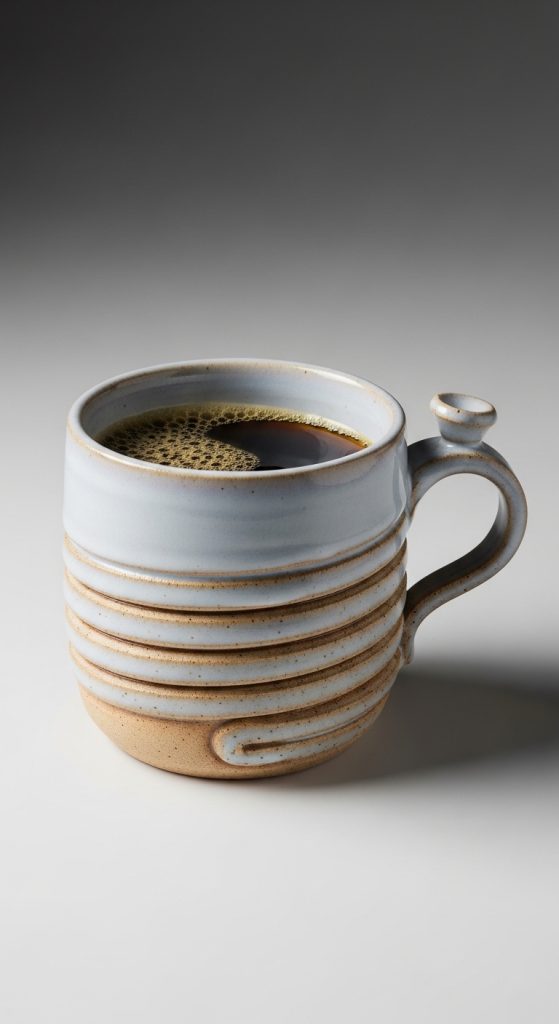
4. Coil Ceramic Mug
Creating a coil ceramic mug is slightly more challenging because the walls must be strong enough to hold liquids and the shape must be comfortable to hold.
Start with a small circular base. Roll thin and even coils, as thick coils may create heavy mug walls. Attach the first coil carefully and continue stacking them upward while smoothing the inside surface thoroughly.
The shape of the mug should remain mostly straight to hold beverages effectively. Use your fingers or a wooden rib to compress the walls and remove air pockets between the coils. This compression improves durability during firing.
After building the body, let the mug reach the leather-hard stage before adding a handle. The handle can be formed by rolling a small coil and flattening it slightly. Score both the mug wall and the handle ends before attaching them with slip.
Refine the rim carefully so drinking from the mug feels comfortable. Any rough edges should be smoothed using a damp sponge.
Once the mug is fired, glazing is essential to make it waterproof. Food-safe glazes are recommended, especially if the mug will be used for coffee or tea. A glossy glaze inside the mug helps with easy cleaning and prevents absorption.
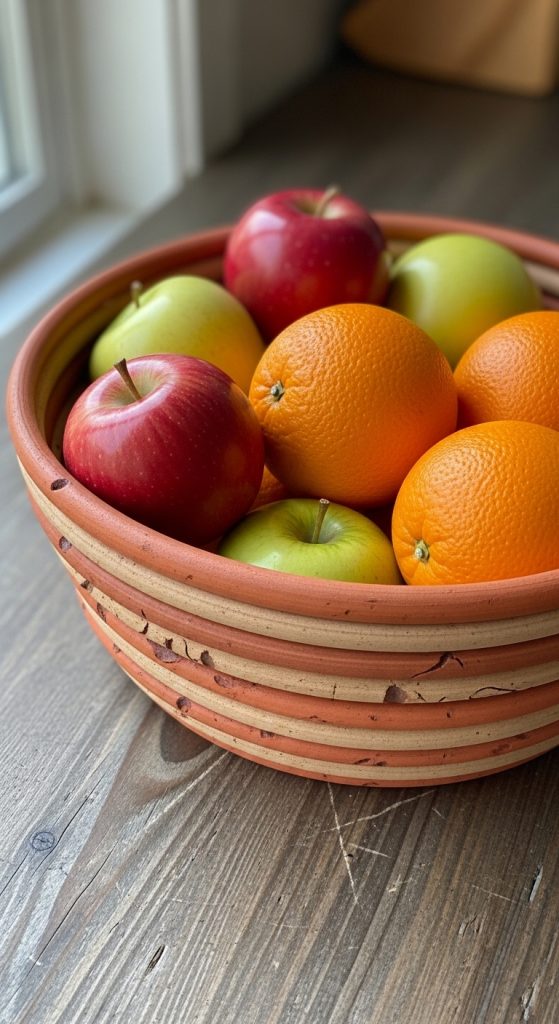
5. Coil Fruit Basket
A coil fruit basket is both decorative and functional. It allows artists to create open designs that showcase the beauty of coil construction.
Begin with a sturdy circular base similar to other projects. Build the walls using coils, but instead of smoothing them completely, leave slight gaps between certain coils to create a basket-like structure. These openings allow air circulation, which helps keep fruit fresh.
The basket shape usually flares outward as it rises. This shape makes it easier to place fruits such as apples, oranges, or bananas inside. Use gentle pressure to maintain the curve and prevent the walls from collapsing.
Some artists add decorative handles to the sides of the basket. These handles are made using thicker coils shaped into arcs and attached securely using slip.
Texture is another important design element. You can use carving tools or textured rollers to create interesting surface patterns. Even simple finger marks can give the basket a handmade appearance.
After drying and firing, apply glaze sparingly. Many ceramic baskets look attractive with partial glazing that highlights the natural clay surface.
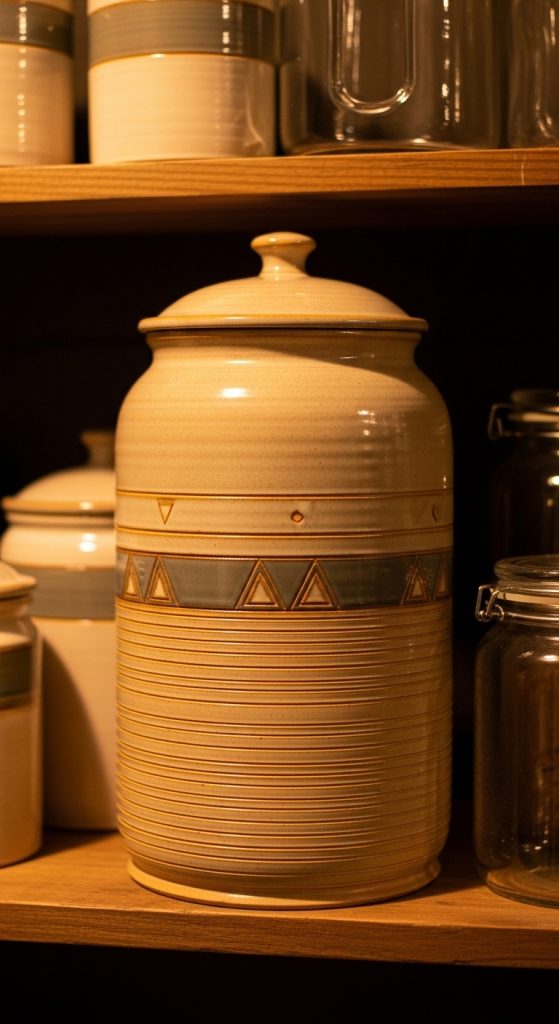
6. Coil Storage Jar
A coil storage jar is a useful container for storing kitchen items such as sugar, tea, or spices. It can also be used for decorative storage around the home.
Start with a thick base and build the jar walls using evenly rolled coils. Unlike bowls or vases, storage jars usually have straight vertical walls for maximum capacity. Maintain consistent thickness to prevent weak spots.
As the jar reaches its full height, create a slightly narrower opening to hold a lid. The lid can be made separately using a small clay slab or coil technique. Make sure the lid fits properly while the clay is still leather hard.
To decorate the jar, you can carve patterns, add small clay appliqués, or use stamping tools. Some artists prefer smooth minimalist surfaces, while others enjoy complex textures.
Once the jar dries completely, it is bisque fired and then glazed. A fully glazed interior is recommended if the jar will store food items. The exterior glaze can be glossy, matte, or layered with multiple colors for artistic effects.
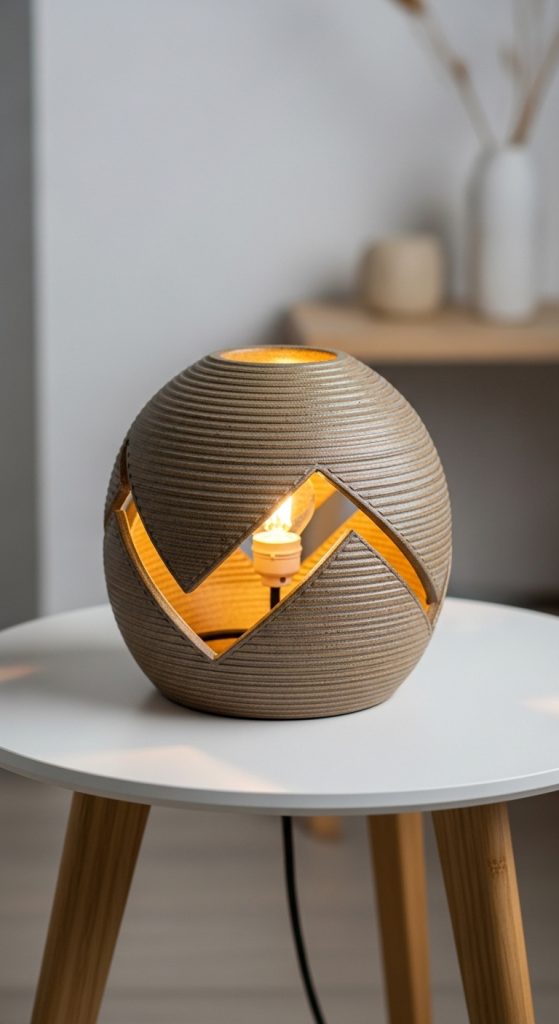
7. Coil Lamp Base
A coil lamp base is an advanced project that combines ceramic art with interior design. The finished piece becomes a functional lighting element for homes or studios.
Begin by designing the overall lamp shape on paper. Because lamps require electrical wiring, the base must include a hollow center where the wire can pass through.
Build the structure using thick coils and gradually shape the form. Lamp bases often have wide bottoms for stability and narrower upper sections. Use tools to compress and smooth the walls to prevent structural weakness.
Before the clay dries completely, create a small hole at the bottom for the electrical cord. This step is important because drilling after firing can damage the ceramic.
Decorative patterns such as carved lines, textured coils, or geometric shapes can enhance the visual appeal of the lamp. Some artists also create cut-out openings that allow light to shine through the ceramic body.
After firing and glazing, the ceramic base can be fitted with a lamp socket and bulb. Neutral glazes such as cream, grey, or black often complement modern interior spaces.
8. Coil Wall Art Plate
Coil wall art plates are decorative ceramic pieces designed to hang on walls. They combine pottery techniques with sculptural art.
Start by forming a flat circular base using a clay slab. Instead of building high walls, add short coils around the edge to create a raised border. This border frames the artwork.
The central surface becomes the canvas for decoration. Artists can carve detailed patterns, press textures, or add raised clay shapes. Floral motifs, geometric designs, and abstract patterns are common choices.
Because the plate will hang on a wall, it is important to attach a small clay loop or hole on the back before the clay dries. This allows the plate to be hung using a hook or wire.
After bisque firing, glaze or underglaze painting can bring the artwork to life. Bright colors often work well for decorative plates, especially when displayed against plain walls.

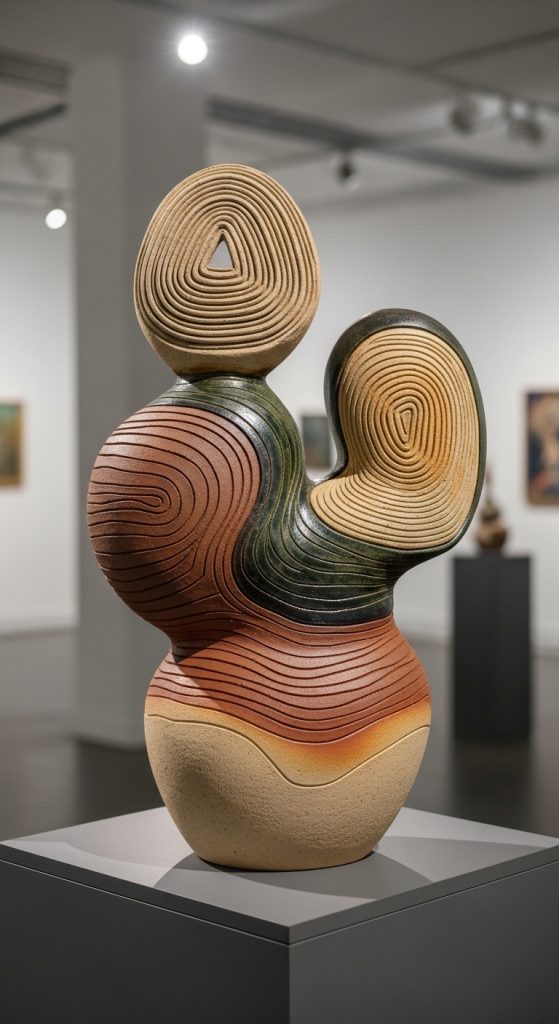
9. Coil Sculpture
Coil sculpture allows complete artistic freedom. Instead of creating functional pottery, the focus is on expressive shapes and artistic storytelling.
Artists begin with a simple base or armature that supports the sculpture. Coils are then layered and shaped to create forms such as animals, abstract shapes, or human figures.
Because sculptures can become complex, it is important to maintain balance and structural strength. Thicker coils are often used for large pieces, while smaller coils help create fine details.
Surface treatment is an important part of sculptural ceramics. Artists may leave the coils visible to emphasize the handmade process or blend them to create smooth organic surfaces.
Once the sculpture is complete and fully dried, it is fired and sometimes painted with glazes or ceramic stains.
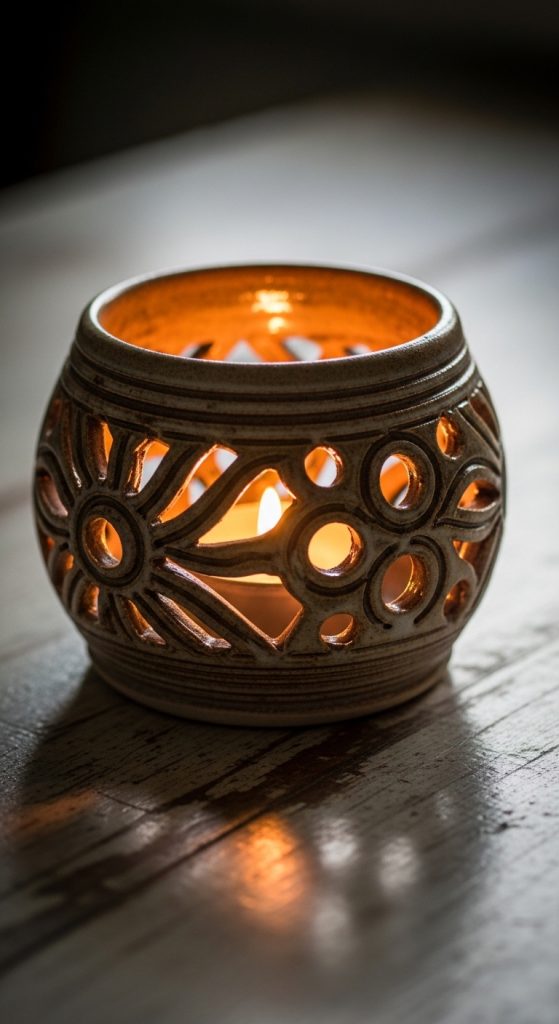
10. Coil Tea Light Holder
A coil tea light holder is a small but beautiful ceramic project. It is perfect for beginners who want to practice coil building without committing to large pieces.
Start with a small circular base and build short walls using thin coils. The holder should be large enough to fit a standard tea light candle. Keep the walls slightly thick to ensure heat resistance.
Decorative cutouts can be carved into the walls while the clay is still soft. These openings allow candlelight to shine through, creating attractive patterns in the surrounding space.
Textures such as stamped designs or carved lines can also enhance the appearance. Because the piece is small, even simple decorations can make a strong visual impact.
After firing, glaze can be applied in warm tones such as amber, red, or gold to enhance the candlelight effect. When lit, the ceramic holder creates a cozy and relaxing atmosphere.