Ceramics and pottery are ancient crafts that continue to inspire creativity today. They involve shaping clay into functional or decorative objects, allowing artists to explore both practical design and artistic expression. Working with clay teaches patience, precision, and an understanding of materials and firing techniques. Whether making everyday items like mugs and bowls or decorative sculptures and tiles, pottery provides a tactile and rewarding experience. The process includes preparing the clay, shaping it using various methods, drying, firing in a kiln, and applying glazes or finishes. Each stage requires attention to detail to avoid cracks or deformities and to ensure durability. For beginners, pottery can seem complex, but starting with simple techniques builds confidence and skill. In this blog, we will explore ten creative pottery ideas suitable for beginners and intermediate artists. Each idea includes clear instructions on materials, preparation, and shaping techniques. By following these steps, you can create beautiful, personalized ceramic pieces while learning essential pottery skills. From hand-building to wheel-throwing, these ideas provide both inspiration and practical guidance for your next project.
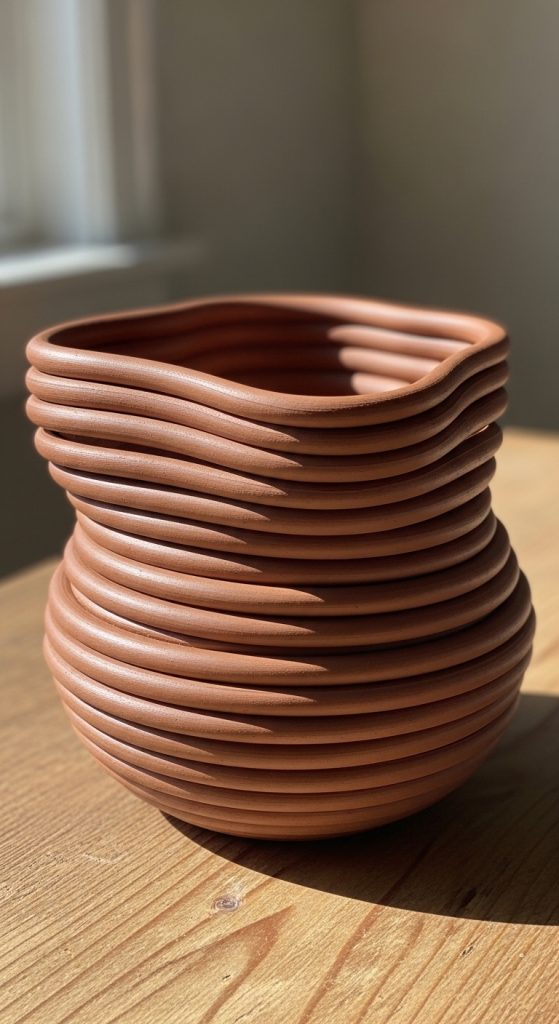
1. Simple Coil Pot
The coil pot is a classic hand-building technique perfect for beginners. This method involves rolling clay into long coils and stacking them to form the pot’s walls. You will need soft clay, a rolling pin, a small sponge, and a bowl of water. Begin by shaping a flat base from a clay disk. Roll the clay into uniform coils about half an inch thick. Layer each coil on top of the base, gently pressing them together to avoid cracks. Smooth the inside and outside with a sponge or your fingers as you build. You can create various shapes, from round planters to tall vases, depending on your design. Once shaped, allow the pot to dry slowly, as rapid drying can cause cracks. After drying, bisque fire the piece in a kiln to strengthen it. Glazing is optional but recommended for durability and aesthetics. Coil pots teach essential hand-building skills and allow beginners to explore clay’s flexibility. They are ideal for functional items like plant pots or decorative vases. This method emphasizes creativity, offering endless possibilities with simple materials and techniques.
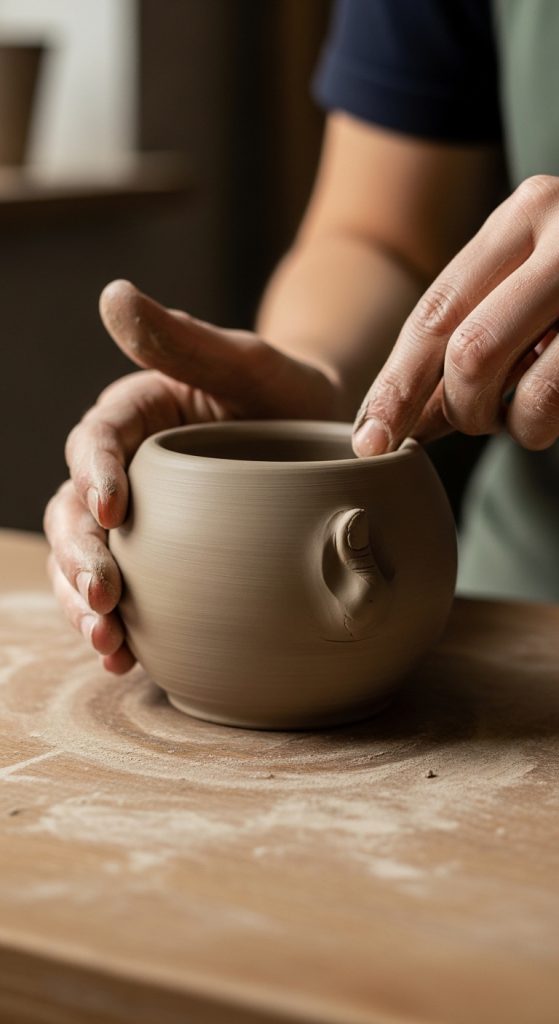
2. Pinch Pot
Pinch pots are small, versatile, and simple to make. They are an excellent introduction to hand-building pottery. For this project, you need soft clay, a smooth workspace, and basic tools such as a sponge or small carving instruments. Start by rolling a ball of clay in your hands. Press your thumb into the center to create an indentation. Then, gently pinch and rotate the clay outward, forming the walls of the pot. Continue until the walls are even in thickness. Flatten the base to ensure stability. You can add texture or patterns by pressing stamps, tools, or fabric onto the surface. Allow the pinch pot to dry slowly to prevent cracks. After drying completely, bisque fire the pot in a kiln. Glaze it afterward to enhance color and durability. Pinch pots can serve as bowls, candle holders, or small decorative pieces. This project teaches beginners how to control clay thickness and shape, providing a hands-on understanding of how clay behaves during drying and firing. Pinch pots are perfect for creating small, personal projects that are both functional and artistic.
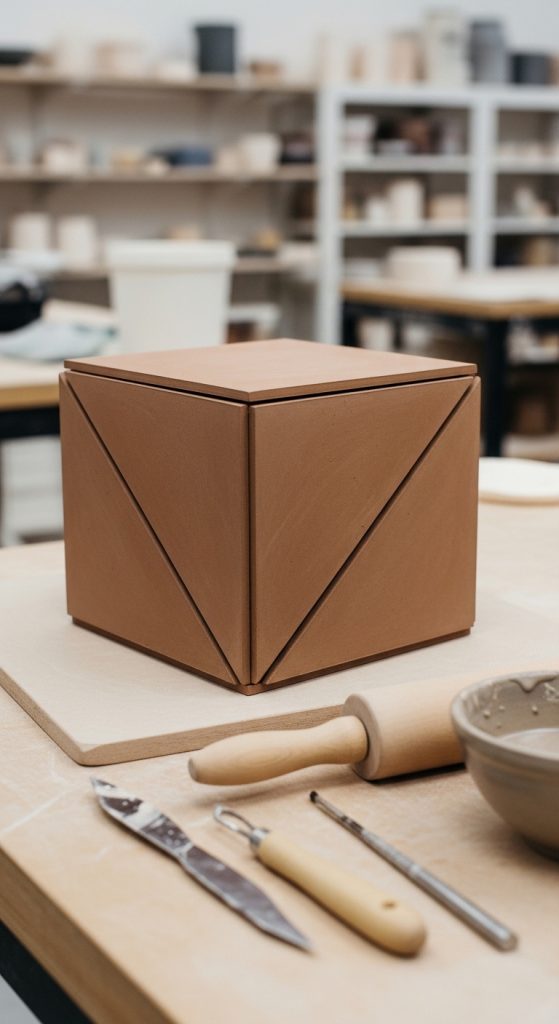
3. Slab Pottery
Slab pottery is a hand-building method that uses flat clay sheets to construct boxes, plates, and tiles. To start, prepare clay slabs by rolling clay evenly using a rolling pin or slab roller. Cut the slabs into the shapes needed for your project. Score the edges using a knife or scoring tool to create shallow scratches. Apply slip, a clay and water mixture, to the scored edges. Attach the pieces carefully, pressing gently to seal seams. Smooth the joints with your fingers or a damp sponge for a neat appearance. You can add texture or carvings to the slabs before assembling for decorative effect. Allow the piece to dry slowly to prevent warping. Once dry, bisque fire it in a kiln. Glazing can be applied afterward to add color and a protective finish. Slab pottery allows precise control over shapes and designs, making it ideal for geometric projects. It also improves planning and sculpting skills, helping potters understand how flat clay can be transformed into functional or decorative three-dimensional objects.
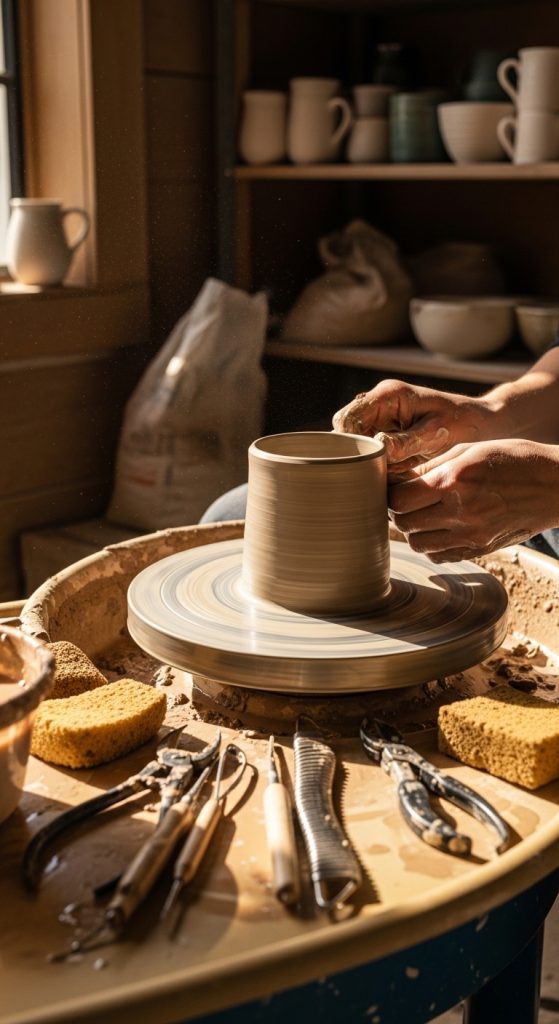
4. Wheel-Thrown Mug
Wheel-thrown pottery introduces dynamic techniques using a spinning wheel. To make a wheel-thrown mug, you need clay, a pottery wheel, water, and shaping tools. Begin by wedging the clay to remove air bubbles. Center the clay on the spinning wheel, then open it by pressing your thumbs into the center. Gradually pull the walls upward to form a uniform mug shape. Ensure even thickness to avoid weak spots. After shaping, cut the base from the wheel using a wire tool. Let the piece dry to a leather-hard state before attaching a handle. Roll a clay coil into a handle shape, score and slip the areas to attach it securely. Smooth the joints carefully. Bisque fire the mug in a kiln, then apply glaze and fire again. Wheel-thrown mugs are functional and teach advanced skills such as centering, pulling walls, and attaching components. This technique develops coordination and control, offering both practical and artistic satisfaction for potters.
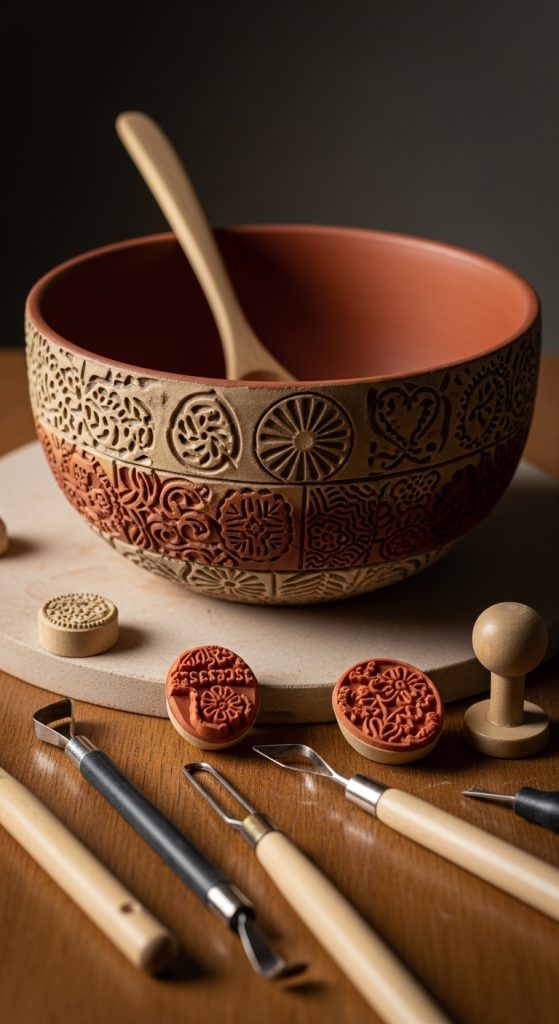
5. Textured Clay Bowls
Textured clay bowls are decorative and allow creative experimentation. Start with soft clay and shape a bowl using a pinch, coil, or wheel-throwing method. Tools such as wooden modeling tools, stamps, combs, or textured fabric can create patterns on the surface. Press the tools gently to achieve the desired texture. Smooth the rim for safety and aesthetics. Dry the bowl slowly to prevent cracking. After drying, bisque fire it in a kiln. Glazing is optional but can enhance the textures, adding visual depth. You can selectively glaze areas to emphasize patterns or use contrasting colors. Textured bowls serve as decorative pieces or functional bowls for small items. This technique encourages artistic expression while practicing hand control and pattern creation. It is ideal for those who want to combine functionality with creativity, producing unique pieces that stand out in any collection.
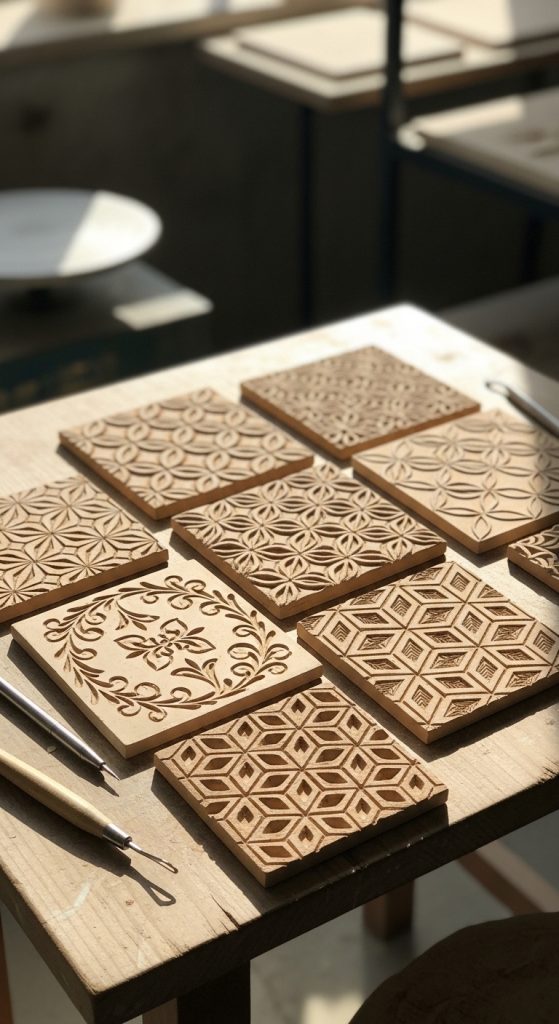
6. Decorative Ceramic Tiles
Creating ceramic tiles allows for intricate designs and artistic expression. Materials include soft clay, rolling pin, carving tools, and stamps. Roll the clay into flat slabs of even thickness. Cut into squares or rectangles for individual tiles. Use carving tools or stamps to create patterns, textures, or images on the surface. Smooth the edges and allow the tiles to dry slowly. Once completely dry, bisque fire them in a kiln. Glaze can be applied to enhance colors or create a glossy finish. Tiles can be used as coasters, wall decorations, or mosaic projects. This technique is excellent for experimenting with designs, textures, and glazing techniques. It develops skills in precision, surface decoration, and planning for consistent results. Decorative tiles combine functionality and art, making them perfect for home décor or gifts.
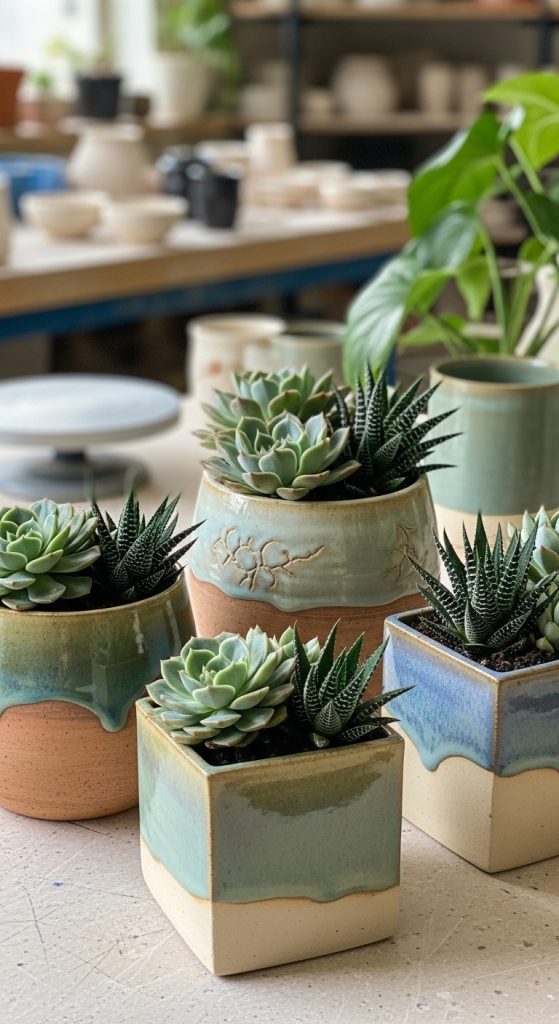
7. Ceramic Planters
Handmade ceramic planters are both functional and decorative. You need soft clay, shaping tools, a sponge, and water. Begin by creating a base, either by hand-building a coil pot, slab, or wheel-thrown form. Build the walls according to the desired height and shape. Smooth edges and ensure even thickness to prevent cracking. Allow the planter to dry slowly to a leather-hard stage. Bisque fire in a kiln to harden the clay. Apply glaze to make the planter water-resistant and decorative. After the final firing, add soil and plants. Ceramic planters teach hand-building and finishing techniques while allowing personalization through shape, size, and texture. They combine art and utility, giving beginners the satisfaction of creating beautiful, functional pottery.
8. Glazed Vases
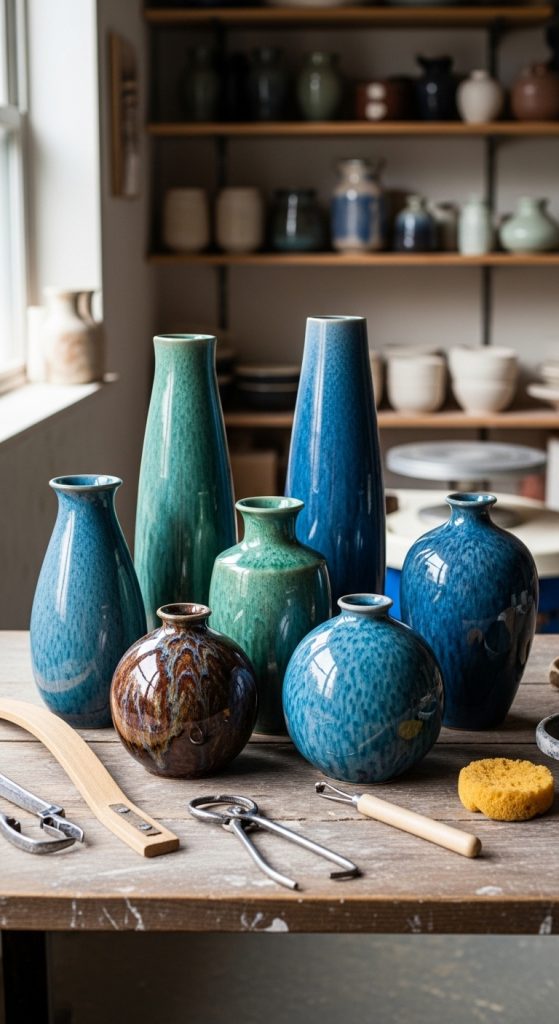
Glazed vases are elegant pieces that emphasize both form and color. Start with soft clay suitable for wheel-throwing or hand-building. Shape the vase, ensuring uniform wall thickness and a stable base. Once leather-hard, refine the shape by trimming and smoothing surfaces. Bisque fire the piece in a kiln to prepare it for glazing. Apply glaze using brushes, dipping, or pouring techniques. After glazing, fire the vase again for a finished glossy surface. Glazed vases can vary in shape, from tall and narrow to short and round. They teach advanced finishing skills and offer opportunities to experiment with color combinations, patterns, and textures. This project combines technical skill with creativity, resulting in visually striking functional or decorative objects.
9. Clay Sculptures
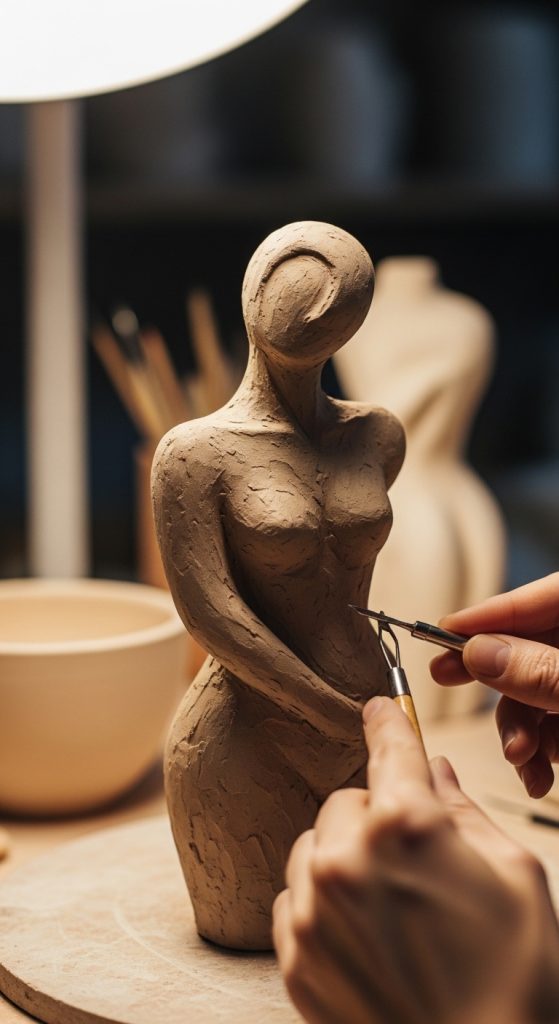
Clay sculptures allow artistic freedom beyond functional pottery. Materials include soft clay, sculpting tools, and a stable workspace. Begin by creating a basic armature for larger pieces if needed. Shape the clay into the desired form using hand-building techniques. Smooth surfaces and refine details with carving tools. Allow the sculpture to dry slowly to avoid cracks. Once dry, bisque fire in a kiln. Glazing or underpainting can add color and texture, though some sculptures remain unglazed for a natural look. Clay sculptures develop creativity, observation skills, and advanced hand control. They are ideal for both decorative purposes and artistic expression, allowing potters to explore abstract or realistic forms.
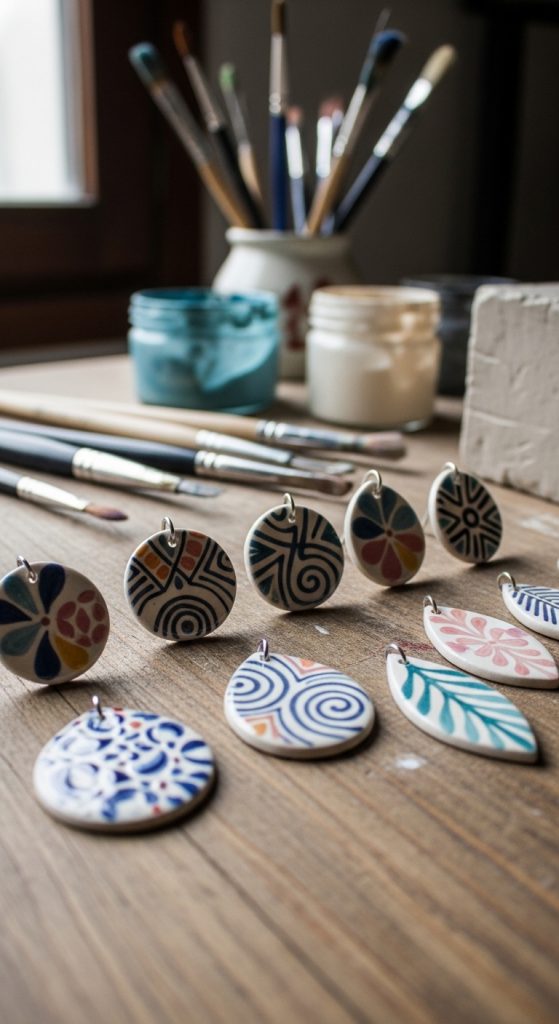
10. Ceramic Jewelry
Ceramic jewelry combines pottery skills with delicate crafting. You need soft clay, sculpting tools, small cutters, and glazes or paints. Roll the clay into thin sheets and cut shapes for earrings, pendants, or charms. Use stamps, carving tools, or texture plates to add patterns. Punch holes for stringing or attaching hooks before drying. Dry pieces slowly, then bisque fire in a kiln. Apply glaze or underglaze for color and finish with a second firing. Ceramic jewelry is lightweight, durable, and unique. This project develops fine motor skills, creativity, and precision. It allows potters to create wearable art and explore miniature design techniques in pottery.