

Designing dedicated indoor feline shelters represents an exceptionally practical strategy for enhancing domestic pet welfare while elevating overall home decor. An indoor cat house serves as a safe, enclosed sanctuary where feline companions can rest, retreat from household activity, and observe their surroundings in complete comfort. This comprehensive tutorial delivers ten distinct, highly detailed indoor shelter concepts crafted to integrate seamlessly into modern residential layouts without compromising spatial aesthetics. Readers will learn the essential principles of structural stability, non-toxic material selection, spatial proportioning, and interior textile integration required to build durable pet enclosures. Implementing a well-planned creative project improves domestic organization, contains loose pet accessories, prevents furniture scratching, and introduces a stylish architectural element to living rooms, bedrooms, and hallway nooks. Each featured concept provides clear, actionable guidance on selecting compatible lumber, handling basic hand tools, managing weight distribution, and applying animal-safe finishes. By controlling the design specifications and construction details yourself, you gain complete authority over the scale, color palette, and physical placement of your indoor pet structures, turning simple building supplies into beautifully integrated functional art.
Why Custom Indoor Pet Architecture Redefines Contemporary Living Spaces
The prominent presence of custom indoor pet enclosures across modern Pinterest ideas stems from an ongoing shift toward integrating pet welfare directly into residential interior design. Traditional commercial plastic crates and wire cages often clash with curated home decor, creating visual clutter that disrupts the harmony of living spaces. In contrast, handmade cat houses allow homeowners to craft functional furniture pieces that serve dual purposes, functioning simultaneously as end tables, bench seating, or wall art. These creative ideas carry massive DIY appeal because they allow individuals to construct high-end pet architecture using accessible materials rather than purchasing expensive retail alternatives. From an aesthetic perspective, incorporating clean wood grains, neutral upholstery textiles, geometric silhouettes, and hidden entrance portals establishes an elevated aesthetic that complements minimalist style environments. This beginner friendly approach breaks down basic woodworking, upholstery, and wall-mounting techniques into manageable steps, proving that thoughtful planning can convert unused residential corners into cozy, functional shelters.
Technical Materials Procurement and Structural Preparation Guidelines
Achieving a durable, aesthetic finish on an indoor cat house project requires systematic material preparation and an organized workspace before executing any cuts or driving fasteners. Essential supplies for these builds include three-quarter-inch cabinet-grade plywood, solid pine boards, natural woven sisal rope, heavy-duty iron mounting brackets, non-toxic water-based wood stains, and washable organic cotton cushions. Crucial tools for construction include a circular saw or miter saw, a cordless impact driver, a pocket hole jig, an orbital sander, a pneumatic staple gun, and a reliable spirit level. To prepare the workspace safely, clear a flat assembly floor and lay down canvas drop cloths to capture fine sawdust and stray adhesive drops. Sand all raw timber boards thoroughly with 120-grit followed by 220-grit sandpaper to eliminate sharp splinters, rough edges, and manufacturing stamps that could harm pet paws. Proper planning involves evaluating your indoor floor space, checking wall stud locations for mounted units, and verifying that all paints, glues, and sealants are completely free of volatile organic compounds.
Dual-Purpose Mid-Century End Table Cat Abode
Step-by-Step Guide
The dual-purpose mid-century end table cat abode merges classic mid-century modern furniture design with an enclosed, cozy feline sleeping compartment. This structural concept features a clean rectangular cabinet elevated on four tapered wooden legs, functioning as a fully operational living room side table while hiding a spacious interior pet bed. The front face includes a custom geometric entry portal that allows easy access for your cat while maintaining a discreet, elegant exterior facade. This timeless design fits seamlessly alongside sofas and reading chairs, providing an organized solution that eliminates the need for unsightly floor-based pet beds.
Executing this build begins by cutting four three-quarter-inch birch plywood panels to form a box measuring eighteen inches wide, eighteen inches deep, and sixteen inches tall. Using a jigsaw, cut a smooth six-inch circular entrance hole into the center of the front panel, sanding the interior edges until completely smooth to the touch. Assemble the top, bottom, and side panels using pocket hole screws and non-toxic wood glue, ensuring all corner joints form precise ninety-degree angles. Attach four angled metal leg mounting plates to the bottom cabinet face, screwing pre-finished four-inch tapered wooden legs firmly into place. Coat the outer wood surfaces with an eco-friendly clear satin varnish, and insert a plush, washable cushion inside the completed cabinet chamber.

Minimalist Wall-Mounted Modular Wooden Hexagons
Setup Method
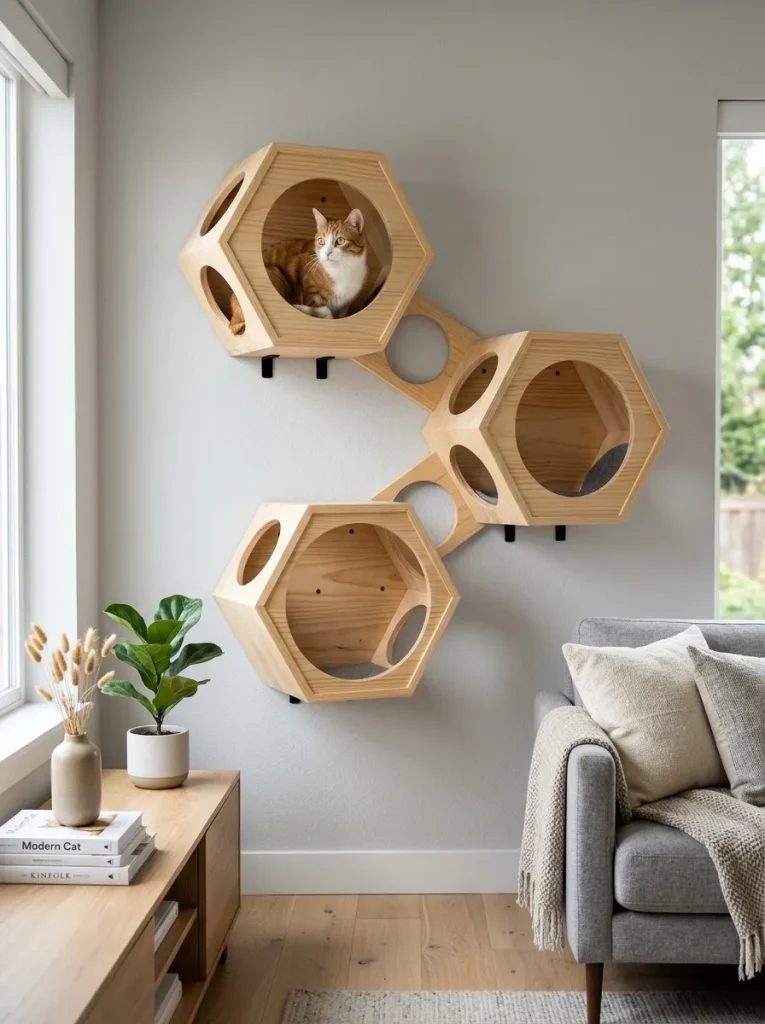
The minimalist wall-mounted modular wooden hexagon concept utilizes vertical wall space to create an elevated climbing playground and sleeping sanctuary for indoor cats. This design features a series of interconnected geometric six-sided wooden cells attached directly to wall studs, allowing pets to climb, perch, and rest high above the floor. Each hexagon module contains circular pass-through openings on the side panels, enabling cats to navigate seamlessly between multiple wall chambers. Elevating pet infrastructure keeps floor areas clear, making this layout an exceptional choice for compact apartments and minimalist style living rooms.
Setting up this modular wall system starts by constructing individual hexagonal frames from one-by-eight-inch select pine boards cut with thirty-degree mitered ends. Join the six equal timber segments together using exterior wood glue and pneumatic finish nails, reinforcing each corner seam with a metal L-bracket on the rear face. Drill five-inch circular pass-through holes into adjacent side walls using a hole saw attachment, ensuring all sharp cut edges are thoroughly sanded flat. Mount heavy-duty keyhole hangers onto the back of each hexagon unit, alignment-checking the layout against wall studs using a spirit level and stud finder. Anchor the wooden modules securely to the wall in a staggered geometric cluster, lining the bottom interior facets with self-adhesive felt padding for traction.
Scandinavian A-Frame Wooden Tent Shelter
How to Create
The Scandinavian A-frame wooden tent shelter offers a lightweight, minimalist architectural design inspired by Nordic cabin structures and simple geometric forms. This concept uses a triangular timber frame wrapped in natural canvas or felt fabric, creating a cozy, semi-enclosed teepee structure that provides a sense of security for anxious pets. The sharp angled silhouette creates an eye-catching visual accent when placed in bedroom corners or next to indoor plant arrangements. The removable fabric wrap makes this design exceptionally easy to clean, combining practical daily maintenance with a soft, warm aesthetic.
To construct this Scandinavian-style shelter, cut four three-quarter-inch square wooden dowels to a length of twenty-four inches, along with three crossbar support dowels measuring twenty inches. Drill a quarter-inch hole two inches from the top tip of each vertical dowel, joining two pairs together in an A-frame configuration using a continuous steel bolt. Connect the two triangular end frames using the three horizontal support dowels attached at the top apex and lower base joints with wood screws. Hem a piece of heavy-duty cotton canvas fabric to measure twenty inches wide by forty-five inches long, attaching brass press snaps along the bottom edges. Drape the tailored canvas snugly over the top ridge dowel, securing the bottom snaps around the lower base frame to form a taut, comfortable tent envelope.

Integrated Bookcase Compartment Pet Hideaway
Execution Process
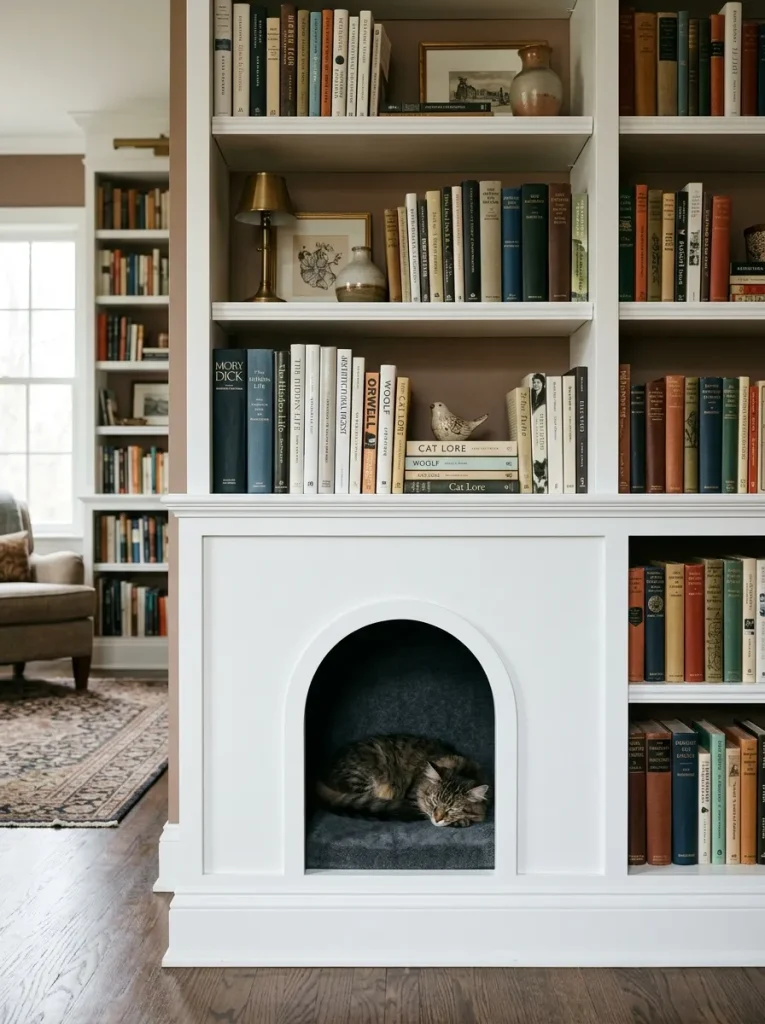
The integrated bookcase compartment pet hideaway converts an existing lower shelf unit into a sleek, built-in feline retreat that blends invisibly into home library storage. This design replaces a standard lower shelf storage bin with a customized wooden facade panel featuring a stylish cat silhouette entry port. The enclosed interior chamber provides a dark, quiet environment that satisfies a cat’s natural instinct to seek hidden, protective spaces during rest periods. Utilizing existing home decor furniture minimizes the spatial footprint required for pet accessories while maintaining a clean, highly organized room appearance.
Executing this built-in hideaway requires measuring the interior height and width of a selected lower shelf compartment inside a sturdy wooden bookcase unit. Cut a piece of half-inch medium-density fiberboard to match the exact front dimensions of the shelf opening, sanding the perimeter edges for a flush fit. Trace a clean cat-head contour or arches onto the board, cutting out the entry portal precisely using a handheld jigsaw equipped with a fine-toothed wood blade. Install magnetic push-latches along the interior side walls of the shelf frame, mounting the custom front panel onto the latches for easy removal during cleaning. Paint the front panel face to match the surrounding bookcase color palette, and place a thick memory foam pet pad inside the private lower chamber.
Industrial Concrete and Wood Layered Cubby
Step-by-Step Guide
The industrial concrete and wood layered cubby combines raw masonry textures with warm timber elements to establish a bold, modern industrial statement piece for indoor spaces. This concept features a thin-walled, fiber-reinforced concrete outer shell resting on a dark stained timber base, housing a plush interior sleeping nook. The substantial thermal mass of the concrete container creates a stable, sound-dampening interior environment that keeps pets cool in summer and warm during winter. This durable build is exceptionally resilient against claw wear, making it a long-lasting addition to urban lofts and contemporary living areas.
The practical construction process begins by building a custom double-walled wooden mold from smooth melamine boards, leaving a two-inch gap between the inner and outer box walls. Mix high-strength fiber-reinforced concrete with water according to precise manufacturer ratios, adding black iron oxide pigment to achieve a slate-grey industrial tone. Pour the wet concrete mixture into the melamine mold, tapping the outer walls with a rubber mallet to release trapped air bubbles and guarantee smooth outer surfaces. Allow the concrete shell to cure undisturbed inside the mold for forty-eight hours before carefully unscrewing the outer melamine panels. Construct a low-profile wooden base from dark walnut timber, seal the cured concrete block with a matte stone sealer, and assemble the two components with construction adhesive.

Vertical Sisal-Wrapped Tower with Internal Cabins
Setup Method
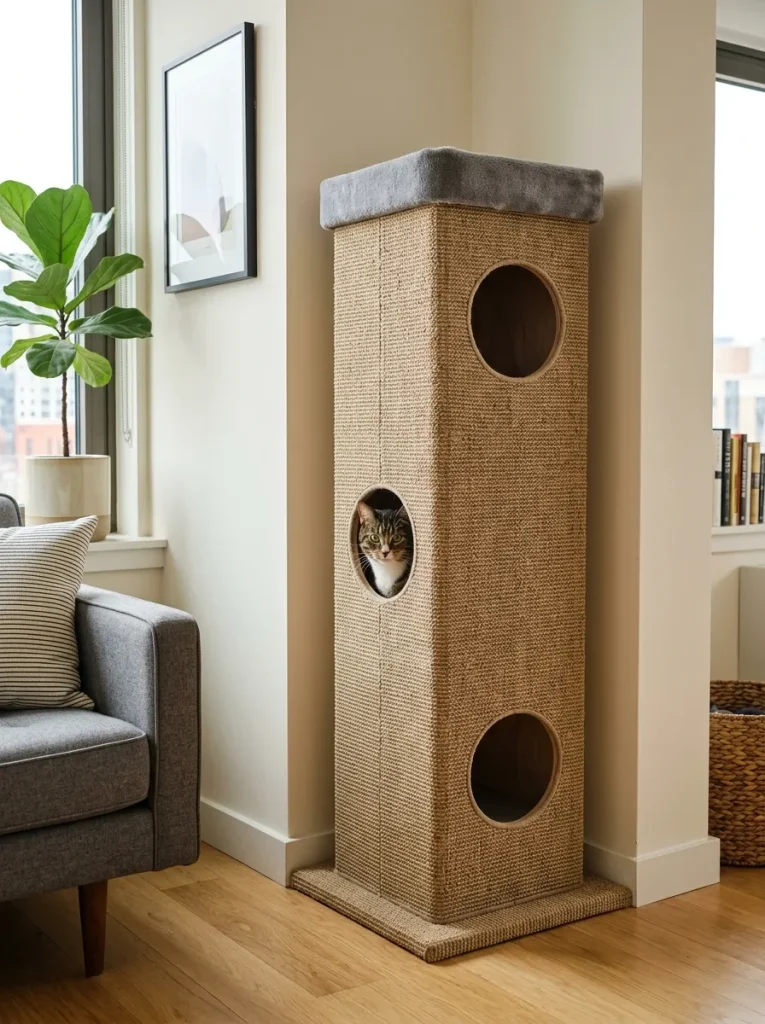
The vertical sisal-wrapped tower with internal cabins combines an active scratching post with multiple multi-level sleeping chambers inside a space-saving vertical column. This architectural design uses a tall rectangular timber frame completely wrapped in natural woven sisal carpet, featuring multiple cut-out entry portals that lead to separate interior resting platforms. Cats can exercise their climbing instincts on the rugged exterior surface while accessing private, dark resting cabins stacked inside the central column. This all-in-one activity center keeps scratch marks away from sofa upholstery while consolidating climbing, scratching, and resting functions into a single neat footprint.
Setting up this vertical activity tower starts by constructing a four-foot-tall rectangular wooden column using three-quarter-inch plywood panels joined with pocket hole joinery. Install two horizontal interior shelf partitions at sixteen-inch intervals up the column, cutting four-inch corner pass-through holes into each shelf board for vertical climbing access. Cut six-inch entry portals into the front face of each individual level, ensuring all raw cut edges are thoroughly sanded and rounded for pet safety. Wrap the entire exterior perimeter of the wooden column in heavy-duty woven sisal carpeting, securing the tough fabric with industrial spray adhesive and heavy staples driven every two inches. Mount a wide, weighted plywood base plate to the bottom of the tower to prevent tipping, and line each interior cabin floor with plush faux-fur inserts.

Floating Timber Ceiling-Suspended Canopy
How to Create
The floating timber ceiling-suspended canopy creates a dramatic, aerial feline retreat suspended safely above floor traffic using high-strength steel aircraft cables and solid hardwood platforms. This design features a lightweight oval or rectangular wooden box with acrylic viewing windows set into the floor, allowing pets to lounge high overhead while observing room activity below. Suspending pet furniture from structural ceiling joists frees up valuable floor space completely, introducing a unique architectural conversation piece that highlights high ceilings. The combination of rich hardwood textures and clear sightlines delivers a sleek, floating aesthetic suitable for modern open-concept homes.
To build this floating aerial canopy, cut a base panel and top rim from three-quarter-inch solid oak lumber, shaping the corners into smooth, sweeping curves with a router. Cut a rectangular opening into the center of the bottom base panel, inserting a clear three-eighths-inch thick acrylic sheet flush into the wood recess to form a transparent viewing floor. Connect the top rim and bottom base using four turned oak corner posts, securing the joints with wood glue and countersunk wood screws driven from beneath. Drill quarter-inch holes through the four corners of the upper rim, threading heavy-duty stainless steel aircraft cables through the wood and crimping copper stops onto the cable ends. Anchor four heavy-duty eye-swivel hooks straight into structural ceiling joists using lag bolts, suspending the timber canopy at a safe, accessible height near a wall shelf.
Biophilic Planter Bench with Integrated Cat Den
Execution Process
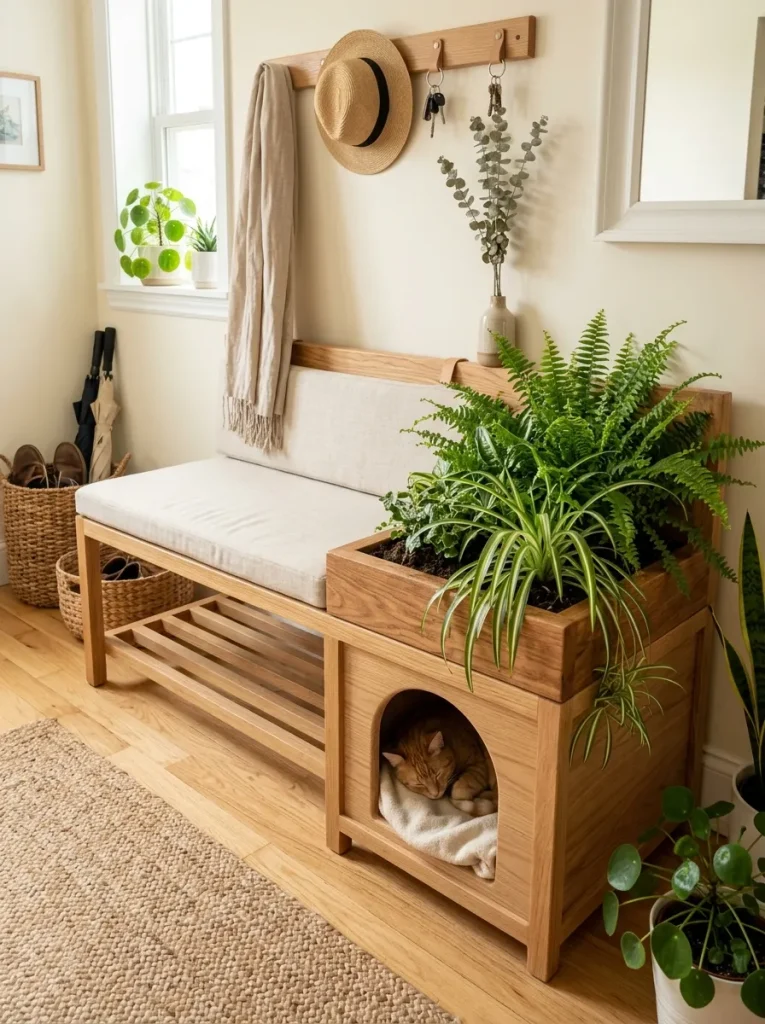
The biophilic planter bench with integrated cat den incorporates living houseplants directly into the roof structure of a functional entryway bench and pet shelter. This dual-purpose design features a long wooden bench frame with a recessed, waterproof planter box on one side and an enclosed feline sleeping nook directly beneath the seating platform. Planting non-toxic indoor flora like Boston ferns, spider plants, or cat grass in the upper bed introduces fresh greenery that purifies indoor air while softening the wooden furniture lines. This organic approach brings natural elements indoors, establishing a harmonious connection between plant care, pet welfare, and home decor.
Executing this biophilic build requires constructing a forty-eight-inch wide by eighteen-inch deep bench frame using solid pine construction lumber and pocket hole joinery. Partition the interior into two zones: a twenty-four-inch enclosed pet cabin on the left and an open storage shelf on the right side. Line the upper top surface above the pet cabin with a heavy-duty plastic trough liner, sealing all inner corners with 100-percent silicone caulk to prevent water leaks into the lower chamber. Cut a clean archway entry into the front panel of the pet cabin, finishing the exterior with a light oak wood stain and a satin protective coat. Fill the upper waterproof trough with lightweight potting soil, planting cat-safe greenery, and place a soft cushion inside the lower sound-proofed den.
Geometric Plywood Cat Igloo with Slatted Walls
Step-by-Step Guide
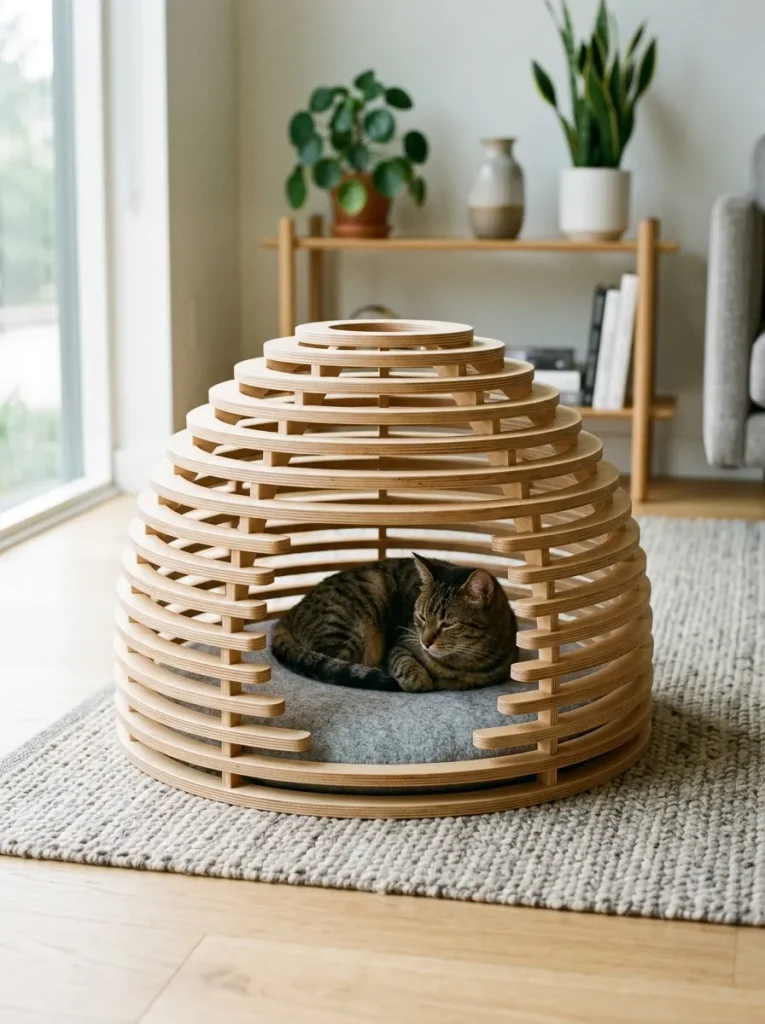
The geometric plywood cat igloo with slatted walls utilizes laser-cut or precision-mitered wooden slats arranged in a dome shape to create an airy, modern pet dome. This design consists of multiple stacked plywood rings separated by uniform wooden spacers, producing slatted walls that allow light and air to filter softly through the structure. The open-slat arrangement satisfies a cat’s desire for an enclosed hideout while enabling pet owners to view their sleeping pets from any angle in the room. The clean, sculptural quality of stacked birch plywood edges provides a contemporary graphic appeal that fits effortlessly into modern artistic interiors.
The creation process begins by drafting a series of twelve concentric circular rings ranging from eighteen inches down to six inches in diameter on three-quarter-inch Baltic birch plywood. Cut out the individual plywood rings using a scroll saw or CNC router, sanding all top and bottom faces until smooth and free of burrs. Cut dozens of half-inch square wooden spacer blocks from solid maple, drilling a small pilot hole through the center of every block. Stack the plywood rings vertically in descending order, placing four wooden spacers between each layer to maintain a uniform half-inch air gap between the rings. Thread long threaded steel rods through pre-drilled alignment holes in the rings and spacers, tightening decorative cap nuts at the top and bottom to lock the geometric dome structure together.
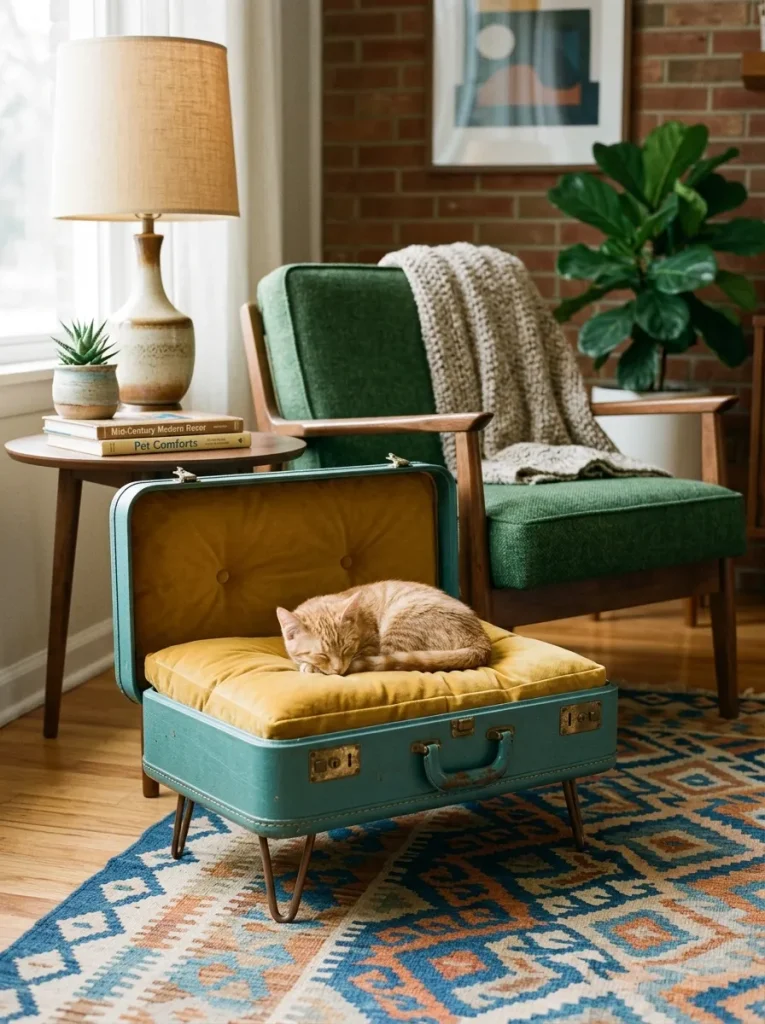
Upcycled Vintage Suitcase Pet Lounge
Setup Method
The upcycled vintage suitcase pet lounge transforms a discarded hard-shell suitcase into a charming, retro-inspired feline bed elevated on stylish wooden legs. This creative project removes the top lid or secures it open at a right angle, lining the deep luggage cavity with dense foam padding and tailored vintage fabric upholstery. The nostalgic aesthetic brings character and warmth to eclectic or mid-century interior spaces while giving durable vintage materials a second functional life. Elevating the suitcase off the floor protects pets from cold drafts and creates an inviting lounge station that coordinates beautifully with antique furniture.
Setting up this vintage pet lounge starts by sourcing a rigid, hard-shell suitcase, cleaning the exterior and interior surfaces thoroughly with upholstery cleaner and rubbing alcohol. If retaining the top lid in an open position, install two heavy-duty steel lid-support hinges along the interior side seams to prevent the lid from accidentally snapping shut. Drill four holes through the reinforced bottom floor of the suitcase, placing large metal washers on both sides to distribute weight loads evenly across the shell material. Screw four tapered wooden furniture legs or vintage hairpin legs into the pre-drilled bottom mounting points, ensuring the structure stands completely stable without wobbling. Cut a piece of two-inch thick high-density upholstery foam to fit the interior suitcase floor, wrapping the foam in a durable, machine-washable fabric cover.
Common Beginner Mistakes and How to Avoid Them
When executing DIY indoor cat house projects, preventing common construction, structural, and material selection errors ensures a safe, long-lasting environment for your pets. The most dangerous and frequent mistake is using toxic solvent-based paints, chemical wood preservatives, or toxic adhesives that off-gas harmful volatile organic compounds inside enclosed pet spaces. Cats are exceptionally sensitive to airborne toxins and chemical residues; always select certified zero-VOC water-based paints, natural oil finishes, and solvent-free wood glues. Another common pitfall is constructing shelters with inadequate internal dimensions or overly restrictive entry portals that make pets feel trapped or uncomfortable. Always size entrance portals to a minimum diameter of six inches, ensuring the interior floor area allows your cat to stand up, turn around, and stretch out fully. Additionally, failing to secure wall-mounted shelves or tall vertical towers directly into structural wall studs creates severe tipping hazards that can result in structural failure. Always use a high-quality electronic stud finder and heavy-duty structural screws when anchoring overhead units, verifying weight capacities before allowing pets to access elevated structures.
Practical Architectural Solutions for Indoor Pet Structures
| Construction Challenge | Recommended Practical Solution | Expected Structural Outcome |
|---|---|---|
| Wood panels warping or splitting | Store raw timber flat inside the house for forty-eight hours to acclimate to indoor humidity | Perfectly flat, stable board assemblies with zero seam separation or joint cracking |
| Wall-mounted shelters wobbling | Anchor mounting brackets directly into solid wood studs using three-inch structural lag screws | A rock-solid wall installation that supports dynamic jumping impact without sagging |
| Fabrics shifting inside cabins | Secure interior cushion bases to wooden floors using self-adhesive heavy-duty hook-and-loop strips | Cushions remain firmly anchored during active pet entry while remaining easy to remove for washing |
| Raw plywood edges looking rough | Apply iron-on real wood edge banding along exposed plywood rims before sanding and staining | A smooth, seamless solid-wood appearance that hides raw plywood layers completely |
Styling, Presentation, and Interior Integration Strategies
Presenting your finished custom indoor cat house beautifully involves styling surrounding furniture and selecting complementary textiles to create a cohesive home environment. Position floor-based enclosures near natural light sources or quiet room corners away from heavy household foot traffic, allowing pets to rest peacefully while staying connected to family activity. Coordinate the stain tones and paint colors of your pet structures with existing furniture finishes, matching dark walnut cabinets with existing wood shelving or pairing white painted units with neutral walls. Incorporate soft organic textiles like wool throw blankets, natural canvas covers, and linen pillows in neutral ivory, grey, or sage green tones to soften the structural lines of wooden enclosures. Arrange indoor air-purifying houseplants such as Boston ferns or spider plants nearby to enhance the biophilic connection while keeping toxic plant varieties completely out of reach. Maintaining clean, hair-free surfaces around pet structures through regular vacuuming and lint-rolling ensures your custom handmade creation remains an attractive visual highlight within your home.
Strategic Project Budget and Execution Timeline
| Project Management Phase | Key Action Items & Milestone Tasks | Estimated Time Investment | Allocated Budget Requirements |
|---|---|---|---|
| Phase 1: Planning & Sourcing | Measure room spaces, locate wall studs, draft cut lists, and purchase non-toxic certified materials | 1 to 2 hours planning time | Low to moderate cost using basic plywood, pine boards, and fasteners |
| Phase 2: Surface Preparation | Cut lumber to size, drill pocket holes, and sand all raw wood faces smooth with 220-grit sandpaper | 2 to 3 hours active prep work | Economical investment for sandpapers, wood glues, and hole saws |
| Phase 3: Assembly & Construction | Join timber panels with pocket screws, wrap sisal rope, install wall brackets, and assemble cabinet frames | 3 to 5 hours active assembly | Variable cost depending on choices of hardwoods, hardware, or concrete mixes |
| Phase 4: Finishes & Curing | Apply zero-VOC stains, allow sealants to cure completely, install cushions, and mount completed units | 24 hours passive curing | Minimal cost for eco-friendly clear coats, foam inserts, and fabrics |
Creative Expansion and Advanced Architectural Inspiration
Once you feel completely comfortable with basic cabinet framing, wall mounting, and fabric tailoring techniques, you can expand your skills by exploring advanced architectural upgrades for indoor pet spaces. Consider integrating low-voltage, motion-activated LED strip lighting beneath floating wall shelves or inside cabinet entryways, providing soft ambient illumination that highlights your custom woodwork at night. Experiment with advanced woodworking techniques like steam-bending timber strips to create smooth, curved organic cat arches or crafting intricate geometric kumiko wood screens for cabinet door fronts. You can also build multi-room wall catwalk networks that connect high ceiling shelters to window perches, allowing pets to travel continuously around the room perimeter without touching the floor. For an impressive modern touch, explore integrating electronic microchip-reader doors into cabinet entrances, ensuring that only specific pets can access private feeding or resting chambers inside multi-pet households. These creative additions transform simple weekend DIY projects into sophisticated home improvements, raising your interior design standards while creating an enriching environment for your pets.