Fulani braids are a distinctive and culturally rooted hairstyle known for their precise parting patterns, clean braiding techniques, and signature frontal braids. Unlike boho-inspired variations that incorporate loose curls and textured ends, non-boho Fulani braids focus on neatness, structure, and long-lasting results. This Pinterest-inspired guide explores ten practical and modern Fulani braid ideas that avoid bohemian elements while maintaining a polished and aesthetic finish. Readers will learn how to create structured braid styles using clear step-by-step methods, suitable materials, and beginner friendly techniques. These ideas are designed for everyday wear, special occasions, and organized styling routines, making them ideal for anyone seeking a clean and professional braided look. The article also provides preparation strategies, practical styling insights, and ways to elevate each design with minimal effort. Whether the goal is simplicity or intricate detail, these Fulani braid concepts offer clear inspiration for a well-executed and visually balanced hairstyle.
Why This Idea Is Trending or Useful
Fulani braids without boho elements are trending due to their clean aesthetic, low-maintenance structure, and adaptability to modern styling preferences. Pinterest ideas often emphasize neat, symmetrical looks that can last longer without frequent touch-ups, making structured Fulani braids a practical choice. This style appeals to individuals who prefer defined patterns over loose textures, especially in professional or everyday settings where a polished appearance is important. The DIY aspect also contributes to its popularity, as many of these braid styles can be recreated at home with basic tools and proper planning. Beginners benefit from the predictable pattern and reduced complexity compared to boho styles, which often require blending curls and maintaining texture. Additionally, minimalist style trends in home decor and fashion have influenced hairstyle preferences, encouraging cleaner lines and simpler finishes. These braid ideas align with modern design preferences by offering balance, symmetry, and clarity in styling, making them both functional and visually appealing.
Materials and Preparation
Before starting any Fulani braid style, proper preparation ensures better results and longer-lasting wear. Essential materials include a rat-tail comb for precise parting, sectioning clips to manage hair divisions, braiding hair extensions if added length or volume is desired, and a moisturizing cream or gel to smooth natural hair. Edge control products help define the hairline, while a spray bottle with water assists in keeping hair manageable during braiding. Preparation begins with clean, detangled hair to avoid uneven tension and breakage. It is important to plan the braid pattern in advance, including the number of frontal braids and the spacing between sections. Beginners should practice clean parting techniques, as Fulani braids rely heavily on symmetry and alignment. Setting up a comfortable workspace with proper lighting also improves accuracy. Taking time to prepare materials and plan the layout helps achieve a neat, organized result that reflects the structured aesthetic of non-boho Fulani braids.
Idea 1: Classic Straight Back Fulani Braids
How to Create
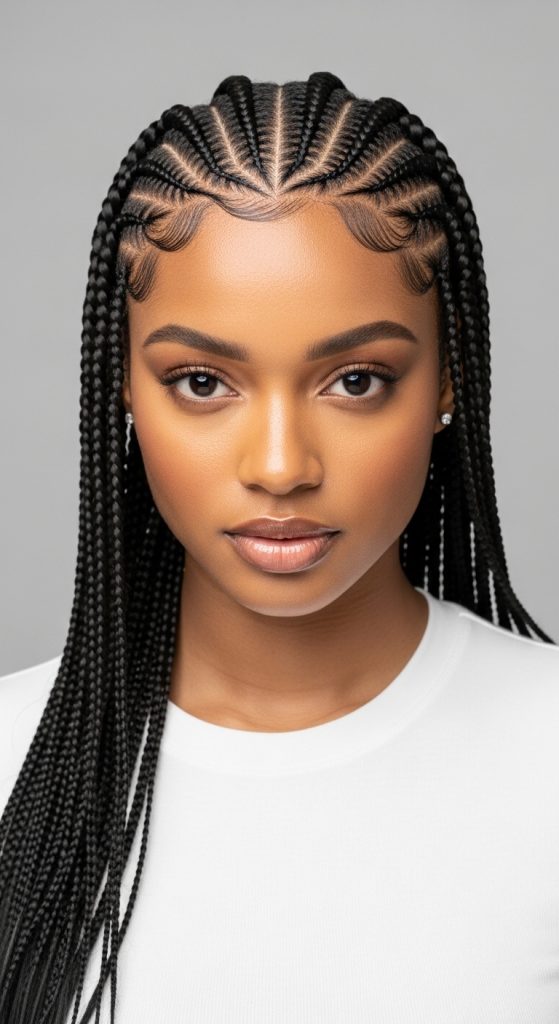
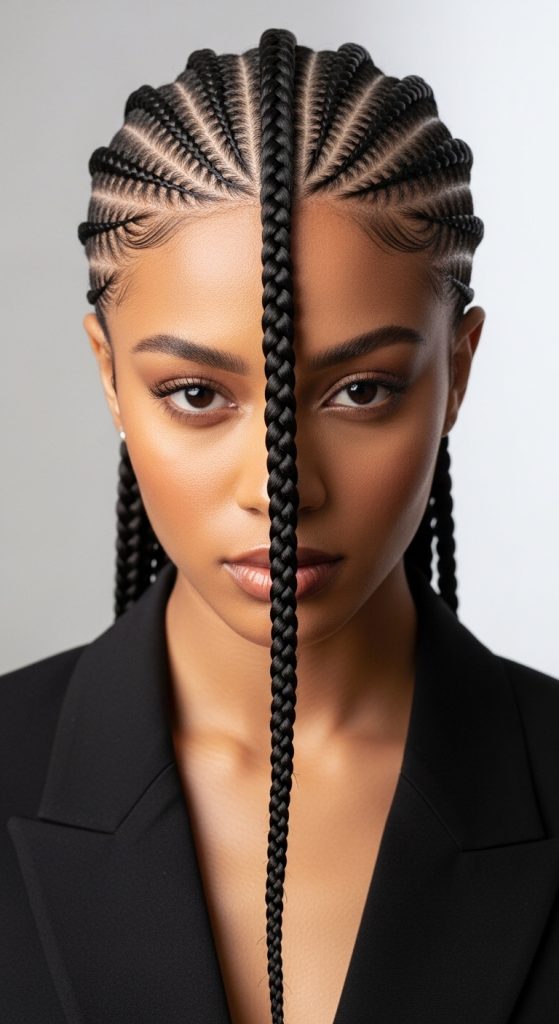
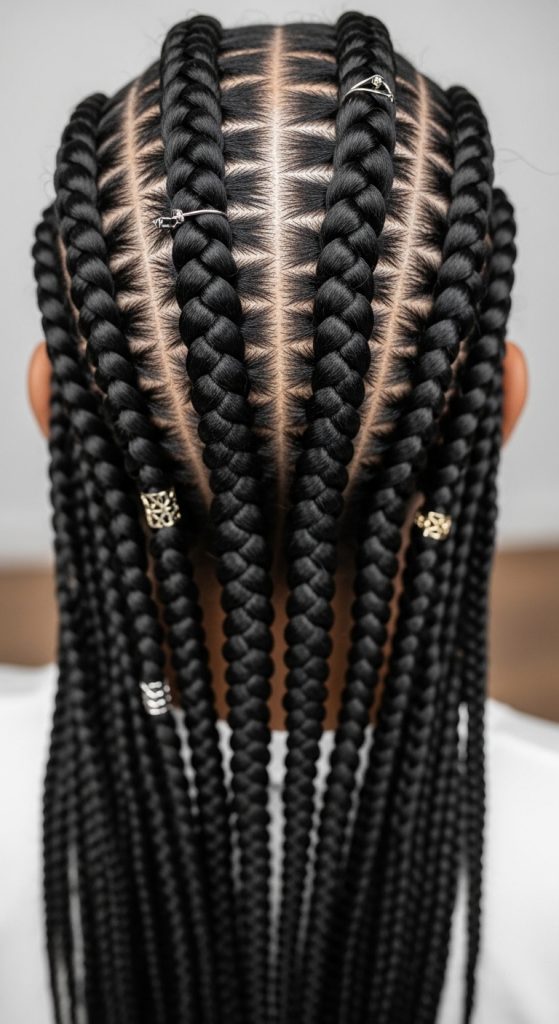
This style focuses on traditional Fulani braid patterns with straight-back braids and a clean center part. The design avoids any loose curls or bohemian elements, maintaining a sleek and structured look. The front typically includes one or two signature braids framing the face, while the rest flow backward in evenly spaced rows. This design works well for those who prefer a minimalist style with clear symmetry and balance. The aesthetic is defined by precision and consistency, making it a strong option for everyday wear or professional environments. The simplicity of this design also makes it beginner friendly, as it does not require complex layering or decorative additions.
To create this style, begin by parting the hair down the middle using a rat-tail comb. Section the hair into evenly spaced rows from front to back, securing each section with clips. Apply a light styling gel to each section to smooth the hair before braiding. Start with the front braids, ensuring they are neat and aligned with the parting. Continue braiding toward the back, maintaining equal tension throughout. If using extensions, feed them in gradually for a natural finish. Once complete, apply edge control along the hairline and lightly oil the scalp to maintain moisture. This step-by-step method ensures a clean and durable braid style.
Idea 2: Fulani Braids with Beaded Ends
How to Create
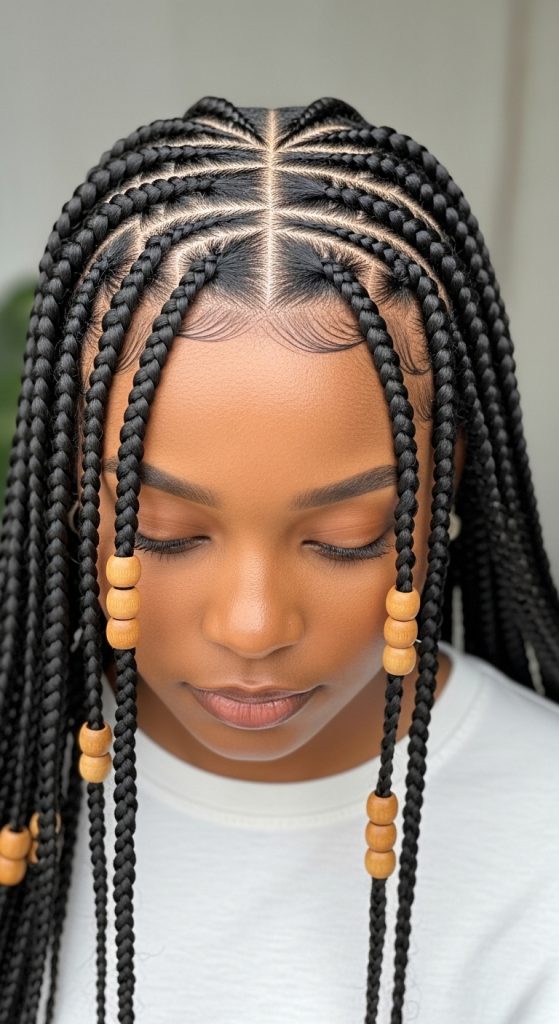
This design enhances traditional Fulani braids by adding beads to the ends while maintaining a structured, non-boho finish. The beads provide a decorative element without introducing loose textures, making the style both aesthetic and controlled. The braids follow a symmetrical pattern, often featuring a central braid with evenly spaced side braids. The addition of beads creates visual interest and allows for subtle personalization without compromising the clean design.
To execute this style, begin by creating a standard Fulani braid pattern with defined sections. Once all braids are completed, select beads that match the desired color scheme. Thread each braid through a beading tool or loop, then secure the bead at the end using a small elastic band. Ensure all beads are evenly spaced and consistent in size for a balanced look. This method maintains the structured nature of the braids while adding a refined decorative element.
Idea 3: Side-Part Fulani Braids
How to Create
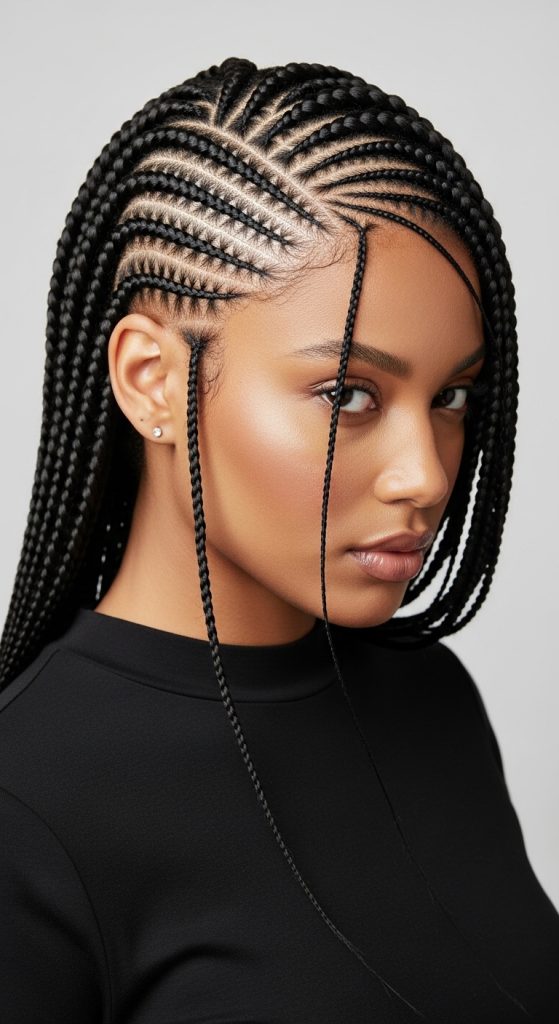
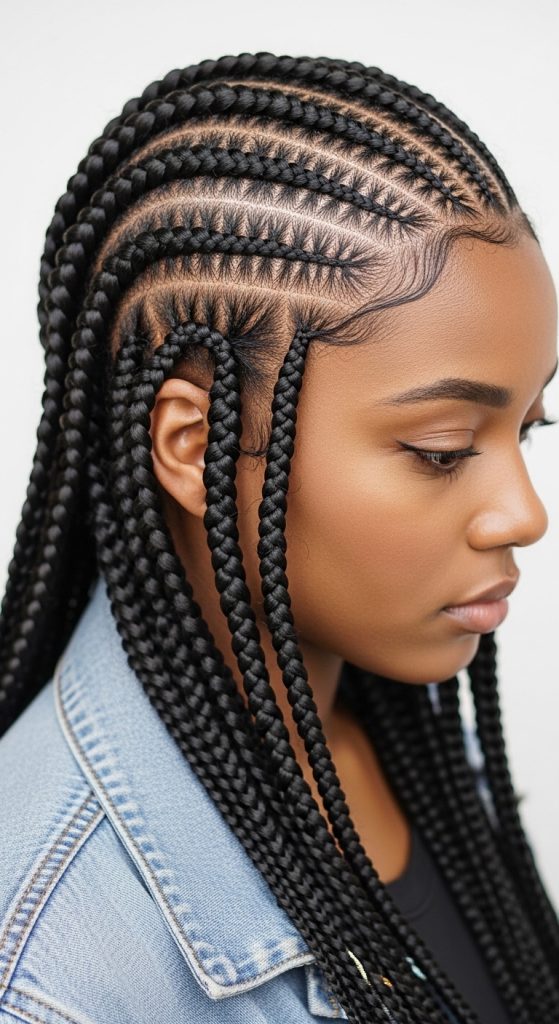
This variation introduces a side part instead of a center part, offering a slightly asymmetrical but still polished look. The braids follow the direction of the part, creating a natural flow across the scalp. This design is ideal for those seeking a modern twist while maintaining a clean and organized style. The absence of curls keeps the overall appearance sleek and controlled.
To create this look, start by parting the hair deeply to one side. Section the hair into rows that follow the direction of the part. Braid each section carefully, ensuring consistent tension and spacing. Pay close attention to the front braids, as they define the overall structure. Once completed, smooth the edges and apply a light oil for shine. This approach creates a refined and stylish braid pattern suitable for various occasions.
Idea 4: Fulani Braids with Zigzag Parts
How to Create
Zigzag parting adds visual complexity while maintaining a neat finish. This style replaces straight part lines with angled sections, creating a geometric pattern across the scalp. Despite the intricate appearance, the braids remain structured and free of boho elements. The result is a bold yet organized design.
To achieve this, use a rat-tail comb to create zigzag part lines across the scalp. Section each area carefully and secure with clips. Braid each section following the part pattern, ensuring clean transitions between angles. Consistent tension is essential to maintain the shape of the design. Finish by smoothing edges and applying a light styling product for hold.
Idea 5: Fulani Braids with a Center Accent Braid
How to Create
This style highlights a single central braid as the focal point, surrounded by evenly spaced supporting braids. The design emphasizes symmetry and balance, making it visually striking without being overly complex. It aligns well with minimalist and modern design preferences.
Begin by creating a central part and designating one section for the accent braid. Braid this section slightly thicker than the others to create contrast. Continue braiding the surrounding sections evenly. Maintain consistent spacing and tension throughout. Finish with edge control and light oil for a polished appearance.
Idea 6: Fulani Braids into a Low Bun
How to Create
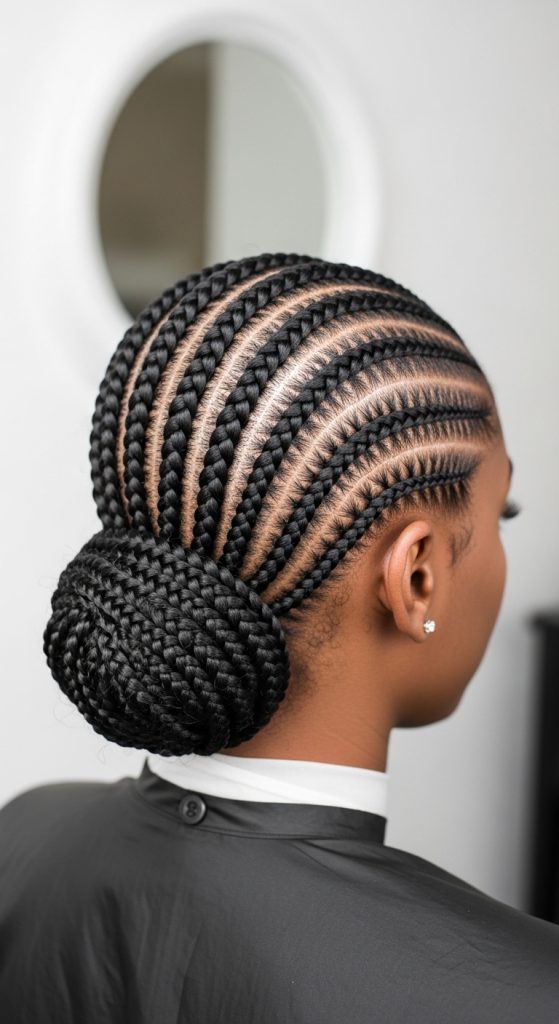
This variation gathers the braids into a low bun, combining practicality with a clean aesthetic. The structured braids remain visible while the bun adds a neat finishing touch. This style is ideal for organized and professional settings.
Create standard Fulani braids across the scalp, then gather all braids at the nape of the neck. Twist them into a bun and secure with pins or a hair tie. Ensure the bun is tight and symmetrical. Smooth edges for a refined look.
Idea 7: Fulani Braids with Thin Micro Braids
How to Create
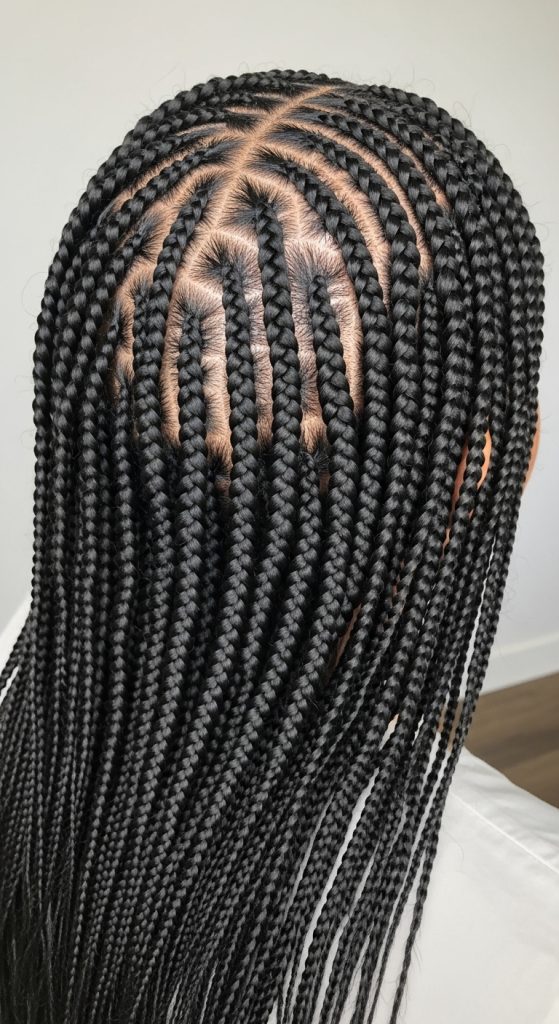
This design incorporates thinner braids for a more detailed appearance. The micro braids create a dense and intricate pattern while maintaining a clean structure. The absence of curls keeps the focus on precision.
Section the hair into smaller parts than usual and braid each section carefully. This process requires patience and attention to detail. Ensure each braid is uniform in size. Finish with edge control and light oil.
Idea 8: Fulani Braids with Straight Back Cornrows
How to Create
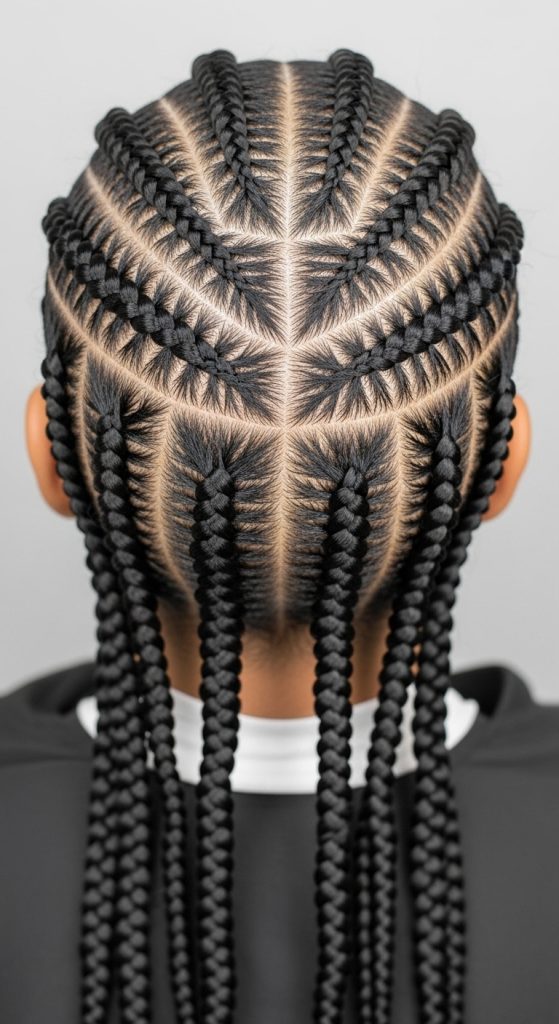
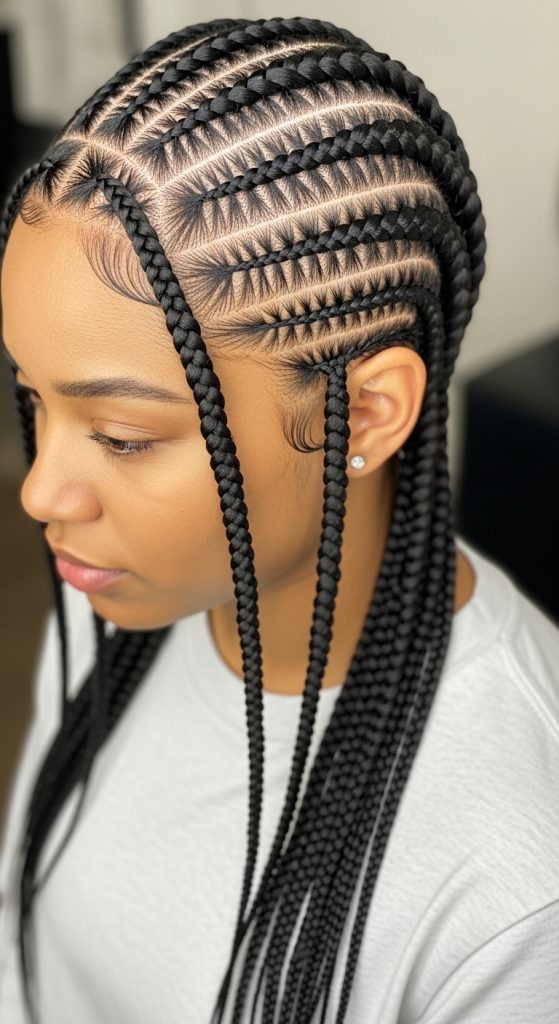
This style blends Fulani braids with straight-back cornrows for a cohesive and structured look. The combination creates a balanced design that remains simple and practical.
Part the hair into sections that combine frontal Fulani braids with back cornrows. Braid each section tightly and evenly. Maintain alignment between the two styles for a seamless finish.
Idea 9: Fulani Braids with Minimal Accessories
How to Create
This design uses subtle accessories such as cuffs or rings while keeping the overall look clean. The accessories are minimal and evenly spaced to avoid clutter.
Create standard Fulani braids, then add small accessories to selected braids. Ensure placement is consistent and balanced. Avoid overloading the design.
Idea 10: Fulani Braids with Defined Edges
How to Create
This style emphasizes clean edges and a sharp hairline. The braids remain simple, but the edges enhance the overall appearance.
After completing the braids, use edge control to shape and define the hairline. Use a fine brush for precision. This step adds a polished finish to the entire style.
Common Beginner Mistakes and How to Avoid Them
One common mistake is uneven parting, which disrupts the symmetry of Fulani braids. Using a proper comb and taking time to section hair evenly prevents this issue. Another mistake is inconsistent tension, which can lead to discomfort or loose braids. Maintaining steady pressure during braiding ensures durability. Skipping preparation steps such as detangling can also affect the final result. Proper planning and using the right materials help achieve a clean and structured look.
Practical Tips for Better Results
Working in small sections improves control and precision. Keeping hair slightly damp makes it easier to manage during braiding. Using lightweight products prevents buildup and maintains a natural finish. Regular scalp care helps extend the lifespan of the style. Practicing parting techniques enhances overall accuracy.
Styling, Presentation, or Organization Ideas
Organizing braids neatly and maintaining consistent spacing improves the visual appeal. Styling edges carefully adds definition. Choosing simple accessories enhances the look without overwhelming it. Keeping the design balanced ensures a clean aesthetic.
Budget or Time Planning
Planning ahead reduces time spent during the braiding process. Using affordable materials makes the project accessible. Setting aside enough time ensures better results without rushing. Practicing simple styles first helps build confidence.
Creative Expansion and Advanced Inspiration
Advanced variations can include combining patterns or experimenting with braid thickness. Exploring geometric parting designs adds creativity while maintaining structure. Incorporating subtle color variations can enhance visual interest. These approaches allow for continuous development of Fulani braid styles without introducing boho elements.