
Messy bun hairstyles for prom continue to be one of the most versatile and widely chosen styling options for formal events. This hairstyle category combines structure with a relaxed finish, creating a balanced look that works with different hair types, lengths, and textures. It is especially popular in Pinterest ideas because it adapts easily to both modern design preferences and soft, romantic aesthetics. The appeal of messy bun styles lies in their ability to look effortlessly styled while still maintaining a polished appearance suitable for prom night. These styles can be customized with braids, twists, volume techniques, and face-framing strands to match individual dress designs and makeup choices.
This article explores practical ways to create different messy bun variations that align with DIY styling approaches. Each idea is designed to be beginner friendly, allowing users to follow step by step guidance without professional assistance. The focus is on creative ideas that support home styling, easy execution, and visually appealing results. Readers will learn how to adapt messy buns for different hair lengths, add texture for volume, and structure buns for long-lasting hold. The content is structured to provide inspiration for prom hairstyles that feel modern, aesthetic, and suitable for formal occasions while remaining accessible and achievable at home.
Why This Idea Is Trending or Useful
Messy bun hairstyles for prom have become highly relevant in modern Pinterest ideas due to their flexibility and universal appeal. These styles align with current preferences for soft, natural-looking hair arrangements that still maintain a formal presence. Unlike rigid hairstyles, messy buns allow controlled imperfection, which enhances their aesthetic value in both photography and real-life presentation. This balance between structure and looseness makes them suitable for different face shapes, hair textures, and dress styles, increasing their popularity among DIY enthusiasts and beginner-friendly styling searches.
Another reason for their popularity is their practicality. Prom preparation often involves time constraints, and easy project hairstyles that can be completed at home are highly valued. Messy buns require minimal materials and can be adapted using basic tools, making them accessible for budget ideas and simple preparation routines. They also support creative project customization, allowing individuals to add braids, curls, or decorative pins without complex techniques. This combination of accessibility, versatility, and aesthetic adaptability makes messy bun hairstyles a trending choice for home decor-inspired beauty planning and modern minimalist style inspiration.
Materials and Preparation
Creating messy bun hairstyles for prom requires a simple set of materials that support structure, texture, and hold. Common materials include a brush or comb for detangling, elastic hair ties for securing sections, and bobby pins for shaping and fixing the bun. Texturizing spray or light mousse is often used to create grip, especially for smooth or fine hair. Heat styling tools such as curling irons or straighteners may be used depending on the desired base texture. These tools help build volume and improve the durability of the hairstyle throughout the event.
Preparation is an essential part of achieving a polished messy bun look. Hair should be clean but not overly soft, as slightly textured hair holds styles better. Planning includes deciding the bun placement, such as high, mid, or low positions, based on dress design and face structure. Sectioning the hair in advance helps maintain control during styling. It is also useful to gather inspiration from Pinterest ideas or creative ideas boards to select a suitable variation. Proper preparation ensures smoother execution, reduces styling time, and improves overall symmetry and balance in the final look.
Idea 1: Classic Low Messy Bun With Soft Strands
How to Create
The classic low messy bun is a foundational hairstyle widely used in prom styling due to its elegant simplicity. It is positioned at the nape of the neck, creating a soft silhouette that complements formal outfits. This style focuses on controlled looseness, where strands are intentionally left slightly undone to achieve a natural aesthetic. It works well for medium to long hair and suits minimalist style preferences. The design emphasizes balance between structure and softness, making it suitable for both modern design and traditional prom looks. Face-framing strands are often included to enhance softness and highlight facial features without overpowering the overall style.
To create this hairstyle, begin by brushing the hair to remove tangles and applying a light texturizing product for grip. Gather the hair into a low ponytail and secure it with an elastic band. Twist the ponytail loosely and wrap it around its base to form a bun. Secure with bobby pins while allowing slight imperfections for a messy effect. Gently pull small sections outward to add volume. Finish by loosening strands around the face for a soft framing effect. This step by step tutorial approach ensures a balanced and beginner friendly execution suitable for DIY prom preparation.

Idea 2: High Volume Messy Bun With Lifted Crown
How to Create
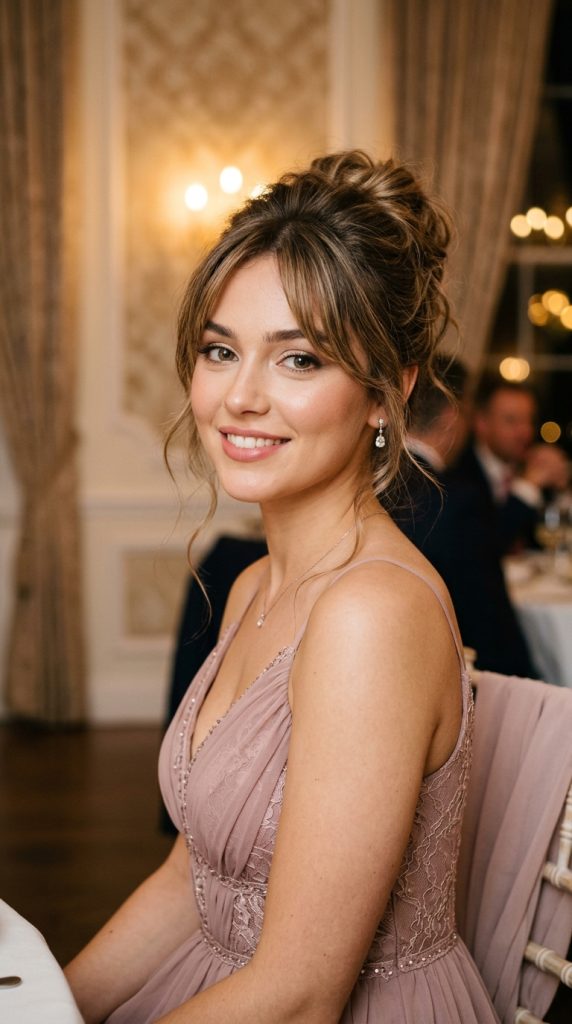
The high volume messy bun is designed to create height and drama, making it ideal for prom hairstyles that require a bold presence. Positioned at the crown of the head, this style elongates the face and enhances overall silhouette balance. It is commonly used in Pinterest ideas for modern design inspiration due to its striking yet effortless appearance. The hairstyle relies heavily on volume at the roots, which creates a lifted structure before forming the bun. This variation pairs well with statement dresses and structured necklines, providing a visually balanced aesthetic.
To create this style, begin by teasing the crown section of the hair to build volume. Apply texturizing spray to maintain lift. Gather all hair into a high ponytail and secure tightly. Split the ponytail into sections and loosely wrap each around the base to form a fuller bun. Secure with pins while maintaining height. Pull small sections outward to create controlled messiness. The execution process focuses on maintaining vertical volume while ensuring the bun remains soft and textured. This method is widely used in easy project hairstyling due to its strong visual impact and beginner friendly structure.

Idea 3: Braided Messy Bun With Textured Layers
How to Create
The braided messy bun integrates structured braiding with loose bun styling, creating a layered and detailed appearance. This hairstyle is popular in creative ideas for prom due to its combination of intricate texture and relaxed finishing. Braids add depth and dimension, making the hairstyle more visually engaging. It works well for individuals seeking a more decorative approach to messy buns while maintaining a soft overall aesthetic. The design can include single braids or multiple small braids depending on hair length and density.
To create this look, divide the hair into sections and braid one or more portions before gathering everything into a low or mid ponytail. Secure the ponytail and wrap it loosely into a bun shape. Allow braided sections to remain visible within the bun structure. Secure with pins while maintaining looseness for a natural effect. Pull small strands outward to blend braids with the bun. This step by step process ensures a balanced combination of structure and softness. It is a beginner friendly method that enhances DIY styling flexibility while maintaining a polished prom-ready appearance.

Idea 4: Side-Swept Messy Bun With Romantic Flow
How to Create
The side-swept messy bun is positioned slightly behind one ear, creating an asymmetrical and romantic aesthetic. This hairstyle is often used in home decor-inspired beauty styling due to its soft and flowing appearance. It enhances facial angles and works especially well with off-shoulder dresses or asymmetrical necklines. The side placement adds visual interest while maintaining a relaxed structure. Loose strands are an important feature, contributing to a soft, natural finish that aligns with modern minimalist style trends.
To create this hairstyle, begin by parting the hair deeply to one side. Gather hair toward the lower side of the head and secure it loosely with an elastic band. Twist and wrap the hair into a bun shape, securing it with pins. Allow sections to fall naturally around the face and neck. Adjust looseness to maintain balance between structure and softness. The execution process focuses on asymmetry and controlled imperfection. This style is widely used in beginner friendly tutorials due to its simple structure and adaptable design for different hair lengths.

Idea 5: Twisted Messy Bun With Soft Rope Sections
How to Create
The twisted messy bun incorporates rope-like twists instead of traditional braiding, creating a smooth yet textured appearance. This hairstyle is suitable for prom styling where elegance and simplicity are both desired. The twisting technique adds dimension without requiring complex braiding skills, making it an accessible DIY option. It works well for medium to thick hair and provides a structured base for a soft bun finish. The overall look is refined yet relaxed, aligning with aesthetic and modern design trends.
To create this hairstyle, divide the hair into two or more sections and twist each section tightly. Gather the twisted sections together into a low ponytail and secure. Wrap the twisted ponytail into a bun shape, allowing some strands to loosen naturally. Secure with pins while maintaining visible twist texture. Pull gently at sections to create volume and softness. This step by step method ensures a controlled yet relaxed finish. It is a practical option for beginner friendly styling that emphasizes texture and simplicity.

Idea 6: Messy Bun With Curtain Bangs Effect
How to Create
The messy bun with curtain bangs effect focuses on framing the face with soft front sections that mimic curtain bangs. This style is widely used in Pinterest ideas due to its flattering and balanced appearance. It enhances facial symmetry and adds softness to the overall hairstyle. The bun itself remains relaxed, while the front sections are styled to fall naturally along the cheeks. This combination creates a harmonious blend of structure and flow, suitable for prom styling with a romantic tone.
To create this look, section the front hair and leave it out before gathering the rest into a ponytail. Form a loose bun at the back or crown depending on preference. Style the front sections using light heat or natural shaping to create soft curves. Allow them to frame the face gently. Secure the bun with pins while maintaining looseness. This execution process focuses on balance between structured bun placement and soft facial framing, making it a beginner friendly approach to creative hairstyling.
Idea 7: Double Knot Messy Bun With Layered Texture
How to Create
The double knot messy bun creates a layered knotting effect that adds visual complexity to the hairstyle. It is commonly featured in creative project styling for prom due to its unique structure. This design uses two consecutive knots instead of a single wrap, producing a textured and voluminous finish. It is suitable for individuals who want a slightly unconventional but still elegant hairstyle. The layered effect adds depth and enhances the overall aesthetic appeal.
To create this hairstyle, divide hair into two sections and tie them into a loose knot. Repeat the knotting process once more and secure the remaining hair into a bun shape. Use pins to hold structure while allowing loose strands to fall naturally. Adjust volume by gently pulling sections outward. This step by step method ensures a balanced layered appearance. It is a beginner friendly technique that introduces creative variation into standard messy bun styling.

Idea 8: Low Rolled Messy Bun With Hidden Tuck
How to Create
The low rolled messy bun focuses on rolling sections of hair inward to create a tucked, soft bun structure. This style is often used in minimalist style inspiration due to its clean yet relaxed appearance. It works well for formal prom settings where understated elegance is preferred. The rolling technique creates smooth transitions between sections while maintaining a slightly undone finish.
To create this hairstyle, gather hair into a low ponytail and divide into sections. Roll each section inward and tuck it into the base, securing with pins. Continue until all hair is incorporated into a soft bun shape. Loosen edges slightly for a messy effect. This execution process emphasizes controlled rolling and secure pinning. It is a practical DIY method suitable for beginners seeking a polished yet relaxed hairstyle.

Idea 9: Messy Bun With Loose Curls Integration
How to Create
The messy bun with loose curls integrates curled strands into the bun structure, adding softness and movement. This hairstyle is widely used in aesthetic inspiration boards due to its romantic and flowing appearance. The curls enhance texture and create visual depth within the bun. It is especially suitable for long hair and prom dresses with flowing silhouettes.
To create this style, curl sections of hair before gathering them into a loose bun. Allow curled strands to remain partially outside the bun for texture. Secure the bun lightly with pins while preserving curl shape. Adjust volume and looseness as needed. This step by step method ensures a soft, dynamic finish. It is a beginner friendly approach that enhances natural movement in hairstyle design.

Idea 10: Wrapped Ribbon Messy Bun With Decorative Finish
How to Create
The wrapped ribbon messy bun introduces decorative elements into a standard bun structure using fabric or ribbon wrapping. This style is popular in creative ideas for prom due to its customizable aesthetic. The ribbon adds visual contrast and enhances overall presentation without altering the core bun structure. It works well for personalized styling and themed prom looks.
To create this hairstyle, form a basic messy bun using any preferred method. Once secured, wrap a ribbon around the base or through sections of the bun. Adjust placement for balance and symmetry. Allow strands to remain loose for softness. This execution process combines structure with decorative enhancement. It is a beginner friendly DIY method that adds individuality to classic bun styling.

Common Beginner Mistakes and How to Avoid Them
Messy bun hairstyles often fail when structure and looseness are not balanced correctly. A common mistake is using overly clean or freshly washed hair, which reduces grip and makes styling difficult. Another issue is over-tightening the bun, which removes the intended relaxed aesthetic. Uneven sectioning can also lead to asymmetry that appears unintentional rather than styled. To avoid these issues, light texturizing should be applied before styling, and sections should be distributed evenly before securing the bun. Controlled looseness should be maintained throughout the process to preserve the messy yet structured appearance.
Practical Tips for Better Results
Improving messy bun styling requires attention to texture, placement, and balance. Light teasing at the roots can enhance volume without making the hairstyle rigid. Using pins strategically rather than excessively helps maintain a natural finish. Leaving intentional loose strands around the face adds softness and enhances aesthetic appeal. Practicing sectioning before final styling improves accuracy and reduces execution time. These practical adjustments support better DIY results and ensure the hairstyle remains stable throughout prom events.
Styling, Presentation, or Organization Ideas
Presentation plays an important role in messy bun hairstyles for prom. Placement should align with dress design and neckline structure to maintain visual harmony. High buns create elongation effects, while low buns emphasize elegance and softness. Incorporating subtle twists or braids adds detail without overwhelming the style. Maintaining balance between structured and loose sections ensures a polished appearance. Organization of hair sections before styling helps create symmetry and improves overall finish quality.
Budget or Time Planning
Messy bun hairstyles are efficient in both time and resource usage, making them suitable for budget ideas and DIY styling. Most styles can be completed within a short preparation window when tools are organized in advance. Minimal materials are required, reducing cost and complexity. Planning includes allocating time for sectioning, styling, and adjustment phases. This structured approach ensures smooth execution and reduces last-minute styling challenges. The simplicity of materials and process makes these hairstyles highly accessible for beginners.
Creative Expansion and Advanced Inspiration
Messy bun hairstyles can be expanded into more advanced variations by combining multiple techniques such as braiding, twisting, and curling within a single structure. Adding layered sections or asymmetrical designs increases visual complexity. Incorporating texture variations enhances depth and modern design appeal. Advanced inspiration may include combining multiple bun placements or integrating structured accessories within the bun framework. These expansions allow for personalized creative project development while maintaining the core principles of messy bun styling.