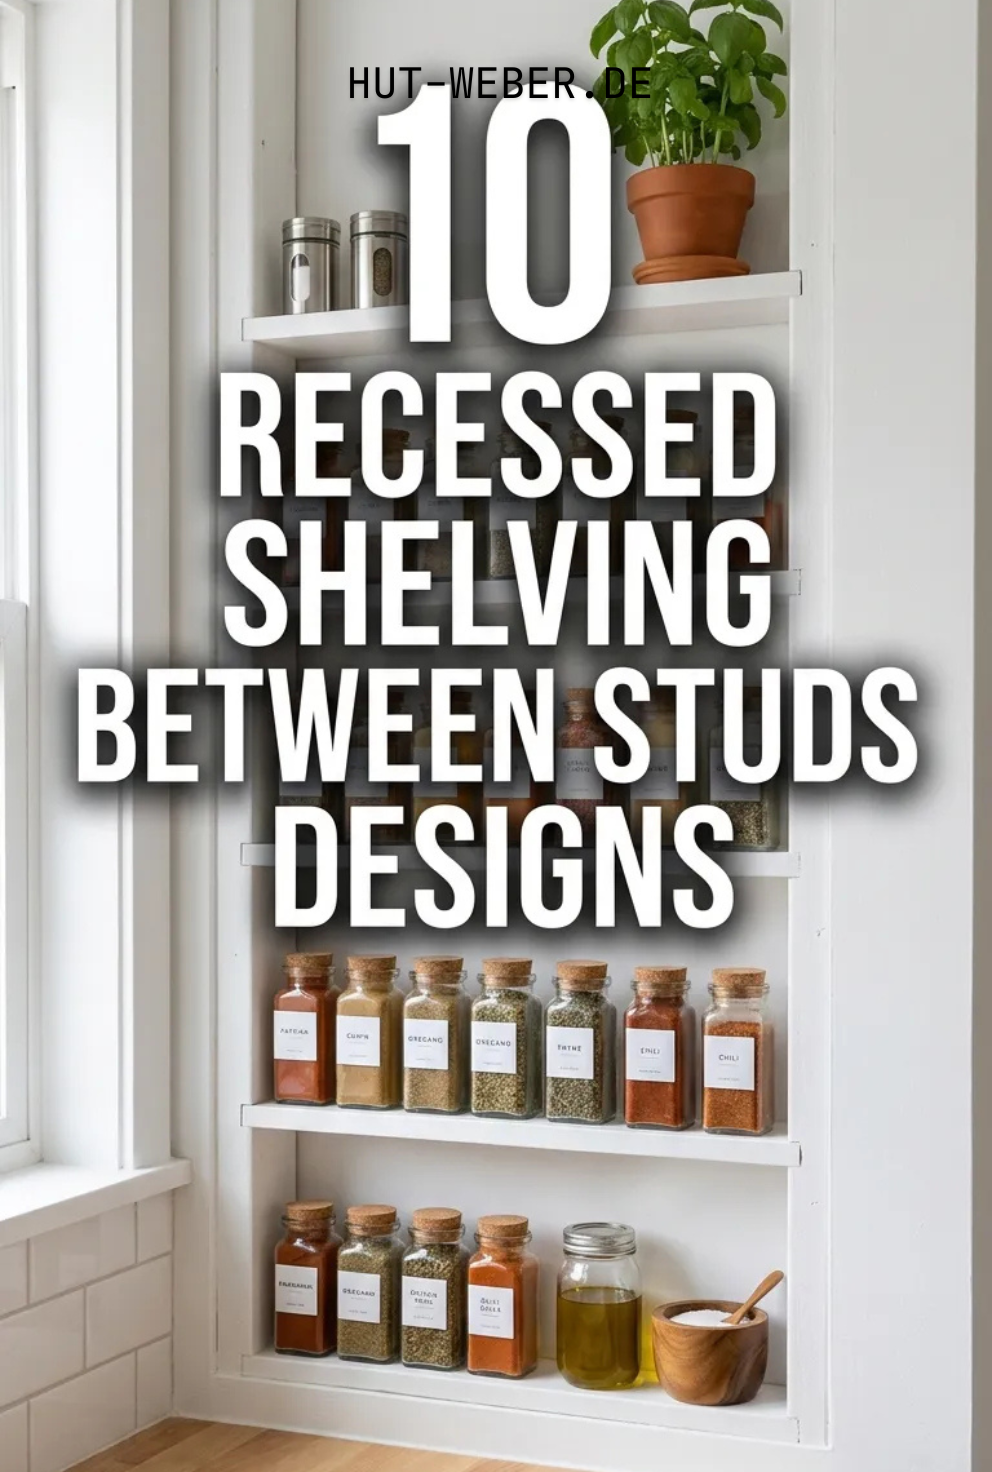
Maximizing internal wall cavities through structural recessing offers an exceptional method for optimizing square footage in residential properties. Recessed shelving built directly between standard wall studs transforms empty vertical space into functional architectural features without sacrificing precious floor area. This comprehensive guide provides step-by-step instructions, creative layout plans, and structural guidance for creating built-in storage solutions across various rooms. Readers will discover how to identify load-bearing walls, safely cut through drywall, build durable wooden box enclosures, and finish the installation with professional trimming techniques. Utilizing these hidden wall spaces is highly valuable for compact rooms, narrow hallways, and high-traffic zones where conventional furniture pieces obstruct movement. By gaining a thorough understanding of standard wall framing and carpentry principles, homeowners can successfully introduce functional home decor elements tailored to their exact storage needs. This layout tutorial outlines ten distinct structural design variations that seamlessly integrate storage into existing drywall surfaces. Whether you aim to clear clutter in a small bathroom or add architectural interest to a minimalist living room, recessed storage boxes provide a practical solution.
Why Built-In Wall Insets Are Trending in Modern Home Design
Inwall storage compartments have become incredibly popular across major interior design platforms as top-tier Pinterest ideas for modern property renovations. The widespread appeal stems from the combination of minimalist style, architectural integration, and the practical value of reclaiming unutilized structural voids. Modern design trends heavily favor clean lines and clutter-free environments, which makes protruding bookcases or bulky shelving units less desirable in compact residential floor plans. For intermediate DIY enthusiasts, constructing a recessed shelving unit serves as an excellent intermediate creative project that yields professional, custom-looking results at a low cost. These projects allow individuals to add personalized handmade charm to a room while permanently improving the organizational efficiency of the household. Additionally, because the shelves sit flush within the wall frame, they create an elegant aesthetic that enhances the perceived size of any room. By choosing specific paint finishes, contrasting wood stains, or integrated lighting options, these custom wall cutouts shift from basic utility shelves into high-impact visual features that improve property value.
Materials and Structural Preparation for Wall Framing Projects
Successfully executing a recessed shelving project requires precise planning, structural verification, and gathering the proper carpentry tools before making any incisions. The standard distance between residential wall studs is sixteen inches measured from center to center, which leaves an approximate fourteen-and-a-half-inch wide opening for your shelving box. Before purchasing materials, you must use a reliable stud finder to locate the structural timber frames and an electronic voltage detector to ensure no live electrical wires or plumbing lines run through the target cavity. The primary structural materials needed include half-inch thick finish-grade plywood or medium-density fiberboard for the box enclosure, along with select pine trim pieces for the front casing. Essential tools for this installation include a drywall saw, a level, a pocket hole jig, wood glue, countersink screws, a framing square, and safety goggles. Proper preparation involves cutting an exploratory hole in the drywall to visually inspect the cavity interior before committing to the full-size cutout. Accurately measuring the depth of the stud cavity, which is typically three and a half inches in standard four-by-two framing, ensures your custom box fits flush with the wall surface.
Idea 1: The Small Bathroom Apothecary and Cosmetic Niche
Concept and Spatial Layout
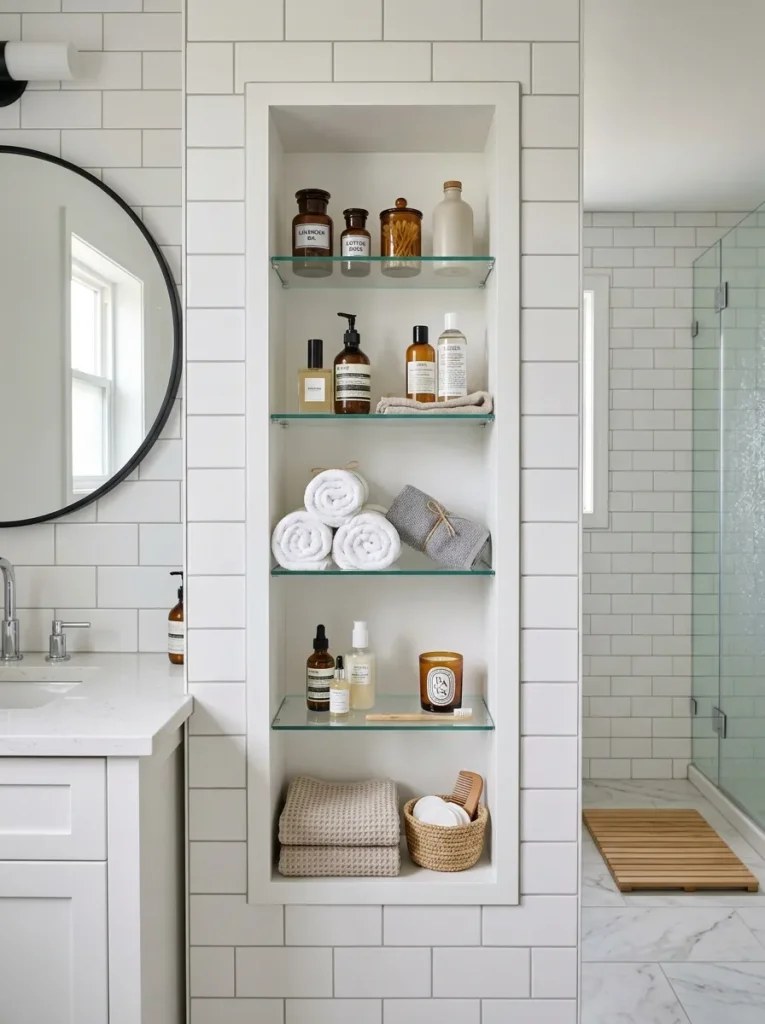
The bathroom apothecary cutout maximizes the narrow vertical spaces next to mirrors, vanities, or inside shower perimeters to store essential grooming items. This design relies on a vertical orientation that utilizes the full height of the stud cavity, dividing it into several short shelves perfect for small bottles, cosmetics, and canisters. The color palette typically aligns with crisp bathroom tile or clean white paint schemes to maintain a hygienic and bright look. Glass shelves can be substituted for wood to allow light to filter downward through the entire enclosure.
Execution Process
To construct this bathroom niche, cut an opening in the drywall measuring fourteen and a half inches wide by twenty-four inches high between two verified studs. Build an open-faced box from moisture-resistant medium-density fiberboard to match these exact dimensions, ensuring the outer depth does not exceed three and a half inches. Assemble the outer frame using wood glue and pocket hole screws, then cut dado grooves into the side panels to support adjustable glass or acrylic shelving inserts. Slide the completed box into the open wall cavity, checking that the front edges sit perfectly flush with the exterior drywall surface before securing it through the sides into the wooden studs. Seal all external gaps around the perimeter using paintable silicone caulk to prevent moisture from entering the wall cavity over time. Finish the project by installing a thin, moisture-sealed mitered picture-frame molding around the exterior edge to conceal the drywall cuts.
Idea 2: The Integrated Kitchen Spice and Condiment Rack
Concept and Spatial Layout
The integrated kitchen cutout relocates frequently used cooking ingredients, spice jars, and oils from horizontal countertops directly into the wall adjacent to the cooking range. This configuration uses multiple shallow wooden ledges spaced roughly six to eight inches apart to keep small containers perfectly organized and visible at a glance. The design style often matches the surrounding kitchen cabinetry finishes or features a contrasting natural wood grain to create a rustic focal point. This placement enhances kitchen workflow by keeping essential items within arm’s reach while preserving valuable counter workspace.
Setup Method
Begin by locating a clear stud cavity near your primary food preparation area, ensuring the space is entirely free of structural utilities or ventilation ducts. Cut the drywall to your desired height, keeping the width at the standard fourteen and a half inches dictated by the internal wall framing. Construct the storage insert using high-grade maple or oak plywood to ensure the unit can withstand the weight of multiple glass condiment jars. Secure thin horizontal retaining strips or front lips across each shelf level to prevent small spice bottles from accidentally sliding out when reached for during cooking. Insert the wooden box into the wall, driving trim screws through the interior side panels directly into the flanking wall studs for a secure hold. Apply a durable, wipeable polyurethane clear coat over the wood to protect the surface from grease splatters and kitchen humidity.

Idea 3: The Living Room Floating Book Display
Concept and Spatial Layout
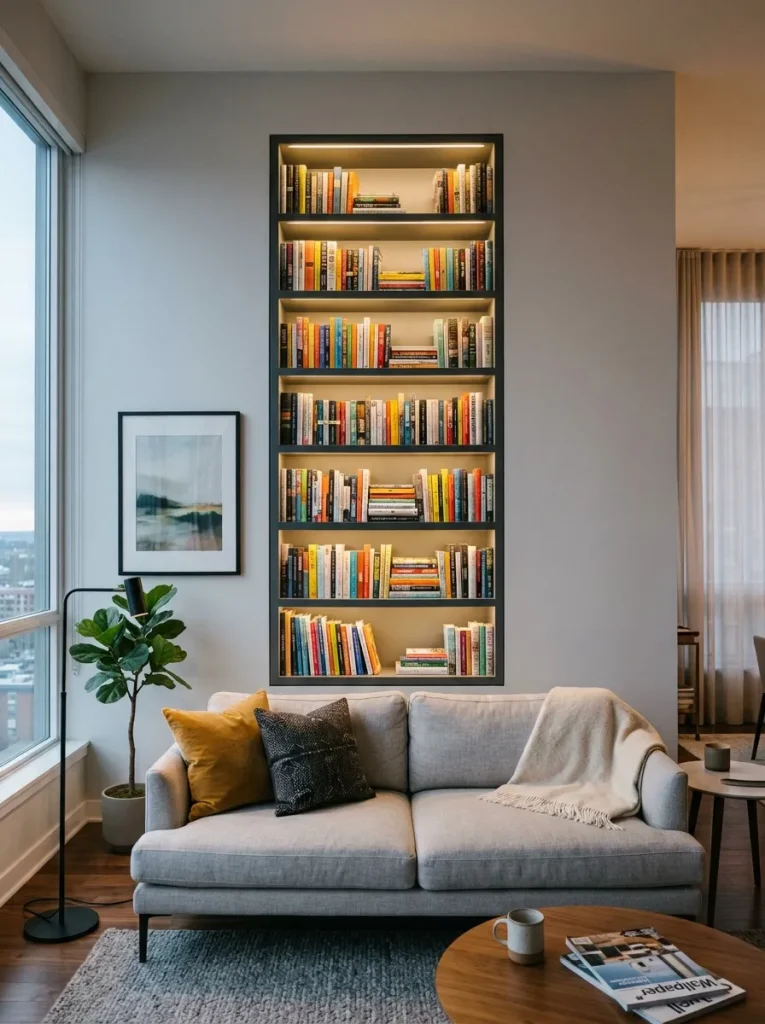
The living room book display functions as a space-saving alternative to traditional, protruding bookcases by setting reading materials deeply into the wall frame. This approach works beautifully behind sofas, along reading corners, or flanking a central entertainment center to exhibit favored book spines and covers. The layout can feature a single tall vertical column or a series of staggered horizontal boxes placed across multiple adjacent stud cavities to create a geometric wall pattern. The aesthetic emphasizes clean lines, utilizing hidden shelf supports to achieve a modern minimalist style.
How to Create
Select the ideal wall section and map out the dimensions for either a singular tall unit or multiple interconnected stud cavities. If extending across multiple studs, remember that you must install proper structural headers to support the cut studs if the wall is load-bearing. For a standard single-cavity installation, construct a long plywood lining box using basic joinery techniques, ensuring the corners are perfectly square. Sand the entire wooden assembly thoroughly before painting the interior backing a contrasting accent color that makes the book covers stand out visually. Mount the box securely into the wall cavity using heavy-duty countersunk construction screws driven straight into the structural framing studs. Install a sleek, low-profile trim around the exterior border, or tape and mud the box edges directly into the drywall for a seamless look.
Idea 4: The Entryway Key and Mail Station
Concept and Spatial Layout
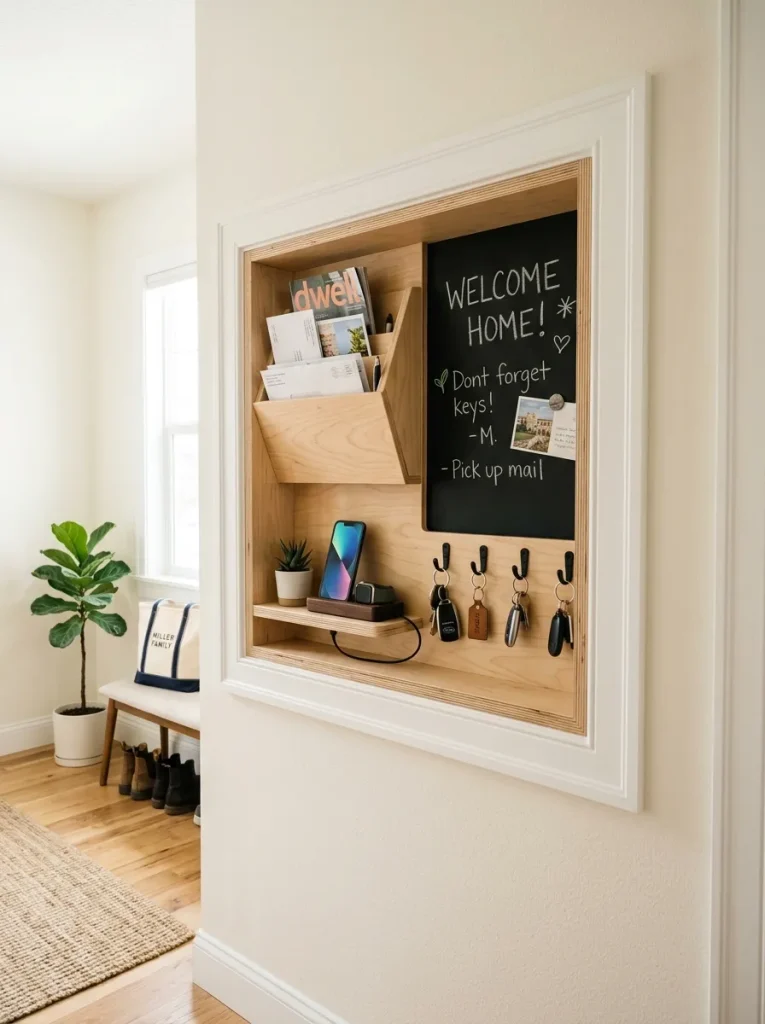
The entryway drop-zone niche provides a dedicated, recessed organization hub immediately inside the front door of a home to manage daily incoming items. This concept consolidates keys, outgoing mail, sunglasses, and small electronic devices into a centralized, compact zone that prevents clutter from accumulating on entryway tables. The interior layout typically incorporates small metal hooks along the bottom edge, a slanted slot for letter organization, and a flat charging surface. The design style can incorporate chalkboard paint or a magnetic backboard to serve as a functional family message center.
Execution Process
Cut a rectangular opening into the entryway wall at a comfortable chest-high level, checking carefully for any light switches or electrical lines nearby. Construct the structural box from sturdy half-inch Baltic birch plywood, incorporating a slanted divider shelf in the middle to catch envelopes and documents. Paint the back panel of the box with magnetic chalkboard paint, allowing family members to write notes or pin important reminders using small magnets. Attach small brass or matte black cup hooks to the underside of the lowest shelf divider to hold key rings securely. Slide the completed mail station into the wall gap, ensuring it is level, and screw it directly into the side studs. Frame the outside edge with a wide decorative trim that complements the existing baseboards and door casings within the entryway corridor.
Idea 5: The Bedroom Bedside Nightstand Alternative
Concept and Spatial Layout
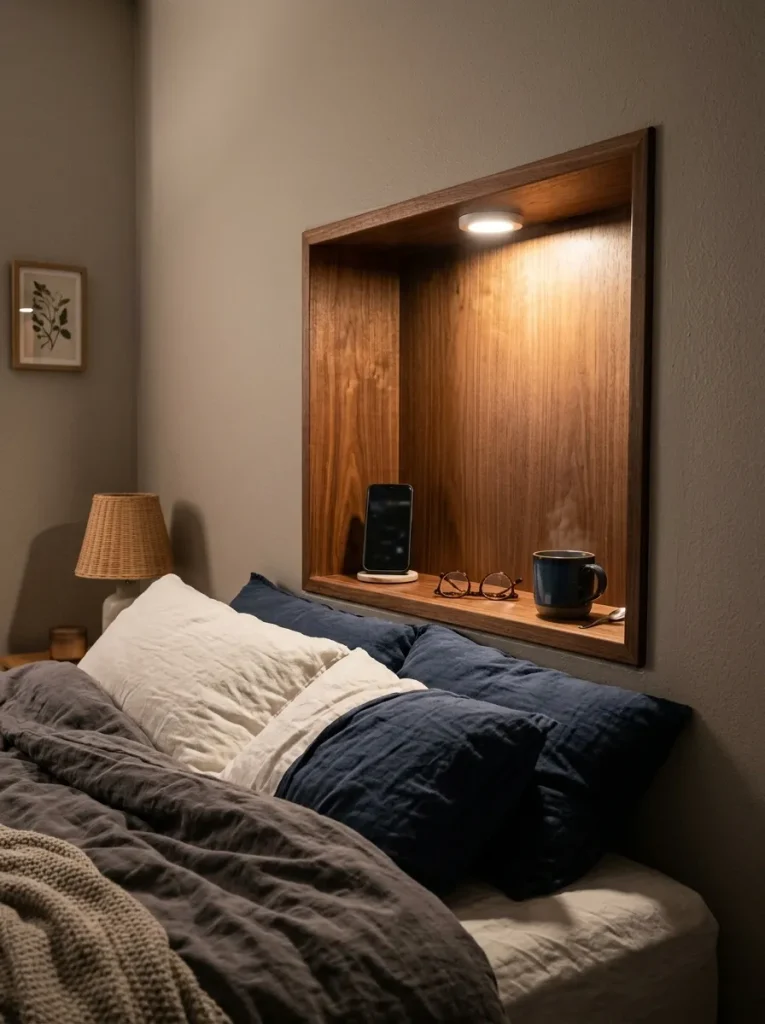
The recessed bedside niche serves as an innovative, space-saving replacement for traditional floor-standing nightstands in compact bedrooms or tight guest spaces. Positioned directly above or alongside the mattress level, this inset provides a convenient ledge for alarm clocks, reading glasses, phones, and nighttime beverages. The design emphasizes comfort and accessibility, often incorporating built-in USB charging ports and low-voltage reading lights hidden within the upper lip. The aesthetic details usually match the bedroom headboard material or the surrounding wall color to maintain a serene environment.
Step-by-Step Guide
Measure the height of your bed frame and mattress to determine the most ergonomic placement for the inset opening on the wall beside the bed. Cut out the drywall panel between the two targeted bed-adjacent studs, taking extreme care if the wall contains outlets that require electrical rewiring. Build a deep wooden enclosure box, drilling a small access hole in the lower corner to route electronic charging cables if an outlet is nearby. Line the inside edges of the box with finished oak or walnut veneer sheets to add a warm, rich natural texture to the sleeping space. Fix the unit into the wall frame with heavy wood screws, ensuring the entire structure is completely stable and flush with the plaster. Install a recessed, battery-operated LED puck light into the top panel of the box to function as a glare-free reading light.
Idea 6: The Home Office Supply and Document Organizer
Concept and Spatial Layout
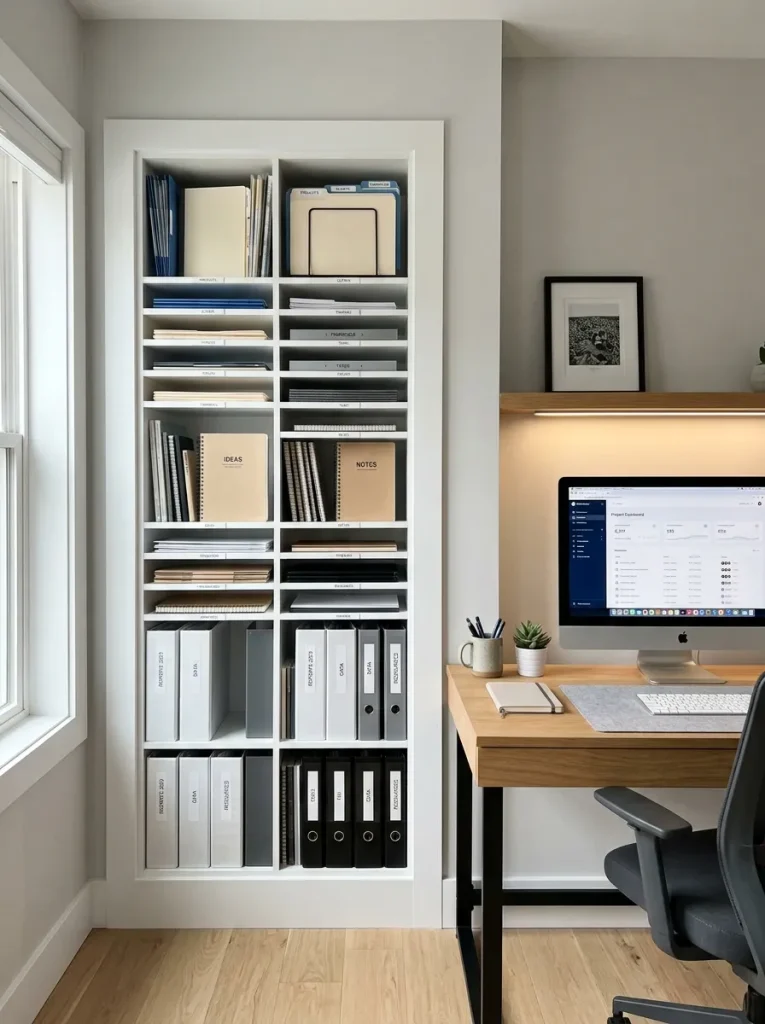
The home office wall inset provides dedicated, out-of-the-way storage for reference binders, filing folders, writing utensils, and essential desk supplies. This configuration helps clear desk surfaces by shifting vertical storage demands into the structural wall zone directly behind or beside the primary workstation. The internal layout features a mix of tall vertical compartments for folders and shallow horizontal slots for notebooks or printer paper. The appearance leans toward a professional, organized design that fits seamlessly into an efficient, modern office workspace environment.
How to Make
Mark out a large vertical section on the wall next to your office desk, utilizing the full fourteen and a half inches of width between the studs. Cut away the drywall and assemble a tall organizer chassis from high-density MDF, using a series of interlocking dados to form individual paper sorting slots. Paint the entire unit with a high-gloss, durable enamel paint that resists scuffing from heavy binders, folders, and desk accessories over time. Push the finished shelving core into the stud opening, using shims if necessary to ensure the unit stays perfectly square and level. Screw the organizer securely into the surrounding wall studs through the interior shelf dividers to hide the fasteners from plain view. Trim the outer perimeter with clean, square-edged molding to achieve a sharp, professional finish that integrates with the workspace.
Idea 7: The Laundry Room Detergent and Utility Shelf
Concept and Spatial Layout
The laundry room utility cutout creates essential storage space for heavy detergent jugs, fabric softeners, stain removers, and cleaning brushes right above the washing machine. Because laundry rooms are often narrow or tight, moving these bulky chemical containers into the wall frame keeps them organized and safely out of the way. The design focuses entirely on durability, water resistance, and heavy-load capacity, using thick shelves and easy-to-clean surfaces. The color scheme is typically bright white or light gray to match the utilitarian aesthetic of modern laundry appliances.
Setup Method
Locate the wall space directly above or adjacent to your washing and drying units, verifying that no water supply lines run through that specific stud cavity. Cut the drywall section to match a large rectangular box frame, keeping the width constrained to the inner fourteen and a half inches between framing timbers. Construct the utility box from thick, water-resistant exterior-grade plywood or solid PVC board to prevent any warping from laundry room humidity or chemical leaks. Install heavy-duty wooden support cleats beneath each shelf layer to ensure the unit can safely support the weight of full liquid laundry jugs. Anchor the completed shelf box into the wall cavity using long construction screws driven deeply into the supporting side studs. Apply a thick layer of waterproof silicone sealant around the entire exterior trim line to prevent humidity from seeping into the wall cavity.

Idea 8: The Kids’ Playroom Toy and Figurine Display Ledge
Concept and Spatial Layout
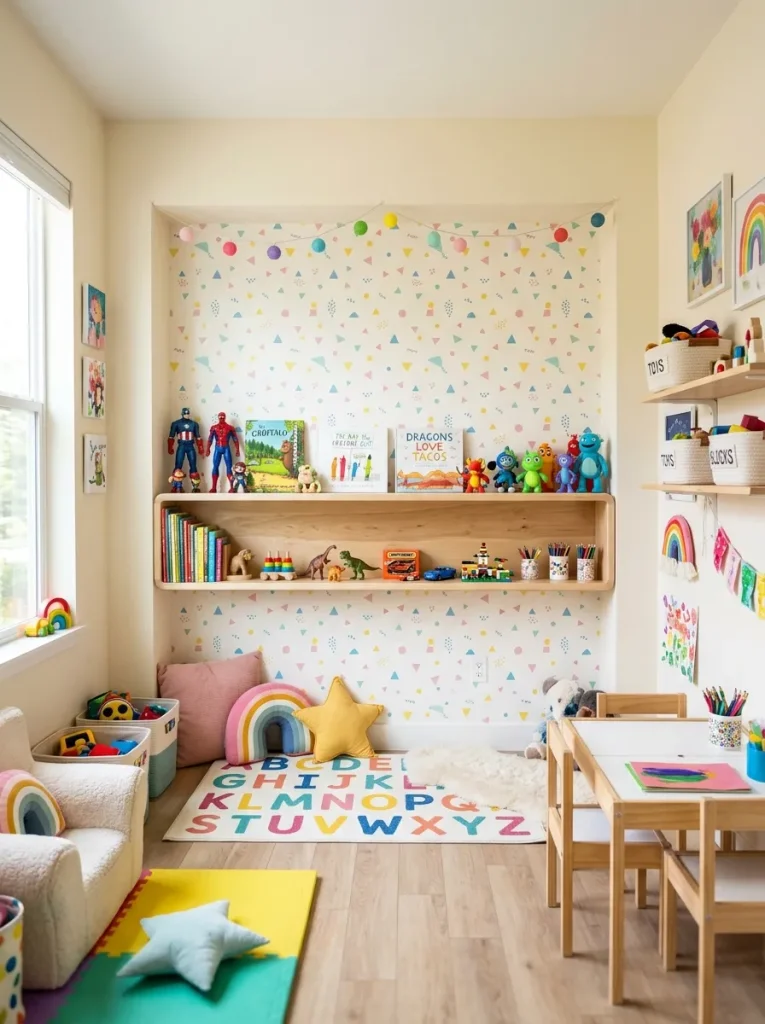
The playroom display ledge offers a child-accessible, visually engaging storage solution designed to showcase action figures, small toys, and children’s books. This concept uses shallow, open tiers that allow young children to easily see, select, and return their favorite playthings independently. The design prioritizes safety, using rounded edges, secure mountings, and durable, non-toxic paint finishes that withstand enthusiastic daily use. The visual style can incorporate bright accent colors or playful geometric backgrounds that enhance the youthful energy of a dedicated playroom.
How to Create
Determine a child-friendly height along the playroom wall and outline a wide horizontal pattern across one or two independent stud cavities as desired. Cut out the drywall panels cleanly, ensuring the interior cavity is completely cleared of any loose insulation debris or structural obstructions. Build the toy display insert using soft pine or smooth poplar boards, taking extra time to sand all exposed edges and corners to a completely rounded shape. Paint the back wall of the wooden box with a vibrant accent color or line it with playful patterned wallpaper to make the toy displays pop. Fit the shelving unit into the wall opening, screwing it securely through the sides into the wall studs using heavy countersunk screws. Add a thick, robust outer trim around the frame, ensuring it is glued and nailed tightly to the wall to prevent removal by children.
Idea 9: The Hallway Gallery Art and Decorative Niche
Concept and Spatial Layout
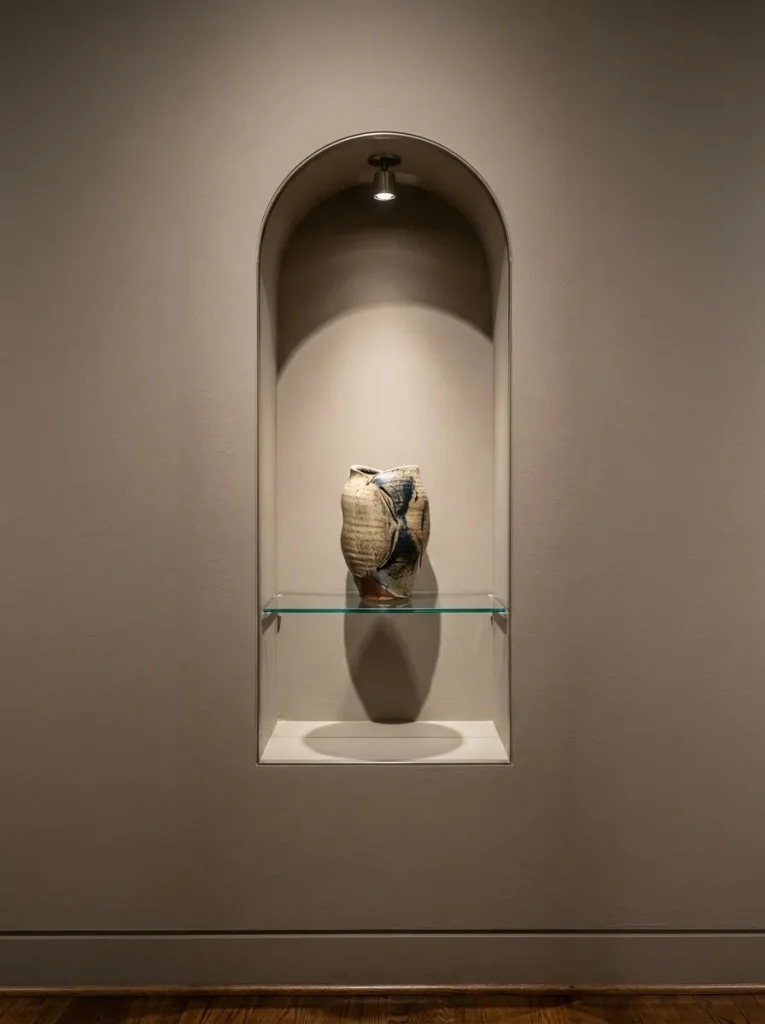
The hallway gallery niche breaks up long, monotonous corridors by introducing elegant, illuminated display alcoves for sculptures, pottery, or framed artwork. Because hallways are narrow paths where projecting furniture creates a safety hazard, recessed niches offer the perfect way to display home decor safely. The layout focuses on a sophisticated, museum-like presentation, featuring arched top frames, glass shelving elements, and directional accent lighting. The styling uses muted, neutral tones that match the hallway walls, letting the spotlighted artwork take center stage.
Execution Process
Cut a tall, elegant vertical opening into the hallway drywall, ensuring the placement sits exactly at standard gallery eye-level for the average viewer. Build a sophisticated enclosure box from smooth cabinet-grade plywood, optionally cutting an arched top profile out of flexible mitered MDF for an elegant touch. Drill a central hole in the top panel of the box to accommodate a low-voltage, battery-operated LED spotlight that will project downward onto your display items. Paint the entire interior of the niche the exact same color as your hallway walls to create a subtle, integrated architectural shadowbox effect. Fit the gallery box into the stud space, leveling it precisely before driving trim screws through the framework into the studs. Finish the project by installing delicate, low-profile trim or apply drywall tape and joint compound over the seams for a flawless, modern design.
Idea 10: The Hidden Jewelry or Valuables Cabinet
Concept and Spatial Layout
The hidden valuables cabinet combines practical storage with clever home security by concealing a recessed wall safe or jewelry rack behind a movable exterior feature. From the outside, the installation looks like a standard framed mirror or artwork hanging flat against the wall surface. However, the picture frame is mounted on a hidden piano hinge, swinging open to reveal a secure, multi-tiered organization cabinet hidden between the studs. The interior features felt-lined hooks, ring slots, and small compartments designed to keep precious personal items organized and completely out of sight.
Step-by-Step Guide
Select a discreet location in a bedroom or closet wall, mapping out a fourteen and a half inch wide rectangular cutout between two standard studs. Cut away the drywall and build a secure, shallow cabinet box from dense hardwood, preparing the interior with soft felt lining sheets. Install rows of small brass jewelry hooks, padded ring dividers, and shallow organizational trays within the wooden frame to maximize storage efficiency. Fit the cabinet box deep into the wall cavity, securing it with heavy-duty lag screws driven directly into the structural wooden studs for maximum security. Attach a high-quality piano hinge along one outer edge of the cabinet box, connecting the opposite side of the hinge to a sturdy, framed mirror or painting. Ensure the exterior frame sits completely flat and flush against the wall surface when closed, totally hiding the secret storage compartment behind it.

Common Beginner Mistakes and How to Avoid Them
| Mistake Type | Potential Structural Impact | Preventative Action & Solution |
|---|---|---|
| Cutting Blindly Into Drywall | Accidental severance of hidden electrical wires, gas lines, or plumbing pipes. | Always use an electronic stud finder with live wire detection and cut a small, shallow exploratory hole first. |
| Ignoring Load-Bearing Walls | Structural sagging or compromised ceiling integrity due to cutting main supports. | Never cut or alter a vertical framing stud in a load-bearing wall without installing a properly engineered header. |
| Forgetting to Check for Level | Crooked shelves that cause objects to roll, slide, or look visually unaligned. | Continuously check both the wall cutout and the wooden box with a spirit level during assembly and fastening. |
| Neglecting Depth Constraints | The storage box sticks out past the drywall surface, ruined flush aesthetic finish. | Always measure the exact depth of your studs (usually 3.5 inches) before building your plywood enclosure box. |
Practical Tips for Better Technical Results
Achieving a professional, high-end finish on your recessed wall shelving requires attention to detail during the final steps of carpentry and drywall integration. When cutting away your drywall panels, always use a utility knife to deeply score the cut lines before using a drywall saw; this simple step prevents the plaster face from tearing and crumbling along the edges. To achieve a seamless look without using thick external wood trim, use metal drywall tear-away L-beads around the junction where the wooden box meets the plaster. This allows you to apply joint compound directly up to the wooden edge, creating a flawless transition that fits a modern design perfectly. When constructing your internal shelves, consider drilling a series of evenly spaced holes using a shelf-pin jig rather than gluing the shelves permanently in place; this simple modification grants you adjustable storage flexibility for years to come. Lastly, always apply a high-quality primer to any raw wood or MDF edges before painting, as these materials absorb moisture quickly and can swell if unprimed paint is applied directly to them.
Styling, Presentation, and Inset Wall Organization
Once your built-in wall shelf is structurally sound and painted, applying thoughtful styling principles transforms it into an appealing feature that enhances your home decor. Avoid overcrowding the small compartments; leave approximately thirty percent of the shelf space empty to maintain an organized, airy aesthetic that aligns with minimalist style. Group smaller objects, such as spice jars or cosmetic bottles, in uniform containers with matching labels to create visual order and eliminate chaotic brand packaging. Place heavier or larger items on the lowest shelf tier to ground the display visually, while keeping lighter, delicate objects at eye level. If your recessed nook is deep enough, layer items by placing flat objects like framed photos or books in the background, with small decorative objects nested in front of them to create depth. For non-illuminated cavities, choose light, reflective interior paint colors or metallic backings to bounce ambient room light forward, ensuring the contents of your custom inset remain highly visible and attractive throughout the day.
Efficient Budget and Time Planning
Completing an in-wall shelving project can be accomplished efficiently and economically by utilizing careful scheduling and smart material choices. A single standard recessed stud cavity project requires relatively little lumber, making it an excellent way to use high-quality plywood offcuts or scrap timber left over from previous household renovations. Allocate your time across a two-day schedule to allow for proper drying windows between the various construction steps without rushing the process. On the first day, focus entirely on locating the studs, cutting the drywall openings, building the wooden boxes, and applying the first coat of paint or wood stain. On the second day, once everything is dry, focus on running any low-voltage wiring, securing the boxes inside the wall cavities, installing the exterior trim molding, and applying the final touch-up paint. By following this structured step-by-step approach, you prevent mistakes caused by rushing through wet glue or tacky paint, resulting in an easy project that fits your budget.
Creative Expansion and Advanced Inspiration
For experienced DIY builders looking to push their home improvement skills further, recessed wall cavities open the door to advanced architectural designs. You can expand a standard installation by cutting through multiple studs to create a dramatic, wide horizontal display landscape, provided you build a proper structural header beam to safely redistribute the wall load. Consider integrating smart-home technology into your built-in units, such as installing concealed wireless charging pads beneath the wooden surface layer or adding voice-activated LED accent lighting channels. Another advanced option is mounting custom glass-panel doors with magnetic touch-latches over the front of the inset, transforming an open wall niche into a dust-free curiosity cabinet. You can also experiment with unique interior backing materials, such as applying reclaimed shiplap boards, pressed tin ceiling tiles, or premium mirrored glass sheets to the rear panel of the enclosure box to create distinct textures. These advanced updates elevate simple drywall openings into beautiful architectural statements that add long-term functionality to your living space.