

Introduction
Short hair has become a versatile and stylish choice for individuals seeking low-maintenance yet impactful looks. In the context of Pinterest ideas, short hairstyles are highly sought after for their aesthetic appeal and practical benefits. They offer an effortless blend of modern design and personal expression, catering to a wide range of face shapes, textures, and lifestyles. Readers exploring this guide will gain insight into various short hair styles that balance elegance, trendiness, and functionality. Each style is designed to be beginner friendly, making it accessible to those who wish to try a new look without complex salon procedures. The tutorial approach of this article ensures that every idea can be adapted to individual preferences while remaining achievable with basic materials and tools. Understanding the techniques behind these styles allows readers to confidently execute DIY adjustments, manage hair efficiently, and maintain a polished appearance. By following step-by-step guidance, this resource provides practical inspiration for short hair styling that integrates seamlessly with modern home decor aesthetics in personal grooming spaces. This guide emphasizes actionable methods, planning, and creative ideas for anyone seeking an easy project in hair styling that complements minimalist style, trending ideas, and handmade personalization.
Why This Idea Is Trending or Useful
Short hair styles continue to trend because of their practicality, adaptability, and aesthetic versatility. In the modern Pinterest landscape, these looks are highly shared for their visual appeal and ease of replication at home. Short hair allows for creative ideas that range from minimalist style cuts to bold, edgy designs, making them a popular choice for both beginners and those seeking fresh inspiration. DIY tutorials for short hair empower individuals to experiment with textures, layers, and shapes, offering an accessible alternative to time-consuming salon visits. The trend is reinforced by the influence of modern design principles in personal grooming, emphasizing clean lines, functional elegance, and effortless styling routines. These hair styles also integrate well into broader organization and home decor themes, where personal presentation aligns with a curated aesthetic. Short hair simplifies daily routines, reduces the need for extensive maintenance products, and allows for easy project-style transformations that encourage creative expression. On Pinterest, short hair styling ideas often combine practicality with aesthetic impact, making them attractive to users searching for inspiration that is both feasible and visually engaging. Their beginner friendly nature ensures that anyone can try these styles with minimal risk and achieve professional-looking results.
Materials and Preparation
Preparing for short hair styling requires gathering essential materials and tools, along with planning the desired outcome. Basic materials include a quality set of hair scissors, a fine-tooth comb, a spray bottle filled with water, hair clips, and styling products suitable for the hair type, such as mousse, pomade, or texturizing spray. Tools like a round brush, flat iron, or curling wand may be included depending on the styles being attempted. Preparation involves washing and conditioning the hair to ensure it is clean, hydrated, and manageable. Planning considerations should include face shape analysis, hair texture, and lifestyle factors that influence the style’s practicality. Mapping out the haircut or style in advance, either through sketches or saved Pinterest inspiration boards, helps streamline the execution process. A step-by-step approach to sectioning the hair and managing layers ensures consistent results, reducing the risk of uneven cuts. For beginner friendly projects, practicing on small sections first or starting with subtle adjustments can prevent errors. Attention to workspace organization, such as using a mirror setup and having clean towels, enhances efficiency. Proper preparation not only ensures professional-looking outcomes but also makes the process more enjoyable, turning hair styling into a creative project that aligns with aesthetic, minimalist, or trending ideas.
Idea 1: Sleek Asymmetrical Bob
How to Create
The asymmetrical bob is a modern, minimalist style that emphasizes sharp lines and geometric appeal. This cut features one side slightly longer than the other, creating visual interest while maintaining an easy-to-manage shape. It suits various hair textures and face shapes, particularly oval and heart-shaped faces. The style is considered beginner friendly because it can be customized in length and angle without intricate layering. Aesthetic appeal comes from its clean lines and polished finish, which work well for professional or casual settings. The sleek asymmetrical bob can also be combined with subtle highlights or lowlights for added depth and dimension, making it a popular Pinterest idea. Its design relevance lies in the way it complements contemporary wardrobe choices, offering a balance between sophistication and ease of styling. This haircut encourages creative projects in personal grooming, as small adjustments to angles or lengths can yield distinctly different looks, allowing individual personalization without sacrificing simplicity.
Step-by-Step Guide
To create a sleek asymmetrical bob, begin by sectioning the hair into four quadrants, using clips to keep hair manageable. Decide which side will be longer and mark the starting point using a comb. Using hair scissors, cut the shorter side first, ensuring an even and straight line from the nape to the front. Gradually trim the longer side to achieve the desired asymmetry, using careful measurements to maintain balance. Apply a flat iron to smooth the hair, enhancing the sleek aesthetic. Use styling products like light pomade or heat protectant spray to maintain shine and manage flyaways. Regular maintenance involves minor trims every four to six weeks to preserve the shape. Planning for natural hair growth and texture ensures the style remains functional and visually appealing over time. This method allows a beginner to follow a structured approach, transforming a simple haircut into a creative project that aligns with modern design principles and trending ideas on Pinterest.

Idea 2: Textured Pixie Cut
How to Create
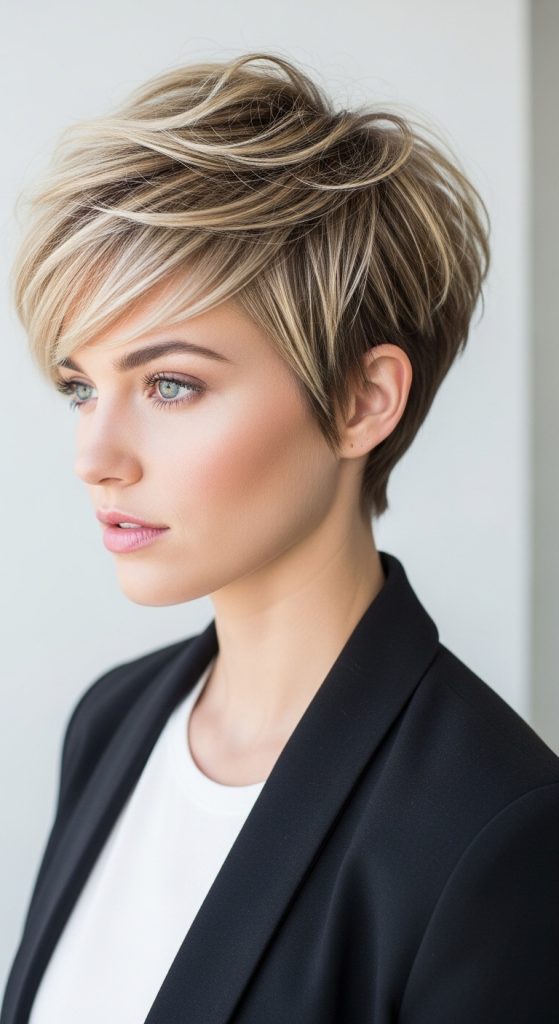
The textured pixie cut is a dynamic and low-maintenance short hair style that emphasizes movement and layered texture. Its defining feature is the combination of shorter lengths at the nape with longer, choppy layers on top, allowing for playful styling options. This style is ideal for those seeking an easy project that enhances facial features while maintaining a minimalist aesthetic. It is beginner friendly because the cut can be approached gradually, focusing on small sections to achieve the desired texture without complex techniques. The design relevance lies in its versatility: it works well with straight, wavy, or slightly curly hair. Textured pixie cuts are commonly shared as Pinterest ideas due to their adaptability and the way they complement modern, clean styling. The handmade feel of a textured pixie allows individuals to express personal creativity through styling products, such as volumizing mousse or texturizing spray, while maintaining a professional and trendy appearance. It balances practicality and aesthetic appeal, making it a reliable choice for anyone seeking a creative project in hair styling.
Execution Process
Begin by washing and conditioning the hair, then gently towel dry and detangle. Section the hair into layers starting at the nape, cutting short lengths to form a clean base. Gradually work upward, using point-cutting techniques to create texture and prevent blunt edges. The top layers should be left slightly longer to allow for styling versatility. After cutting, apply texturizing spray and use fingers to tousle the hair, emphasizing natural movement. For a polished finish, a small round brush and blow dryer can be used to smooth sections selectively. Regular trims every 4–6 weeks maintain the shape and texture of the pixie cut. Planning the haircut according to face shape ensures the style highlights key features. This step-by-step method provides beginner friendly guidance while encouraging creative exploration, making the textured pixie a practical, trending, and aesthetically appealing short hair style.
Idea 3: Classic Blunt Bob
How to Make
The classic blunt bob is a straightforward yet stylish short hair style characterized by an even, horizontal cut that rests near the jawline. Its minimalist style makes it one of the most accessible Pinterest ideas for beginners seeking a structured and polished look. This cut emphasizes the hair’s natural volume and shine while providing a sleek silhouette that complements modern design aesthetics. The style works across various hair textures, though straight or slightly wavy hair accentuates the crisp edges most effectively. Its practical value lies in its low-maintenance approach, as it requires minimal daily styling and supports efficient organization of hair care routines. The blunt bob also functions as a versatile base for other creative ideas, such as adding subtle highlights or integrating decorative hair accessories for a handmade and personalized touch. Understanding the foundational structure of the blunt bob allows readers to replicate the style at home confidently while maintaining aesthetic harmony with trending short hair inspirations.
Step-by-Step Guide
Start by washing and conditioning hair to ensure it is manageable and smooth. Section hair into four parts, securing each section with clips. Using hair scissors, begin cutting from the back, ensuring a straight line that aligns with the intended jawline. Gradually move to the sides, checking symmetry regularly with a comb and mirror. After achieving the desired length, use point-cutting at the ends to prevent overly rigid lines while maintaining the overall blunt silhouette. Style with a flat iron for a polished look or leave natural for a more casual aesthetic. Maintenance involves minor trims every 5–6 weeks to preserve sharp edges. Planning the length according to face shape ensures a flattering result. By following this structured, beginner friendly approach, the classic blunt bob can be executed effectively as a practical and visually appealing DIY project that fits minimalist and trending Pinterest ideas.

Idea 4: Layered Short Shag
How to Create
The layered short shag is a retro-inspired haircut revived for its textured, voluminous appeal. This style incorporates uneven layers throughout the hair to create natural movement and a casual, lived-in aesthetic. Its modern interpretation fits seamlessly into trending Pinterest ideas, especially for those seeking creative projects that balance effortless styling with visual impact. The layered shag accommodates various hair textures, from straight to wavy, enhancing volume at the crown and around the face. Its design relevance stems from its ability to frame facial features while allowing flexibility in styling, such as tousled waves or sleek finishes. This style is beginner friendly due to its forgiving layered structure, which allows slight variations without compromising overall appearance. Materials and preparation are minimal, focusing on standard haircutting tools and texturizing products to define layers effectively. The layered short shag encourages experimentation and personalization, making it an appealing choice for individuals exploring DIY styling with aesthetic and practical appeal.
Step-by-Step Guide
Begin by washing and lightly drying the hair, leaving it slightly damp for precision cutting. Section the hair into top, middle, and bottom layers, securing each section with clips. Start trimming the bottom layer using point-cutting to establish a textured foundation. Gradually move to middle and top layers, cutting at varied lengths to enhance volume and natural movement. Apply light texturizing spray to lift sections and refine the shape. The cut should appear effortless, with layers blending naturally. Finish by styling with fingers or a round brush to accentuate the shaggy texture. Regular trims every 6–8 weeks maintain the intended layered effect. Planning the length and layering pattern according to hair thickness ensures the style remains manageable and aesthetically balanced. This method provides a beginner friendly guide to creating a versatile and creative short hair style aligned with Pinterest DIY inspiration.

Idea 5: Curly Short Cut
How to Create
Curly short cuts focus on enhancing natural curls while maintaining a manageable length. This style celebrates texture, volume, and shape, offering a beginner friendly option for those seeking easy projects in DIY hair styling. Curly short cuts can range from tight ringlets to soft waves, allowing flexibility in aesthetic presentation. Practicality lies in reduced maintenance time compared to longer curly hair, with easier application of styling products such as curl creams or gels. The style’s trending appeal comes from its ability to combine handmade charm with modern design aesthetics, producing a visually appealing and versatile Pinterest idea. Planning the cut according to curl pattern ensures that the hair retains bounce and shape without excessive weight. Curly short cuts also encourage creative expression, as curls can be accentuated or defined with minimal tools, making it a functional, beginner friendly, and aesthetically pleasing project suitable for daily styling routines.
Execution Process
Wash and condition the hair with curl-friendly products to preserve natural texture. Section hair to allow for controlled cutting, ensuring curls are evenly distributed. Trim small amounts at a time, focusing on maintaining shape and preventing shrinkage issues. Use curl-defining products to test the final form and refine areas that need adjustment. Dry hair using a diffuser or air-dry method to retain natural curl patterns. Regular trims every 6–8 weeks prevent split ends and maintain shape. Planning the cut to complement face shape and curl density enhances aesthetic appeal. Following this method ensures a beginner friendly approach that maximizes natural texture while creating a trending, easy project suitable for home styling and Pinterest inspiration.

Idea 6: Undercut Bob
How to Create
The undercut bob combines a traditional bob with shaved or closely trimmed sections underneath. This creative idea adds contrast and modern design elements while remaining practical for beginner friendly styling. It provides a unique aesthetic by balancing sleek top layers with bold, minimal underlayers. The style is accessible for those who want a DIY project that feels handmade and visually impactful. Planning is essential to determine the placement of the undercut, typically near the nape or sides, ensuring the cut complements natural hair growth and face shape. This short hair style aligns with Pinterest trending ideas due to its edgy yet sophisticated appeal, offering opportunities for experimentation with patterns, lengths, and styling products. The undercut bob requires minimal maintenance on top layers, making it a practical, aesthetic, and versatile creative project.
Step-by-Step Guide
Wash and section the hair, separating the top layer from the section intended for the undercut. Use clippers or scissors to trim the undercut area to the desired length, ensuring a clean and even result. Release the top layers and cut them into a bob silhouette, maintaining balance over the shaved portion. Style using a flat iron or light products to enhance the bob’s sleek appearance. Regular touch-ups on the undercut are needed to retain precision, while the top layer requires trimming every 4–6 weeks. Planning the undercut placement according to hairstyle preferences and lifestyle ensures functionality and aesthetic appeal. This structured, beginner friendly method transforms a simple bob into a bold, modern, and creative DIY project.

Idea 7: Layered Pixie with Bangs
How to Make
The layered pixie with bangs introduces a playful and stylish element to short hair. This haircut incorporates short layers at the crown, combined with bangs that frame the face. Its practical value lies in easy styling and low maintenance while allowing room for creative expression. The style is highly beginner friendly due to its forgiving layered structure, which accommodates adjustments without compromising the overall look. Modern design aesthetics are evident in the balance between volume and proportion, making it a popular Pinterest idea. Planning the length and layering ensures that bangs complement the face shape and hair texture, producing a harmonious and visually appealing result. The style also allows variations, such as side-swept bangs or choppy fringe, adding versatility and adaptability to home DIY styling projects.
Execution Process
Wash and lightly towel-dry hair, leaving it damp. Section the hair into top, middle, and bottom areas. Cut the bottom and middle layers first using point-cutting techniques to build texture and avoid blunt edges. Trim the bangs according to face shape, adjusting length to achieve the desired framing effect. Apply styling products like light mousse or texturizing spray to enhance volume and separation. Blow-dry with a round brush or diffuse to accentuate layers. Regular trims every 4–6 weeks maintain shape and prevent overgrowth. Proper planning ensures bangs remain manageable and layers retain intended movement. This structured approach provides beginner friendly guidance while creating a trending, easy project suitable for Pinterest-inspired creative ideas.

Idea 8: Angled Bob with Highlights
How to Create
The angled bob with highlights merges geometric haircuts with visual depth. Its defining feature is a slightly longer front compared to the back, enhanced by subtle highlights that create dimension and movement. This style is practical, beginner friendly, and aesthetically appealing, fitting into modern design trends and trending Pinterest ideas. Planning involves selecting appropriate lengths and angles to suit face shape, as well as highlighting techniques that complement natural hair color. This short hair style enhances natural volume while providing easy styling options, such as straightened sleek looks or textured, tousled finishes. It is a versatile DIY project that allows creativity while remaining realistic for home execution.
Step-by-Step Guide
Wash and section hair for cutting, separating front and back layers. Trim the back shorter while gradually increasing length towards the front to achieve the angled bob silhouette. Apply highlighting techniques, either with foils or balayage, to add dimension. Use a comb and scissors to refine ends and ensure even distribution of color. Style with a flat iron or curling wand for a polished look, adding volumizing or texturizing products to enhance movement. Regular trims every 5–6 weeks maintain the angle and overall shape. Planning the cut and highlights according to hair type ensures a balanced, professional finish. This beginner friendly method transforms a classic bob into a visually striking, creative, and modern short hair style.

Idea 9: Choppy Layered Cut
How to Make
A choppy layered cut creates texture and movement through uneven layers. It is a popular choice in Pinterest ideas for its edgy yet low-maintenance appeal. The style is beginner friendly because small, staggered cuts gradually shape the hair, allowing adjustments without over-cutting. Its practical value includes effortless styling and reduced daily maintenance. Choppy layers complement various hair textures, from straight to wavy, and provide versatility for styling, including tousled, voluminous looks or sleeker appearances. The aesthetic is handmade, trendy, and adaptable, making it suitable for DIY hair projects. Planning the length and layer distribution ensures balance and enhances facial features.
Execution Process
Wash hair and leave damp. Divide into sections for manageable cutting. Begin cutting the bottom layer, using point-cutting techniques for uneven, choppy texture. Progress to middle and top layers, trimming small sections at varying lengths to create dimension and movement. Apply texturizing spray or mousse to enhance volume and separation. Style with fingers or a diffuser to retain natural texture. Regular trims every 4–6 weeks prevent uneven growth. Planning layers according to hair density and face shape ensures a flattering and practical result. This method provides beginner friendly guidance for a versatile and trending short hair style that fits modern aesthetic and DIY inspiration.

Idea 10: Curved Bob with Side Part
How to Create
The curved bob with a side part emphasizes soft, rounded lines and face-framing contours. Its appeal lies in its simplicity, beginner friendly execution, and adaptability for various textures. The style is practical for daily maintenance while remaining visually appealing for Pinterest-inspired projects. Planning the curve and side part ensures hair frames the face effectively, complementing personal style and modern design trends. This haircut allows subtle variations, such as slightly longer front strands or accentuated layers, creating a personalized and creative short hair project. The curved bob is ideal for an easy project that balances aesthetic, function, and trending ideas in a home styling context.
Step-by-Step Guide
Wash and towel-dry hair, leaving it slightly damp. Section hair into top and bottom layers. Trim the bottom layer into a gentle curve, gradually transitioning to the front. Adjust the top layers to blend seamlessly with the curve, ensuring the side part is defined and complements facial structure. Style using a round brush or flat iron to enhance curvature. Apply light styling products like serum or volumizing mousse for finish. Regular trims every 5–6 weeks maintain the shape and curvature. Planning the cut to suit hair texture and personal preference ensures a polished, beginner friendly, and visually appealing result. This approach offers a creative DIY short hair project with aesthetic versatility and trending Pinterest appeal.

Common Beginner Mistakes and How to Avoid Them
A frequent mistake in short hair styling is cutting too much hair at once, which can result in uneven or disproportionately short styles. Beginners should approach each section gradually, trimming small amounts and checking symmetry continuously. Another common error is neglecting preparation,
such as failing to detangle or section hair properly before cutting, which can lead to uneven layers and difficulty in achieving desired shapes. Using inappropriate tools, like dull scissors or hair brushes not suited to texture, can cause split ends or imprecise cuts. Overlooking styling products is another beginner pitfall, as they help control movement, volume, and texture, ensuring the style appears polished. Improper planning regarding face shape, hair density, or curl pattern can also compromise the aesthetic of a short haircut. Avoiding these mistakes involves following structured tutorials, carefully measuring lengths, and testing cuts gradually. Maintaining proper sectioning, using appropriate materials, and planning for hair growth ensures beginner friendly execution and successful DIY results that reflect Pinterest-inspired trends.
Practical Tips for Better Results
Achieving better results in short hair styling involves combining careful preparation with strategic product use. Using sectioning clips ensures manageable portions of hair, allowing precision when trimming or layering. Selecting hair products based on texture—mousse for volume, pomade for control, curl cream for defined waves—enhances the style’s final appearance. A sharp, quality pair of scissors reduces split ends and ensures clean lines. Maintaining damp hair while cutting provides better control, especially for textured or layered styles. Regular trims prevent overgrowth and maintain the integrity of the shape, particularly for styles like bobs or pixies. Practicing techniques such as point-cutting, layering, or texturizing gradually builds skill and confidence. Observing symmetry through mirrors and measuring lengths consistently ensures professional-looking results. Planning the haircut to match face shape, hair density, and lifestyle considerations enhances aesthetic appeal. Following these practical tips results in a beginner friendly, easy project that is consistent with Pinterest DIY trends, creative ideas, and modern short hair design principles.
Styling, Presentation, or Organization Ideas
Presentation of short hair involves strategic styling to highlight the haircut’s shape and texture. Organizing hair tools such as scissors, combs, and styling products within reach enhances workflow and efficiency. Styling can emphasize different aspects of a haircut, such as sleekness for blunt bobs or tousled texture for layered shags. Using appropriate brushes or diffusers ensures control over movement and volume. Incorporating side parts, subtle twists, or small accessories allows personalization without complicating the style. Planning haircare routines to maintain shine, hydration, and manageability supports consistent presentation. Organizing tutorials or reference boards, particularly Pinterest inspiration boards, helps visualize desired outcomes before execution. Rotating styling methods between straightened, curled, or naturally textured presentations provides versatility and showcases the haircut’s full potential. Structuring the styling process with clear steps and appropriate products ensures a beginner friendly approach that enhances aesthetic appeal, creative expression, and practical DIY project management for short hair.
Budget or Time Planning
Efficiently completing short hair styling projects requires planning both time and budget. Essential tools and materials should be selected for durability and effectiveness, avoiding unnecessary expenses on specialized products unless required for specific styles. Most beginner friendly cuts can be achieved with basic scissors, combs, hair clips, and styling products, minimizing investment. Allocating sufficient time for preparation, cutting, and styling prevents rushed mistakes. Scheduling regular trims reduces the need for corrective cuts, saving time and maintaining consistent results. DIY projects benefit from planning by breaking the process into manageable steps, such as washing, sectioning, trimming, and finishing. Budget ideas include repurposing existing products or learning versatile techniques applicable across multiple styles. Time management ensures beginner friendly execution and allows for experimentation without compromising the aesthetic outcome. Structured planning promotes efficiency while supporting creative expression and practical results aligned with trending Pinterest ideas and easy home projects.
Creative Expansion and Advanced Inspiration
Short hair styles can be expanded creatively by combining techniques, experimenting with textures, or integrating color elements. Advanced variations include asymmetrical layering, undercut patterns, or balayage highlights, which elevate standard cuts into unique, personalized expressions. Curly or wavy textures can be enhanced with advanced styling methods, such as finger-coiling, diffusing, or heat-based shaping. Creative projects can incorporate temporary color, hair accessories, or strategic styling to transform a simple cut into a dynamic look suitable for diverse occasions. Planning these expansions involves understanding the foundational cut and experimenting gradually to maintain balance and proportion. Pinterest inspiration can guide advanced techniques, allowing beginner friendly experimentation while encouraging aesthetic innovation. Expanding on basic short hair cuts fosters versatility, reinforces skills, and promotes confidence in DIY styling. These methods support ongoing creative exploration, offering an opportunity to adapt trending ideas into sophisticated, handmade, and visually appealing results that align with modern design principles.