Natural hair styling continues to evolve with practical, stylish solutions that emphasize simplicity, versatility, and healthy hair care. Braided updos without weave have become a strong focus within Pinterest ideas because they combine protection, elegance, and ease of maintenance. These styles rely entirely on natural hair, making them ideal for individuals seeking a DIY approach that avoids extensions while still achieving a polished appearance. This article explores ten detailed, beginner friendly braided updo ideas that can be recreated at home using basic materials and clear step by step methods. Each idea focuses on structure, design balance, and real-life practicality, ensuring the styles are achievable without professional assistance. Readers will learn how to prepare hair properly, section efficiently, and construct durable updos suitable for daily wear or special occasions. These creative ideas also support better organization of styling routines and encourage consistent hair care habits. Whether for a minimalist style or a more intricate aesthetic, these techniques provide inspiration for modern design that prioritizes natural beauty and functionality.
Why This Idea Is Trending or Useful
Braided updos without weave are trending ideas because they align with current preferences for low-maintenance, protective styling that supports natural hair health. Many people are shifting toward styles that reduce tension, limit product buildup, and eliminate dependency on added hair. These styles are widely shared across Pinterest ideas due to their accessibility and adaptability for different hair textures and lengths. The DIY nature of these looks makes them practical for beginners, while still offering enough variation to remain visually appealing. They also fit well within home decor and lifestyle inspiration boards, where organization and simplicity are valued. From a design perspective, these updos reflect a clean, structured aesthetic that complements modern fashion and minimalist style trends. Additionally, these hairstyles are cost-effective, making them suitable for budget ideas while still delivering a refined appearance. The combination of practicality, aesthetic appeal, and ease of execution makes braided updos without weave a reliable choice for everyday styling and special events alike.
Materials and Preparation
Before starting any braided updo, proper preparation ensures better results and longer-lasting styles. Essential materials include a wide-tooth comb, rat-tail comb for sectioning, moisturizing cream or leave-in conditioner, hair gel for hold, and elastic bands or hairpins for securing the structure. Clean, detangled hair is the foundation of every successful DIY hairstyle. Begin by washing and conditioning the hair, then allow it to air dry or stretch it using low-heat methods to make braiding easier. Sectioning plays a critical role in achieving neat results, so planning the layout before braiding helps maintain symmetry and balance. It is useful to divide the hair into manageable parts using clips to keep the process organized. Moisturizing each section before braiding helps reduce breakage and enhances smoothness. For beginners, practicing basic braid patterns such as three-strand braids or cornrows improves overall execution. Preparation also involves deciding the final updo shape, whether it will be centered, side-swept, or layered, ensuring the creative project remains structured and easy to follow.
Idea 1: Classic Crown Braided Updo
How to Create
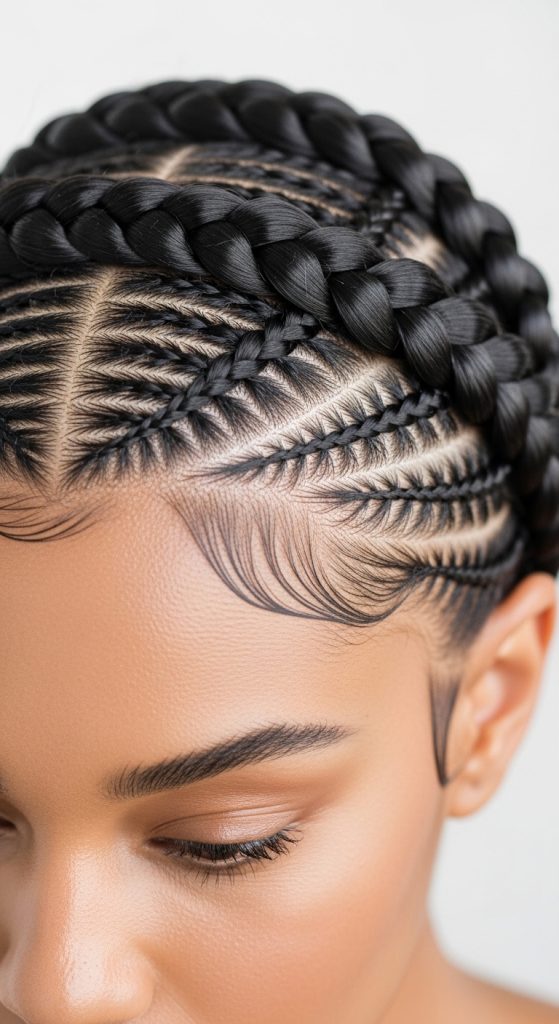
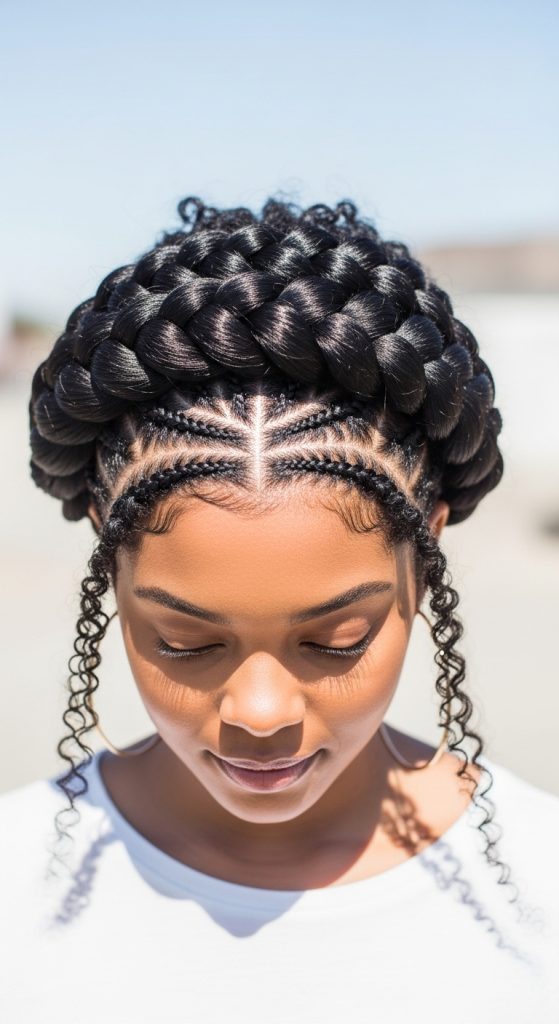
This style focuses on wrapping braids around the head to form a crown-like shape that highlights facial features while keeping the hair secure. It is a timeless option often seen in Pinterest ideas due to its balance of elegance and practicality. The design works well for both casual and formal settings, making it a versatile addition to any styling routine. The crown effect creates a natural frame, emphasizing symmetry and clean lines. This minimalist style does not require complex techniques, making it beginner friendly while still delivering a refined aesthetic. The structure also protects the ends of the hair, reducing exposure and helping maintain moisture. Because it uses natural hair only, the result feels lightweight and comfortable throughout the day. This idea is especially useful for individuals looking for a simple yet polished updo that can last for several days with minimal adjustments.
To execute this step by step, begin by parting the hair horizontally from ear to ear. Create two main sections: front and back. Start braiding from one side using a cornrow technique, moving along the hairline toward the opposite side. Repeat the same process with the back section, ensuring both braids meet seamlessly. Wrap each braid around the head and secure with pins, overlapping slightly to create the crown shape. Apply a small amount of gel to smooth edges and maintain neatness. Ensure the braids are not too tight to avoid tension on the scalp. This easy project requires minimal materials and can be completed in under an hour with practice, making it a reliable choice for everyday wear.
Idea 2: Low Braided Bun Updo
Step-by-Step Guide
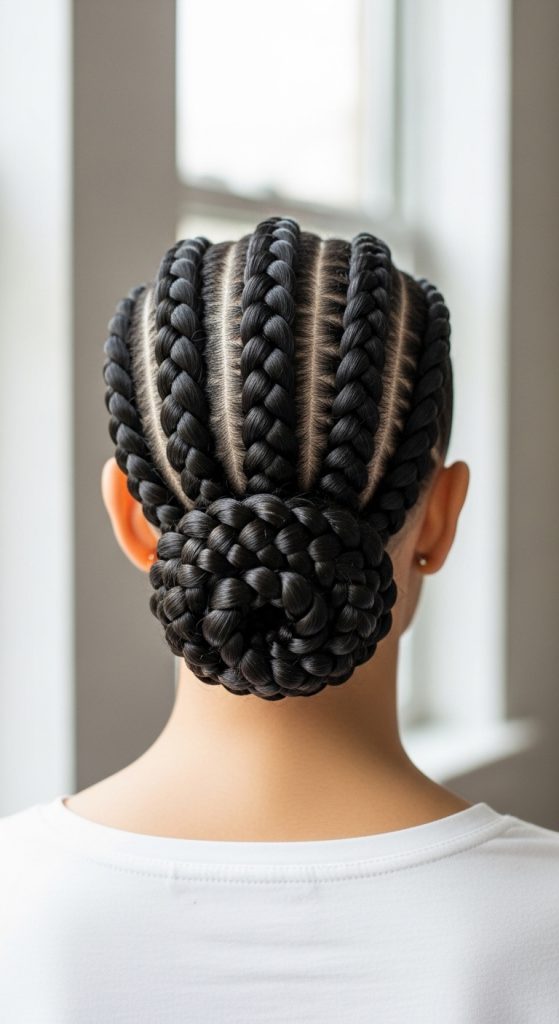
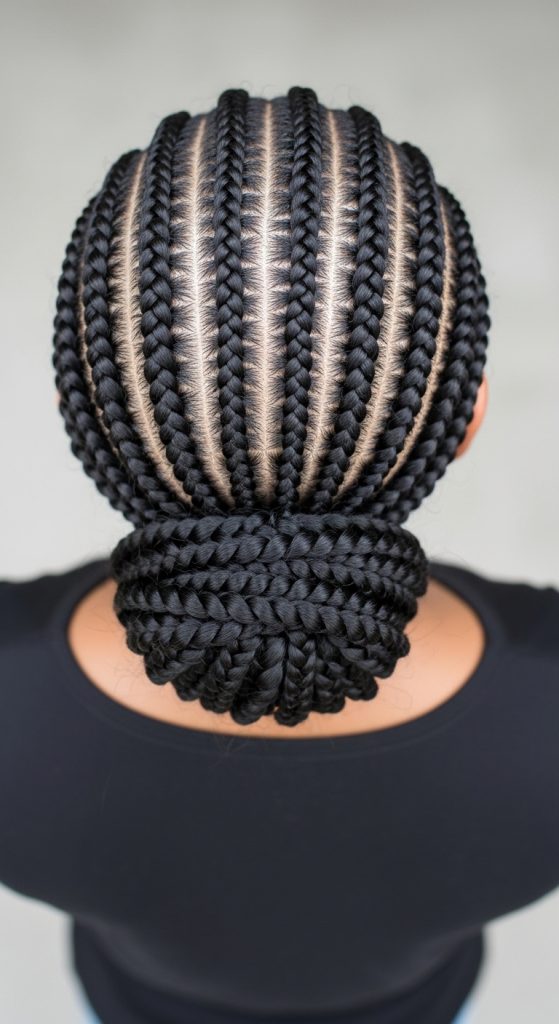
The low braided bun is a practical and organized hairstyle that sits at the nape of the neck. It is widely featured in creative ideas because of its simplicity and professional appearance. This style works well for work environments, events, or daily routines where a clean look is needed. The low placement reduces strain on the scalp while keeping the hair controlled and neat. Its structured design aligns with modern design trends that emphasize balance and subtle detail. This hairstyle also supports hair protection by tucking away the ends, minimizing exposure to environmental stress. The overall aesthetic is understated yet effective, making it suitable for individuals who prefer a minimalist style with functional benefits.
To create this style, begin by parting the hair into three sections: one center and two side sections. Braid each section downward using a standard three-strand method. Gather all braids at the nape and wrap them into a bun, securing with pins or elastic bands. Smooth the surface with a light styling product to maintain a polished look. Ensure the bun is firm but not overly tight. This DIY tutorial requires basic braiding skills and minimal tools, making it accessible for beginners. The result is a long-lasting updo that maintains its shape throughout the day while remaining comfortable and easy to maintain.
Idea 3: Side-Swept Braided Updo
How to Make
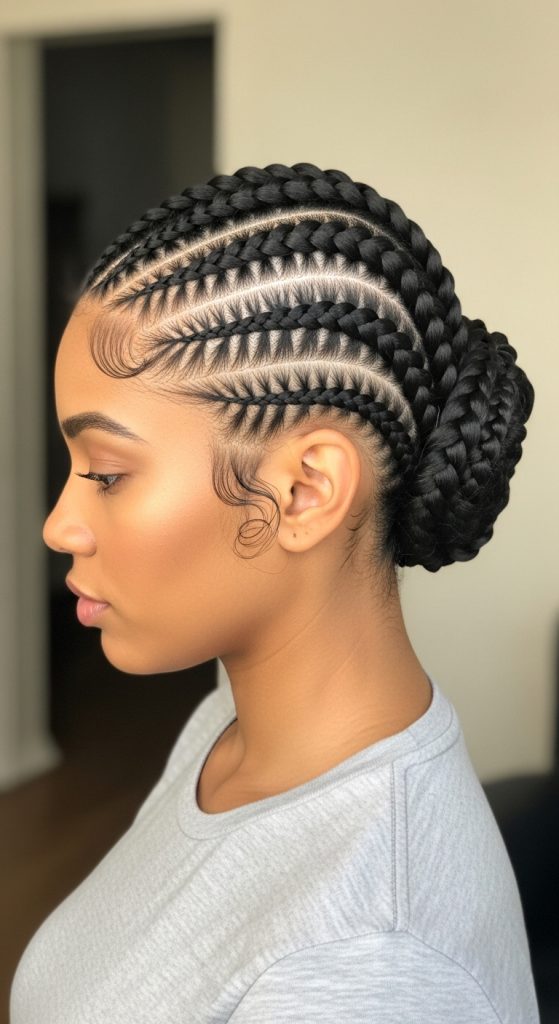
The side-swept braided updo introduces asymmetry, creating a dynamic and visually interesting hairstyle. This approach is popular among Pinterest ideas because it offers a fresh alternative to centered styles. The design shifts focus to one side, enhancing dimension and adding a modern touch. It works particularly well for highlighting facial features and adding variety to routine styling. This style blends creativity with practicality, allowing for a structured yet flexible outcome. It is also adaptable for different occasions, making it a useful addition to any collection of creative projects.
To achieve this look, part the hair deeply to one side. Begin braiding from the heavier side using cornrows or flat twists, directing the braids toward the opposite side of the head. Gather the ends into a compact updo positioned near the ear or slightly behind it. Secure the structure with pins and smooth any loose strands. Apply a light hold product to maintain neatness. This step by step method ensures the hairstyle remains stable and balanced. The process requires careful sectioning but remains beginner friendly with practice. The final look combines elegance and creativity, making it suitable for both casual and formal settings.
Idea 4: Braided High Bun Updo
Execution Process
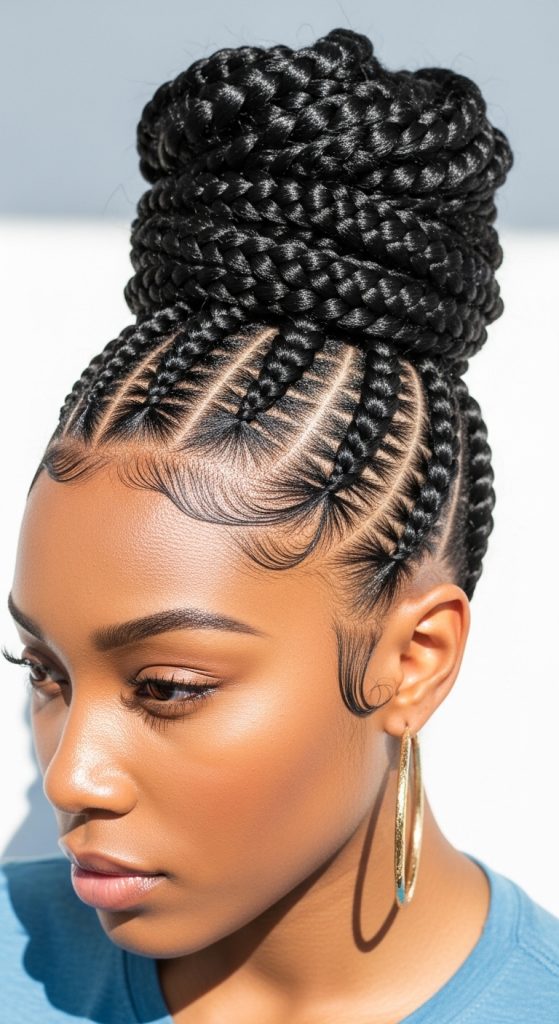
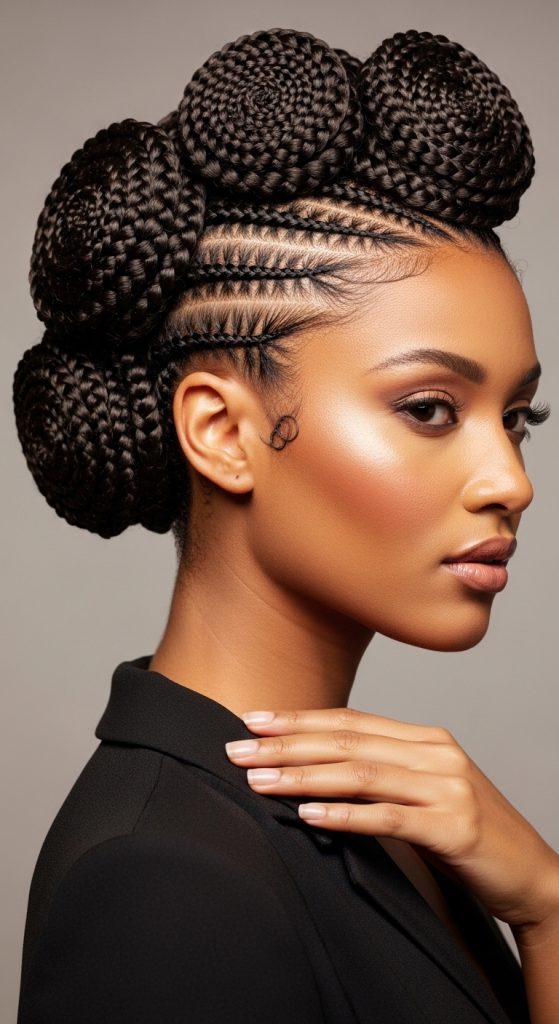
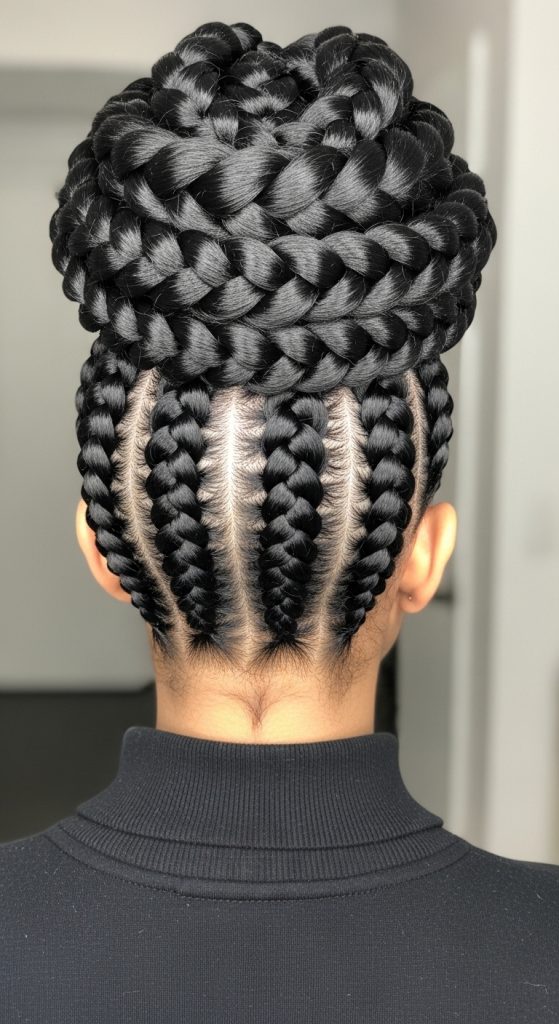
The braided high bun offers a bold and elevated look that emphasizes structure and height. It is commonly featured in trending ideas because it creates a strong visual impact while remaining practical. This hairstyle lifts the hair away from the face and neck, making it ideal for warm weather or active days. The design focuses on vertical balance, creating a clean and defined silhouette. It aligns with aesthetic preferences for organized and polished appearances, making it suitable for various occasions. The high placement also allows for better airflow to the scalp, contributing to comfort.
To create this style, gather the hair into a high ponytail at the crown. Divide the ponytail into multiple sections and braid each one individually. Wrap the braids around the base of the ponytail to form a bun, securing with pins as you go. Ensure the structure is firm but not overly tight. Smooth edges with a small amount of gel for a clean finish. This easy project requires basic tools and can be completed quickly once the technique is mastered. The result is a durable, stylish updo that remains intact throughout the day.
Idea 5: Halo Braid Updo
How to Create
The halo braid is a continuous braid that circles the head, creating a soft and balanced look. It is often used in Pinterest ideas for its elegant and symmetrical appearance. This style works well for both casual and formal settings, offering a refined yet approachable aesthetic. The halo effect frames the face evenly, creating a harmonious design. It is also a protective style that keeps the hair secure and reduces manipulation.
To execute this style, begin braiding at the nape of the neck and continue around the head using a continuous cornrow technique. Keep the braid close to the scalp for a smooth finish. Once the braid reaches the starting point, tuck the end underneath and secure with pins. Apply a light styling product to maintain neatness. This step by step process requires patience but remains achievable for beginners with practice.
Idea 6: Twisted Braided Updo
Setup Method
This style combines twists and braids to create texture and depth. It is popular among creative ideas because it offers variation without increasing complexity. The combination of techniques adds visual interest while remaining manageable. This style is suitable for individuals looking to experiment with different textures.
To create it, section the hair and alternate between twists and braids. Gather all sections into a central updo and secure with pins. Ensure the structure is balanced and not overly tight. This DIY approach allows flexibility while maintaining a cohesive look.

Idea 7: Flat Twist Updo
How to Make
Flat twists provide a simpler alternative to braiding, making this style highly beginner friendly. It is commonly used in organization-focused Pinterest ideas because of its neat appearance. The style keeps hair close to the scalp, reducing frizz and maintaining order.
To execute, create flat twists from the front toward the back. Gather the ends into a bun or tuck them into the twists. Secure with pins and smooth the surface. This method is quick and efficient, making it ideal for busy schedules.
Idea 8: Braided Roll Updo
Execution Process
The braided roll updo focuses on rolling braided sections into a structured shape. It is a creative project that emphasizes design and form. This style is often used for formal occasions due to its polished appearance.
To create it, braid sections of hair and roll them upward, securing each roll with pins. Arrange the rolls to create a balanced design. Apply a light hold product for durability. This method requires attention to detail but produces a refined result.
Idea 9: Chunky Braided Updo
How to Create
Chunky braids create a bold and defined look. This style is popular in trending ideas for its strong visual impact. The larger braids reduce styling time while still delivering a striking appearance.
To execute, divide the hair into larger sections and create thick braids. Gather them into an updo and secure with pins. Ensure even spacing for a balanced look. This easy project is suitable for beginners and requires minimal effort.
Idea 10: Spiral Braided Updo
Step-by-Step Guide
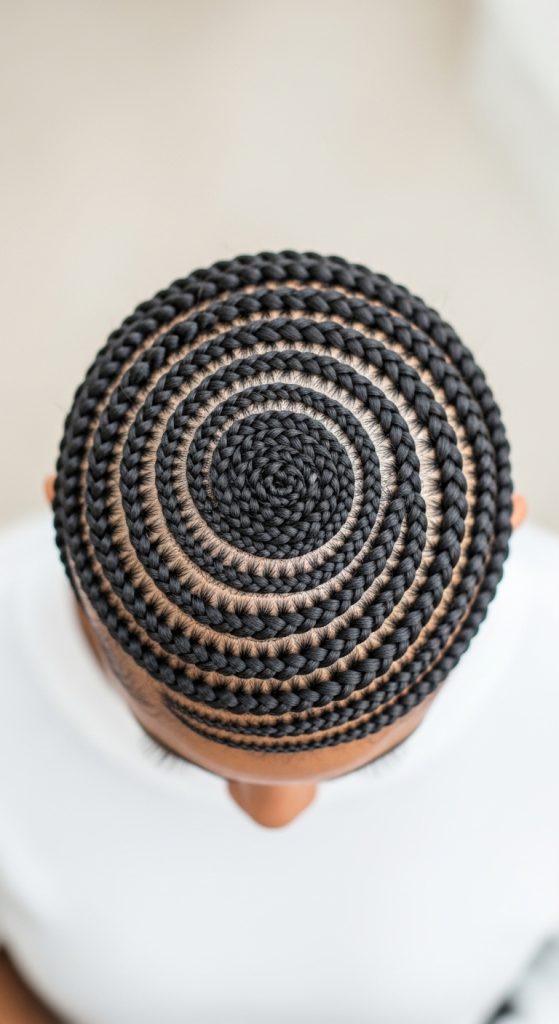
The spiral braided updo uses curved braiding patterns to create movement. It is a unique option among Pinterest ideas, offering a dynamic design. The spiral effect adds creativity while maintaining structure.
To create this style, braid the hair in curved sections that follow a spiral pattern. Gather the ends into a central updo and secure with pins. Smooth the surface with a light product. This method requires careful planning but delivers a visually engaging result.
Common Beginner Mistakes and How to Avoid Them
One common mistake is braiding too tightly, which can cause discomfort and damage the scalp. Maintaining moderate tension ensures both durability and comfort. Another issue is poor sectioning, which leads to uneven braids and an unbalanced final look. Using a rat-tail comb for precise parts improves overall structure. Skipping proper moisturizing can result in dryness and breakage, so applying a leave-in conditioner before styling is essential. Beginners also often rush the process, leading to loose or messy results. Taking time to follow each step carefully improves consistency. Avoiding excessive product use is also important, as buildup can affect the appearance and longevity of the style.
Practical Tips for Better Results
Consistent sectioning and proper preparation are key to achieving professional-looking results. Working with slightly stretched hair makes braiding easier and reduces tangling. Using small amounts of product ensures a clean finish without buildup. Practicing basic braid techniques regularly improves speed and accuracy. Keeping tools organized during the process helps maintain efficiency. Choosing styles that match your skill level ensures better outcomes and reduces frustration.
Styling, Presentation, or Organization Ideas
Presentation plays an important role in enhancing the final look. Keeping edges smooth and maintaining clean lines improves the overall aesthetic. Coordinating hairstyles with outfits creates a cohesive appearance. Organizing styling tools and materials before starting ensures a smoother process. Using simple accessories sparingly can enhance the design without overwhelming it.
Budget or Time Planning
Braided updos without weave are cost-effective because they require minimal materials. Most tools are reusable, making them suitable for budget ideas. Planning the hairstyle in advance reduces time spent on decision-making. Practicing simpler styles first helps build confidence and efficiency. Allocating enough time for preparation ensures better results.
Creative Expansion and Advanced Inspiration
Once basic techniques are mastered, styles can be expanded by combining different braid patterns or incorporating unique parting designs. Experimenting with symmetry and asymmetry adds variety. Advanced inspiration can include mixing twists and braids or creating layered updos. These creative ideas allow for continuous development and personalization of natural hair styling techniques.