
Creating beautiful home decor does not have to be expensive. With a little creativity and some basic supplies, you can turn simple items from Dollar Tree into stylish decorations for your home. Dollar Tree stores offer a wide range of affordable materials such as glassware, picture frames, candles, floral supplies, foam boards, baskets, and seasonal decor. These budget-friendly items are perfect for DIY projects because they are easy to customize and replace if you make a mistake. Crafting your own decor also allows you to match your personal style, whether you prefer farmhouse, modern, rustic, or minimalist designs.
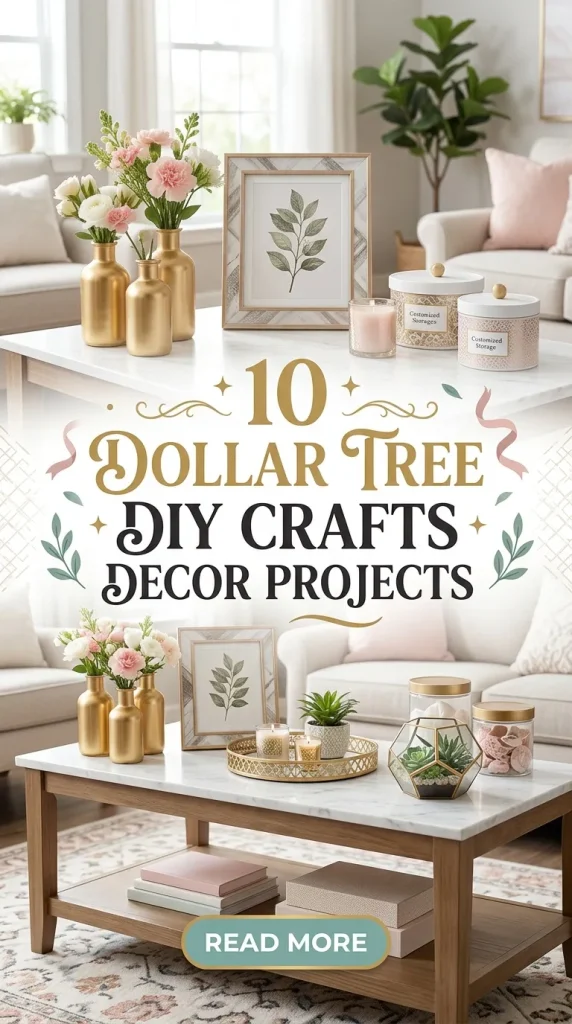
In this blog post, you will find 10 detailed Dollar Tree DIY decor projects. Each project includes preparation steps, materials needed, instructions, and helpful tips for best results. The language is simple, so even beginners can follow along. These projects are great for decorating your living room, bedroom, kitchen, bathroom, or even for gifting. Most of these crafts require basic tools like glue guns, scissors, paint brushes, and acrylic paint. With patience and creativity, you can create high-end looking decor on a small budget.
Now let us explore these 10 inspiring DIY decor ideas.
## 1. Farmhouse Style Candle Holders
Farmhouse decor remains popular because of its warm and cozy feel. You can easily create farmhouse style candle holders using Dollar Tree glass candle holders and small mason jars.
Materials needed: glass candle holders, small glass jars or vases, E6000 glue or hot glue gun, white or cream acrylic paint, sandpaper, twine, and tea light candles.
Preparation: Clean all glass surfaces with rubbing alcohol to remove dust and oil. This helps the glue and paint stick properly. Lay down newspaper to protect your workspace.
Instructions: Glue the mason jar or small vase on top of the candle holder base. Let it dry completely according to the glue instructions. Once dry, lightly paint the glass with white acrylic paint. For a distressed farmhouse look, use a dry brush technique so the paint looks slightly uneven. After the paint dries, gently sand certain areas to create a worn effect. Wrap twine around the neck of the jar and tie a simple bow.
Usage: Place tea lights inside and display them on a coffee table, dining table, or mantel. You can also add small artificial greenery inside for a fresh look.
Tips: Use battery operated candles for safety. If you want a more rustic style, add small wooden beads to the twine. This simple project looks much more expensive than it actually costs and adds warmth to any room.

## 2. Decorative Wall Mirror Using Plastic Frames
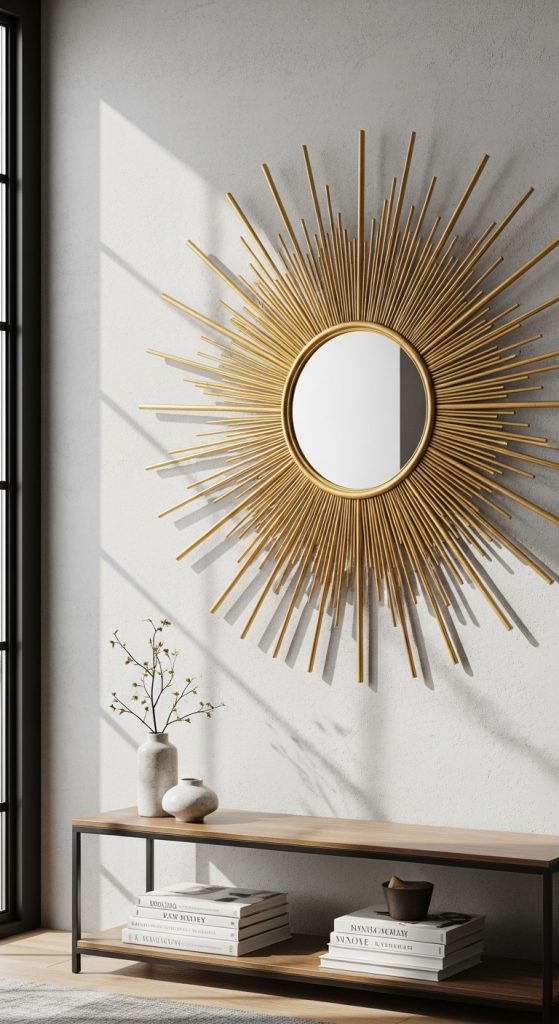
Large decorative mirrors can be expensive, but you can make your own statement piece using multiple Dollar Tree plastic frames.
Materials needed: 8 to 12 identical plastic picture frames, a round or square mirror from Dollar Tree, strong adhesive glue, spray paint, and a large piece of cardboard or foam board.
Preparation: Remove the glass and backing from each frame. Keep only the decorative outer frame. Clean all pieces before painting. Work in a well ventilated area when spray painting.
Instructions: Spray paint all the frames in your desired color, such as gold, black, or white. Let them dry completely. On a flat surface, arrange the frames in a circular or square pattern around the mirror to create a sunburst or layered effect. Once you are happy with the design, glue the frames together and attach them to the foam board. Finally, glue the mirror in the center.
Usage: Hang the finished mirror in your hallway, bedroom, or above a console table. It creates a bold focal point without a high price tag.
Tips: Use a level when hanging to ensure it is straight. If you want a glam look, sprinkle a little glitter over wet spray paint. For a modern style, keep the frames in a simple matte black finish. This project is easy but makes a strong visual impact.
## 3. Floating Wall Shelves Using Crates
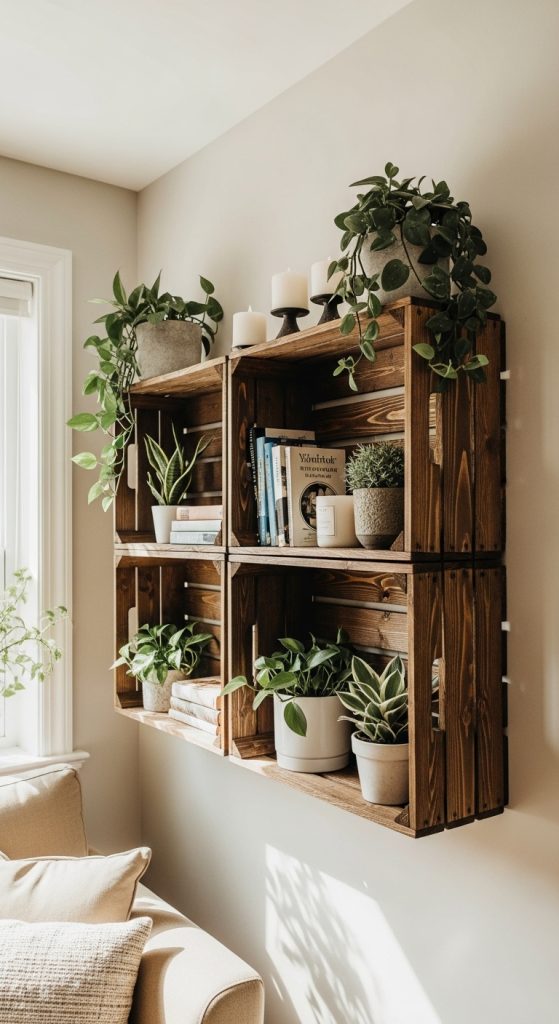
Wooden crates from Dollar Tree can be turned into charming floating shelves that add storage and decoration to your walls.
Materials needed: wooden crates, sandpaper, wood stain or acrylic paint, paint brush, screws, wall anchors, and a drill.
Preparation: Lightly sand the wooden crates to smooth rough edges. Wipe away dust with a dry cloth. Decide if you want a natural stained look or painted finish.
Instructions: Apply wood stain using a cloth or brush, following the wood grain. Wipe away excess stain and allow it to dry. If painting, apply two thin coats for even coverage. Once dry, decide on placement on your wall. Use a level to mark straight lines. Secure the crates to the wall using screws and wall anchors for stability.
Usage: Display small plants, books, candles, or picture frames on the shelves. They work well in living rooms, bedrooms, or even bathrooms for extra storage.
Tips: Always check the weight limit before placing heavy items. For a more decorative look, line the inside of the crate with peel and stick wallpaper. You can also stack two crates together for deeper shelving. This project combines function and style at a very low cost.
## 4. Elegant Glass Vase Makeover
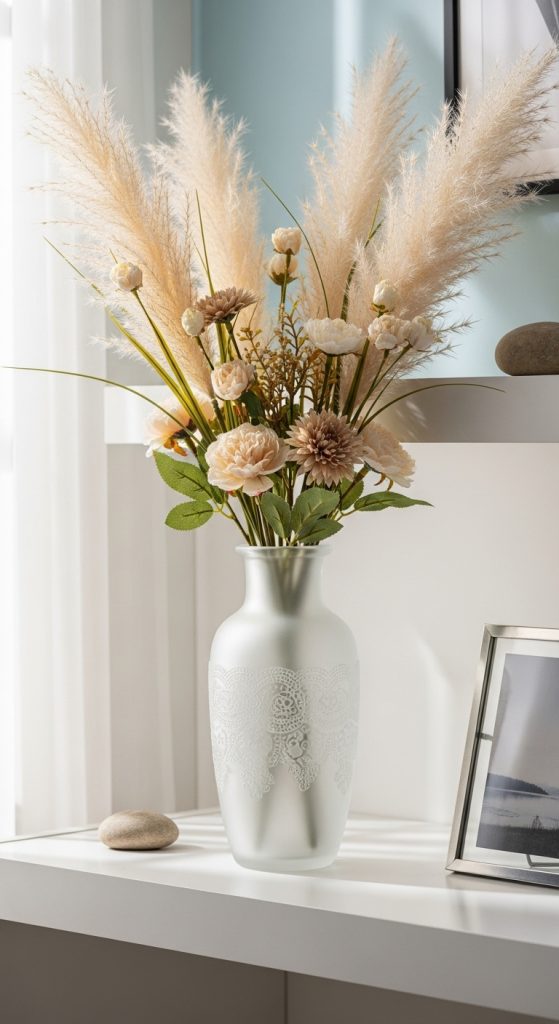
Simple glass vases can look plain, but with a few changes, they can become elegant decor pieces.
Materials needed: clear glass vase, frosted glass spray paint or acrylic paint, painter’s tape, lace ribbon or stencil, and artificial flowers.
Preparation: Clean the vase thoroughly and let it dry. Decide on a design pattern before starting.
Instructions: Use painter’s tape to create stripes or geometric patterns on the vase. Spray or paint over the exposed areas. If you want a delicate look, wrap lace around the vase and spray paint lightly over it. Remove the lace carefully to reveal a textured pattern. Allow the paint to dry completely.
Usage: Fill the vase with artificial flowers, pampas grass, or seasonal stems. Place it on a dining table, entryway table, or shelf.
Tips: Use light coats of spray paint to avoid drips. For a wedding or event, create several matching vases for centerpieces. Frosted paint gives a soft, elegant finish that looks much more expensive than clear glass. This quick makeover can match any decor theme with just a change of color.
## 5. DIY Wall Art with Foam Boards
Creating custom wall art is easy using Dollar Tree foam boards and simple craft supplies.
Materials needed: foam boards, acrylic paint, paint brushes, stencils, vinyl letters, and hot glue gun.
Preparation: Plan your design before painting. You can choose inspirational quotes, abstract art, or simple patterns.
Instructions: Paint the foam board in a base color and allow it to dry. Use stencils or vinyl letters to add words or designs. You can also create abstract art by using a sponge to dab different colors. If desired, glue a thin frame made from painted craft sticks around the edges for a finished look.
Usage: Hang your art in a living room, bedroom, or home office. Personalized quotes make great gifts.
Tips: Keep your design simple for a clean appearance. Neutral colors blend easily with most decor styles. If you make a mistake, let the paint dry and repaint the area. Foam boards are lightweight, making them easy to hang with adhesive strips. This project allows you to express your creativity without spending much money.

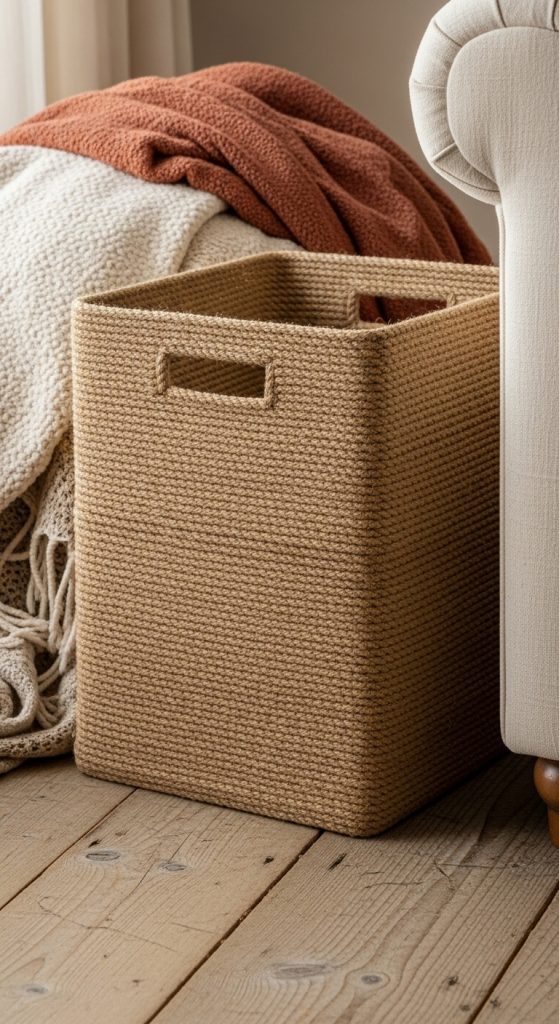
## 6. Rustic Rope Basket Makeover
Plastic baskets can look cheap, but adding rope can transform them into stylish storage pieces.
Materials needed: plastic basket, thick jute rope, hot glue gun, and optional fabric liner.
Preparation: Clean the basket surface. Cut the rope into manageable lengths.
Instructions: Starting at the bottom edge, apply hot glue in small sections and press the rope firmly onto the basket. Continue wrapping the rope around the basket until the entire surface is covered. Take your time to keep the rows even. If desired, sew a simple fabric liner and place it inside.
Usage: Use the basket for blankets, magazines, toys, or bathroom towels. It adds texture and warmth to any room.
Tips: Work slowly because hot glue dries quickly. Use gloves if needed to avoid burns. Choose lighter colored rope for a modern look or darker rope for a rustic style. This project is affordable and adds practical storage with a designer feel.
## 7. Tiered Tray from Plates and Candle Holders
A tiered tray is perfect for displaying desserts or decor items, and you can make one with Dollar Tree plates and candle holders.
Materials needed: two or three plates of different sizes, candle holders, strong adhesive glue, spray paint if desired.
Preparation: Clean all surfaces and decide on your design layout.
Instructions: Glue a candle holder upside down in the center of the larger plate. Attach the smaller plate on top of the candle holder. If making three tiers, repeat the process. Let the glue cure completely before moving. Spray paint the entire piece for a uniform look if needed.
Usage: Display cupcakes at parties or decorate seasonally with small pumpkins, ornaments, or flowers.
Tips: Allow enough drying time to ensure stability. Choose matching plates for a polished appearance. This project creates a functional centerpiece for a fraction of store prices.

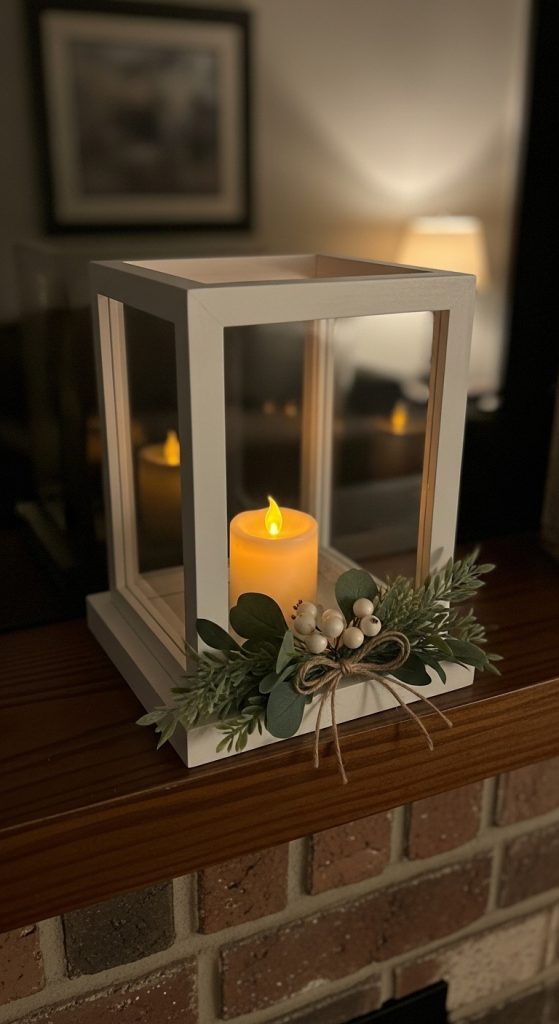
## 8. Decorative Lantern with Picture Frames
You can build a charming lantern using four Dollar Tree picture frames.
Materials needed: four identical picture frames, hot glue gun, small LED candle, cardboard base, and decorative elements like faux greenery.
Preparation: Remove glass and backing from frames. Lay them flat.
Instructions: Glue the frames together at the edges to form a square box shape. Attach the structure to a cardboard base for support. Paint if desired. Place an LED candle inside and decorate the base with greenery or small decorative stones.
Usage: Place the lantern on a porch, mantel, or dining table. It adds cozy lighting and style.
Tips: Always use LED candles for safety. Reinforce corners with extra glue for durability. This project is simple yet makes a beautiful statement piece.
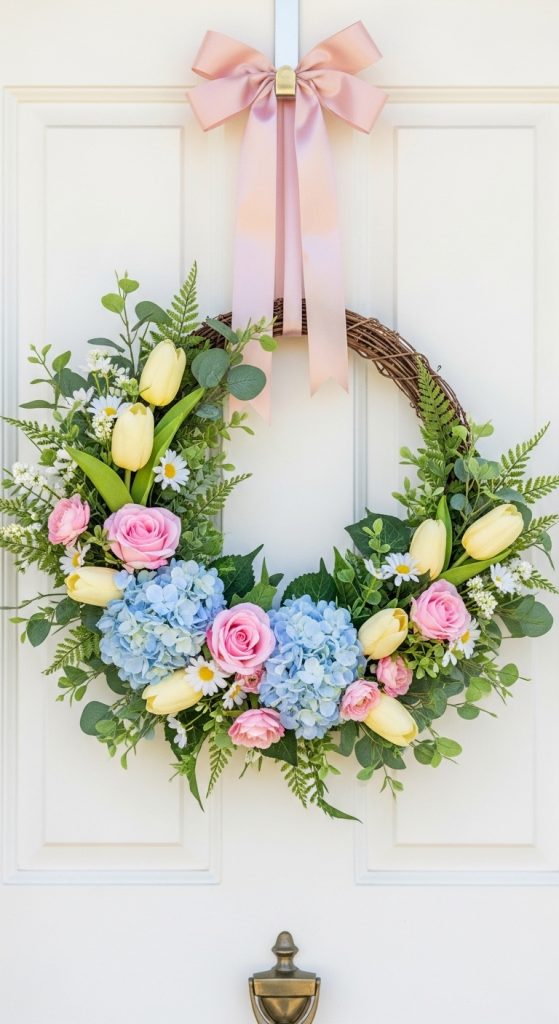
## 9. Floral Wreath Using Wire Frame
Seasonal wreaths can be expensive, but making your own is easy and affordable.
Materials needed: wire wreath frame, artificial flowers, floral wire, hot glue gun, ribbon.
Preparation: Trim flower stems and plan the arrangement before attaching.
Instructions: Attach greenery around the wire frame using floral wire. Layer larger flowers first, then fill gaps with smaller blooms. Secure everything tightly. Add a ribbon bow at the top or bottom.
Usage: Hang the wreath on your front door, above a fireplace, or on a wall.
Tips: Choose colors based on the season. For spring, use pastel flowers. For fall, use warm tones. Store carefully after the season ends so you can reuse it. This wreath adds a welcoming touch to your home.
## 10. Decorative Storage Jars for Kitchen
Organize your kitchen with stylish storage jars made from Dollar Tree containers.
Materials needed: clear plastic or glass jars with lids, chalk paint or acrylic paint, chalkboard labels, and chalk marker.
Preparation: Wash and dry the jars thoroughly.
Instructions: Paint the lids in a color that matches your kitchen decor. Let them dry fully. Attach chalkboard labels to the front of each jar. Fill jars with flour, sugar, rice, pasta, or snacks. Use a chalk marker to write the contents.
Usage: Display on open shelves or countertops for a neat and decorative look.
Tips: Keep writing clear and simple. Reapply chalk when contents change. These jars make your kitchen look organized while staying within budget. They also help you see when supplies are running low.
With creativity and patience, Dollar Tree items can be transformed into beautiful decor pieces. These projects prove that stylish home decoration does not require a large budget. By using simple materials and easy techniques, you can personalize your space and enjoy the satisfaction of creating something with your own hands.
