Prom hairstyles remain one of the most searched Pinterest ideas because they combine elegance, creativity, and personal expression in a single look. Among all hairstyle options, prom buns stand out as one of the most versatile choices for formal occasions. They can be styled sleek, messy, braided, or voluminous depending on hair type and personal preference. This article explores 10 prom buns tutorial ideas designed for different skill levels and aesthetic goals, making them suitable for beginners as well as those with more styling experience. Each idea focuses on practical execution, easy-to-follow structure, and achievable results without requiring professional salon tools. Readers will learn how to create different bun styles step by step while understanding how to adapt each look for modern events, home preparation, and creative experimentation. The goal is to provide clear inspiration for anyone searching for elegant, DIY-friendly, and trending ideas for prom hairstyles that are both stylish and realistic to achieve.
Why This Idea Is Trending or Useful
Prom buns have gained popularity across Pinterest because they align with current preferences for clean, structured, and elegant hairstyles that are still adaptable. Many people now look for DIY tutorials that allow them to achieve salon-like results at home without excessive complexity or cost. This makes prom buns especially appealing, as they can be customized using basic styling methods while still appearing sophisticated. The rise of minimalist style and modern design trends has also contributed to their popularity, since buns naturally create a polished and balanced look suitable for formal events. Another reason this hairstyle category remains relevant is its versatility across different hair textures and lengths, allowing more people to participate in easy project styling. Prom buns also fit well into budget ideas because they often require minimal tools and materials. Overall, they represent a combination of aesthetic inspiration, practical execution, and creative freedom, making them a strong choice for Pinterest-style content seekers.
Materials and Preparation
Before starting any prom bun tutorial, proper preparation ensures smoother execution and better results. Basic materials typically include a brush or comb for detangling, hair ties for securing sections, and bobby pins for holding the bun in place. Depending on the style, additional tools such as curling methods, sectioning clips, or light styling products may be helpful. Preparation begins with clean, dry hair that is properly detangled to avoid uneven texture during styling. Planning the desired bun style beforehand is also important, as it determines whether the look will be sleek, voluminous, braided, or messy. Many beginner friendly tutorials recommend practicing sectioning techniques before attempting the full hairstyle. This helps improve control and precision during the actual styling process. It is also useful to set up a well-lit mirror area to ensure visibility from different angles. With proper planning and materials ready, the entire DIY process becomes more efficient, organized, and easier to complete successfully.
Idea 1: Classic Sleek Low Bun
How to Create
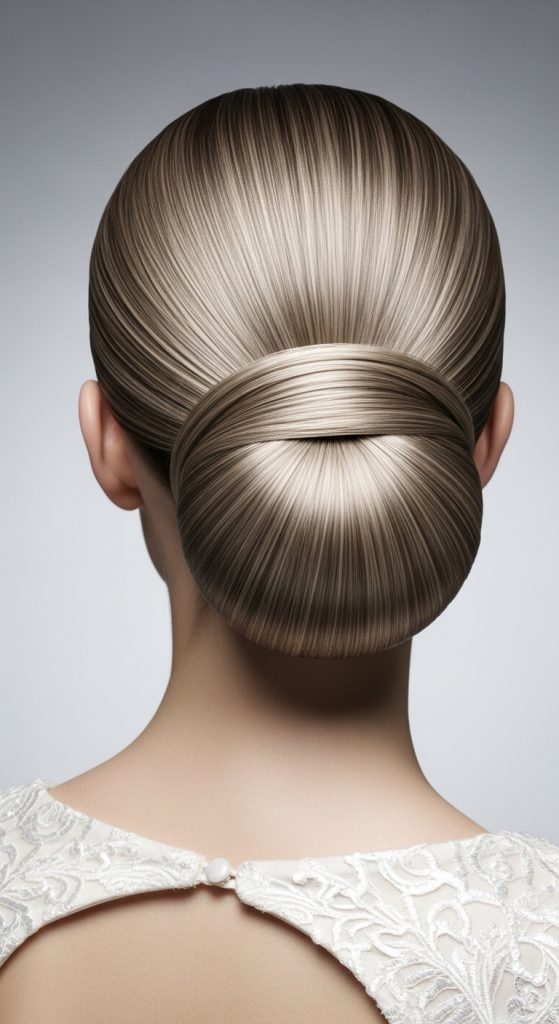
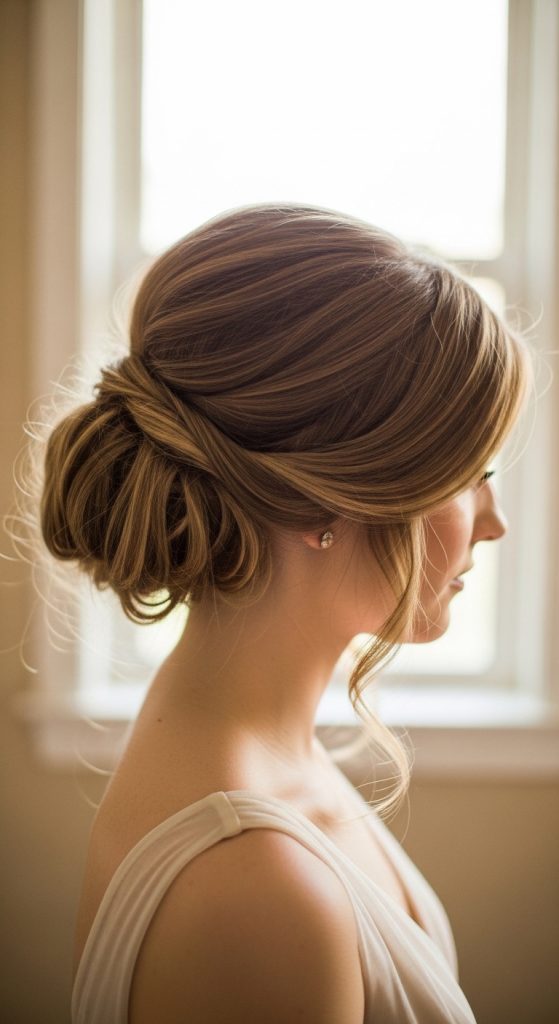
The classic sleek low bun is one of the most timeless prom buns tutorial ideas, known for its smooth finish and elegant placement at the nape of the neck. This hairstyle is widely used in formal settings because it creates a clean silhouette that complements dresses with detailed necklines or open back designs. The structure focuses on control and simplicity, making it ideal for those who prefer minimalist style over intricate detailing. The hair is typically styled straight and smooth to maintain a polished appearance, emphasizing symmetry and neatness. This look is especially effective for individuals who want a refined, modern design without excessive volume or texture. Its popularity in Pinterest ideas comes from its adaptability and universal appeal across different hair types and face shapes.
To create this bun, the hair should first be brushed thoroughly to remove tangles and ensure smooth alignment. It is then gathered at the nape and secured tightly with a hair tie. The ponytail is twisted and wrapped around its base to form a compact bun shape. Bobby pins are used strategically to secure loose ends and maintain structure. Light styling products can help control flyaways and enhance the sleek finish. The final step involves adjusting the bun’s shape for symmetry and ensuring it sits comfortably without tension. This step by step method creates a clean and beginner friendly hairstyle suitable for prom preparation.
Idea 2: Messy Textured Bun
How to Make
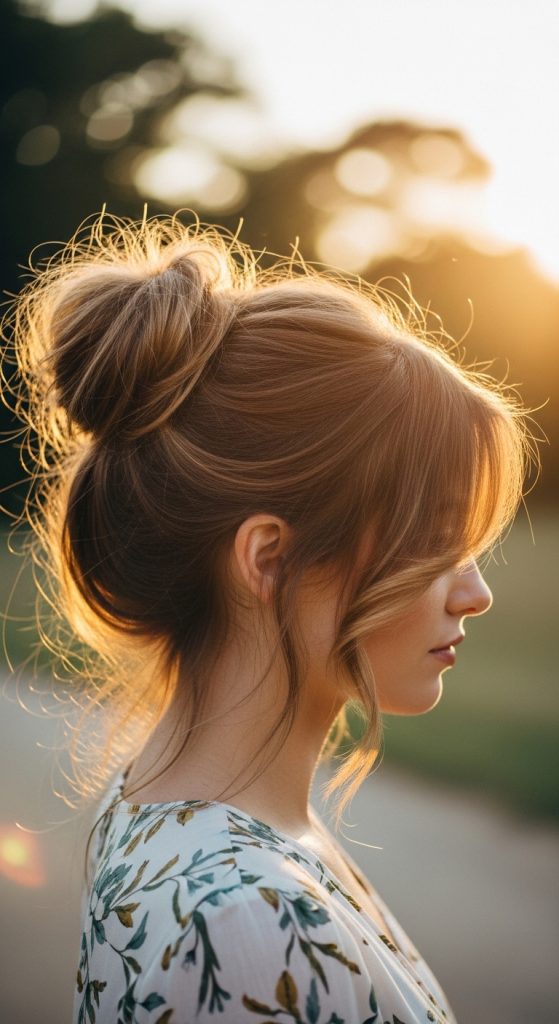
The messy textured bun is a popular choice among creative ideas because it combines relaxed styling with elegant structure. Unlike sleek buns, this style embraces natural volume and imperfect texture, making it ideal for modern prom looks. It is widely appreciated in DIY tutorials due to its flexibility and forgiving nature, allowing beginners to achieve attractive results without precise execution. The hairstyle creates a soft, romantic appearance that works well with various outfit styles, especially flowing or vintage-inspired dresses. Its charm lies in controlled randomness, where strands are intentionally loosened to enhance depth and movement. This approach aligns with trending ideas on Pinterest that focus on effortless beauty and natural aesthetics.
To create this bun, the hair is first loosely curled or texturized to add volume. It is then gathered into a low or mid ponytail without tightening too much. Instead of a firm wrap, the hair is twisted gently and pinned in sections to form a relaxed bun shape. Strands are pulled slightly outward to create softness and dimension. Bobby pins are used loosely rather than tightly to maintain structure while preserving the messy effect. The final step includes adjusting face-framing pieces to enhance balance and softness. This method is beginner friendly and requires minimal precision, making it a popular easy project for home styling.
Idea 3: Braided Crown Bun
How to Create
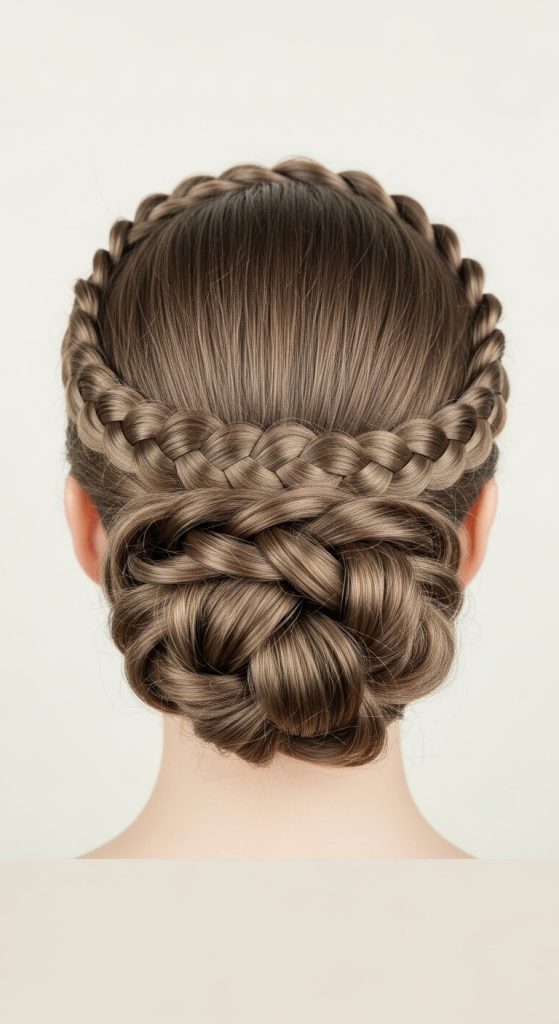
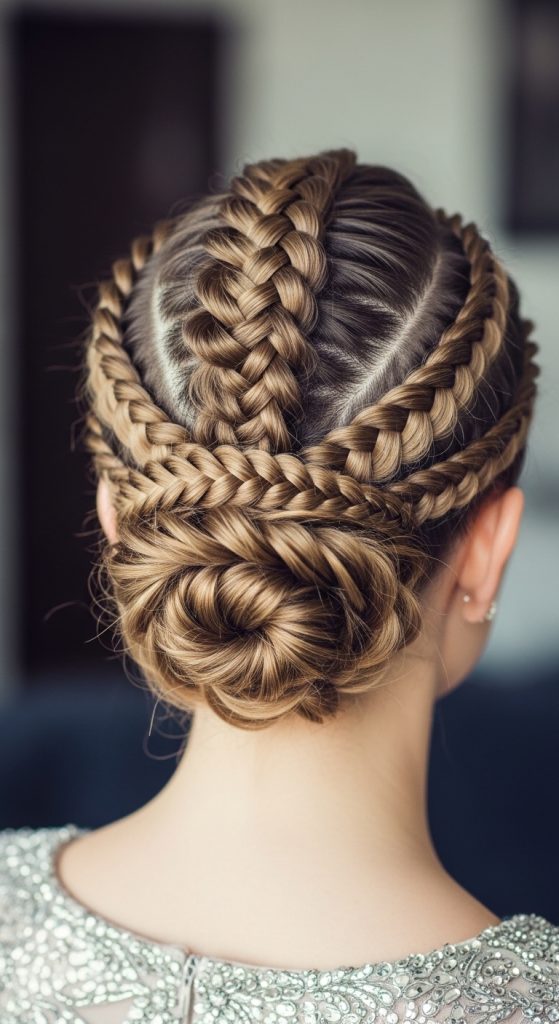
The braided crown bun combines intricate braid work with a structured bun base, making it one of the most decorative prom buns tutorial ideas. This style is often chosen for formal occasions where a more detailed and artistic appearance is desired. The braids act as a visual frame around the head, creating a crown-like effect that enhances elegance and sophistication. This hairstyle is especially suitable for individuals who want a creative project that feels more advanced but remains achievable with step by step guidance. It blends traditional braiding techniques with modern bun styling, resulting in a balanced and visually rich design that aligns with Pinterest inspiration trends.
To create this look, the hair is first divided into two sections and braided on both sides of the head. These braids are then brought toward the back and secured together. The remaining hair is gathered into a low bun, which serves as the foundation for the style. The braids are wrapped around or positioned above the bun to create a crown effect. Bobby pins are used to secure both the bun and braid placement. Adjustments are made to ensure symmetry and comfort. This tutorial method allows beginners to practice braiding skills while creating a structured and elegant prom hairstyle.
Idea 4: High Volumized Bun
How to Create
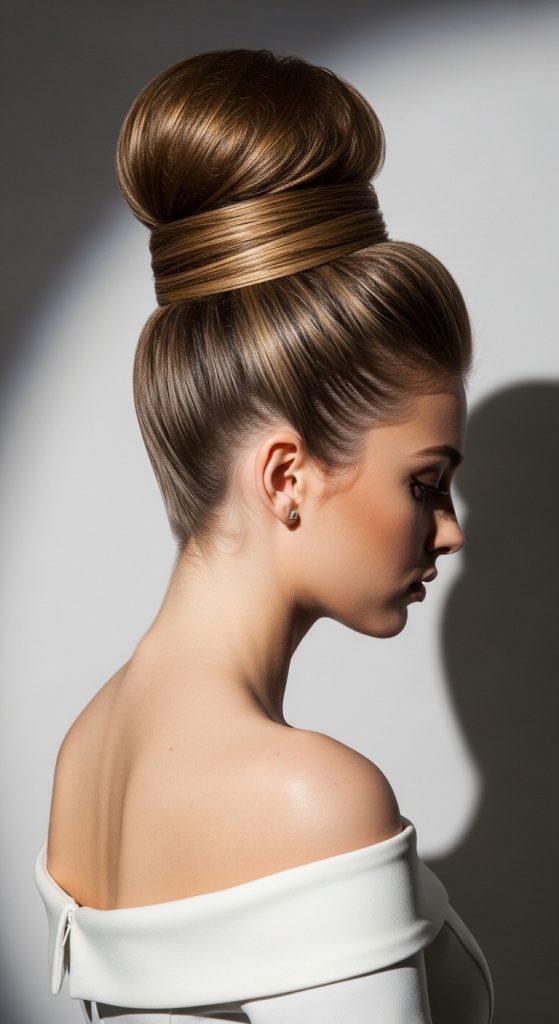
The high volumized bun is designed for those who prefer bold and lifted hairstyles that create a strong visual impact. Positioned at the crown of the head, this bun adds height and structure, making it a popular choice for dramatic prom looks. It is especially effective for enhancing facial features and elongating the neck area. This hairstyle fits well into modern design trends that emphasize volume and presence while maintaining elegance. It is often featured in Pinterest ideas because it balances sophistication with statement styling. The elevated position makes it suitable for dresses with detailed bodices or minimal necklines.
To create this bun, the hair is first teased at the crown to build volume and texture. It is then gathered into a high ponytail and secured tightly. The ponytail is divided slightly before being wrapped around its base to form a full bun shape. Bobby pins are inserted to support structure and maintain height. Additional teasing can be applied to sections of the bun to enhance fullness. The final step involves smoothing outer layers while preserving internal volume. This method is beginner friendly but requires attention to balance and placement to ensure the bun remains stable throughout wear.
Idea 5: Twisted Rope Bun
How to Create
The twisted rope bun is a structured yet simple hairstyle that uses twisting techniques instead of braiding, making it ideal for quick DIY tutorials. This style is known for its clean spiral effect, which adds subtle detail without requiring advanced skills. It is widely used in easy project guides because it offers a polished finish with minimal effort. The twisted texture creates visual interest while maintaining a controlled and elegant appearance. This bun style is suitable for individuals who prefer a neat but slightly decorative prom look that remains lightweight and comfortable.
To create this hairstyle, the hair is divided into two sections and individually twisted in the same direction. The two twisted sections are then wrapped around each other in the opposite direction to form a rope effect. This combined twist is wrapped into a bun shape and secured with bobby pins. The structure naturally holds well due to the interlocking twist pattern. Adjustments are made to ensure smoothness and even distribution. This step by step method is efficient and beginner friendly, making it a practical option for last-minute styling or simple prom preparation.

Idea 6: Side Swept Bun
How to Create
The side swept bun offers a soft and asymmetrical design that creates a romantic and elegant appearance. Positioned to one side of the head, this hairstyle adds dimension and movement while maintaining a structured bun base. It is often used in creative ideas that focus on balance between casual flow and formal styling. The side placement enhances facial framing and works well with layered or curled hair textures. This style is popular in Pinterest ideas because it introduces variation to traditional bun positioning while remaining simple and wearable for formal events.
To create this bun, the hair is first swept to one side and loosely secured into a low side ponytail. The hair is then twisted and wrapped into a bun near the shoulder area. Bobby pins are used to hold the structure while maintaining softness. Loose strands can be pulled gently to enhance framing around the face. Light curling may be added beforehand to improve texture and flow. This step by step method allows beginners to create an elegant and slightly unconventional prom hairstyle that feels both modern and graceful.
Idea 7: Braided Bun Hybrid
How to Create
The braided bun hybrid combines structured braiding with bun formation, creating a detailed and layered hairstyle. This design is ideal for individuals looking for more intricate DIY tutorials that still remain achievable. The braided elements add texture and depth, while the bun provides structure and balance. This combination makes it a standout choice in creative project styling, especially for prom events where detailed hairstyles are appreciated. It blends traditional techniques with modern aesthetic goals, resulting in a polished and decorative finish.
To create this style, the hair is first divided and partially braided in selected sections. These braids are then gathered along with the remaining hair into a central ponytail. The ponytail is wrapped into a bun, incorporating braided strands into the structure. Bobby pins secure both braid placement and bun stability. Adjustments are made to distribute braids evenly around the bun for visual balance. This method requires patience but remains beginner friendly when followed step by step, making it suitable for structured learning and practice.
Idea 8: Low Knot Bun
How to Create
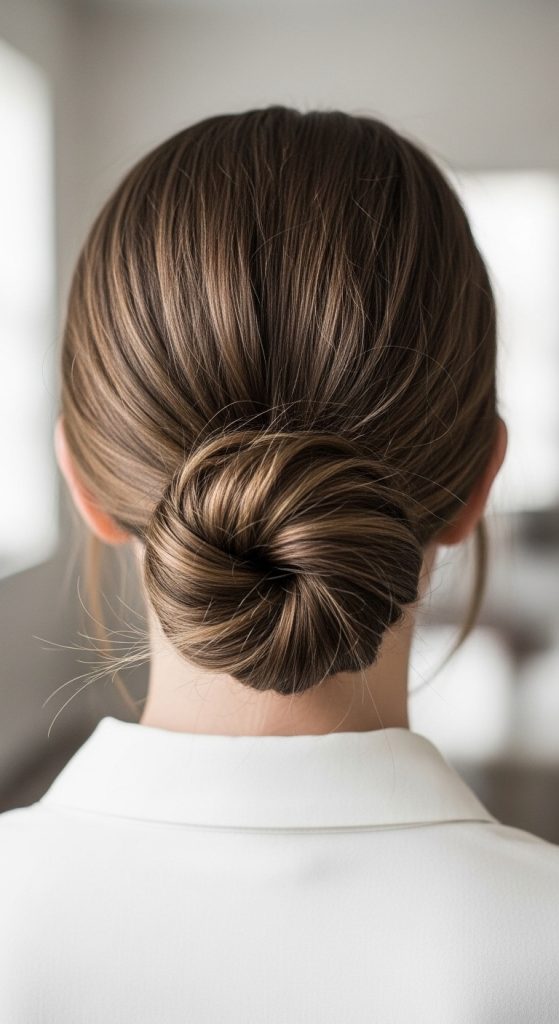
The low knot bun is a minimal and structured hairstyle that creates a knot-like appearance at the back of the head. This style focuses on simplicity and clean execution, making it ideal for those who prefer understated elegance. It is often included in minimalist style tutorials because it requires little volume while maintaining a refined finish. The knot effect gives subtle visual interest without overwhelming the overall look, making it suitable for various prom dress styles and personal aesthetics.
To create this bun, the hair is divided into two sections at the nape and tied into a loose knot. The ends are then wrapped around the base of the knot and secured with pins. The structure is tightened carefully to maintain shape without losing softness. Flyaways can be controlled with light smoothing techniques. This step by step method is quick and efficient, making it a practical choice for beginners seeking a simple yet elegant prom hairstyle.
Idea 9: Curled Bun Updo
How to Create
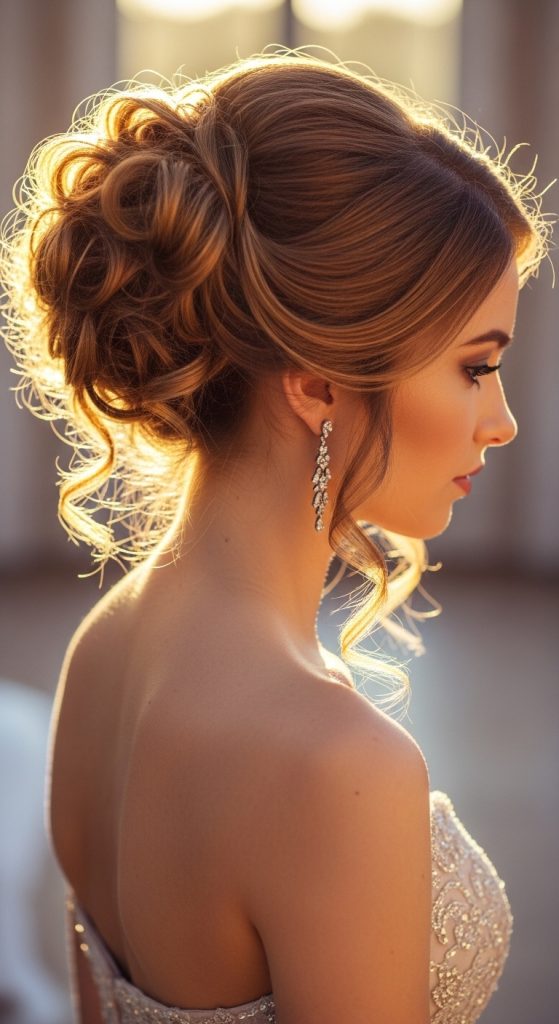
The curled bun updo adds softness and volume through pre-curled hair, creating a romantic and textured bun style. This hairstyle is popular in inspiration boards that focus on flowing and feminine aesthetics. The curls provide natural dimension, allowing the bun to appear fuller and more dynamic. This makes it ideal for individuals with medium to long hair who want a decorative yet controlled prom hairstyle. It fits well into modern design trends that emphasize texture and movement.
To create this bun, the hair is first curled and allowed to set for texture. It is then gathered loosely into a ponytail and pinned into a bun shape without flattening the curls. Sections are arranged to maintain volume and natural flow. Bobby pins secure the structure while preserving curl definition. Adjustments are made to enhance balance and softness. This step by step approach creates a romantic and visually rich hairstyle suitable for formal events.
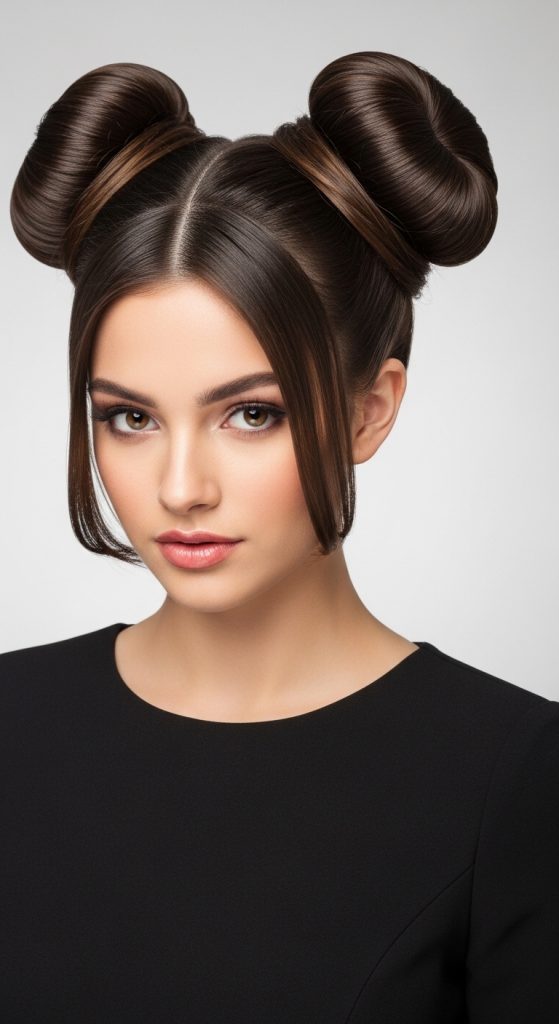
Idea 10: Double Bun Style
How to Create
The double bun style introduces two separate bun structures, creating a playful yet balanced prom hairstyle. This design is often chosen for creative ideas that break traditional symmetry while maintaining elegance. It can be styled vertically or side-by-side depending on preference. The double structure adds uniqueness and visual interest, making it a standout option in Pinterest tutorials focused on modern experimentation.
To create this style, the hair is divided into two equal sections. Each section is twisted and wrapped into individual buns. Both buns are secured with pins and adjusted for symmetry. The spacing between buns is refined to maintain balance. This step by step method is simple yet visually distinctive, making it suitable for beginners who want to explore creative bun variations.
Common Beginner Mistakes and How to Avoid Them
Many beginners struggle with uneven sectioning, overly tight styling, or insufficient pinning when creating prom buns. These mistakes often lead to discomfort or unstable hairstyles that do not last throughout an event. Another common issue is skipping preparation steps such as detangling or texture building, which affects final results. Using too many or too few bobby pins can also disrupt balance and structure. To avoid these problems, it is important to follow step by step tutorials carefully and practice section control before styling. Ensuring proper preparation and patience significantly improves the outcome of DIY hairstyles and leads to more polished results.
Practical Tips for Better Results
Improving prom bun results often comes down to small adjustments in technique and preparation. Working with slightly textured hair instead of completely flat hair helps improve grip and structure. Practicing sectioning before starting the full hairstyle increases accuracy and reduces mistakes. Using controlled tension while tying and pinning ensures comfort without sacrificing stability. Maintaining consistent symmetry during styling also enhances visual balance. Following these practical tips allows beginners to achieve more refined results while keeping the process simple and manageable.
Styling, Presentation, or Organization Ideas
Presentation plays an important role in how prom buns appear overall. Face framing strands can be adjusted to soften or sharpen the look depending on preference. Adding subtle volume at the crown can enhance elegance without overwhelming the style. Ensuring clean parting lines improves overall organization and visual clarity. Hairstyles can also be paired with different hair textures to match outfit styles and personal aesthetic direction. These styling adjustments help transform basic buns into polished and visually appealing prom-ready looks.
Budget or Time Planning
Prom buns are highly efficient in both cost and time because they require minimal tools and materials. Most styles can be completed within a short timeframe once basic techniques are understood. Planning ahead by practicing the hairstyle reduces preparation stress on the actual event day. Using simple tools already available at home supports budget ideas and reduces the need for professional services. Time management improves significantly when each step is broken down into preparation, styling, and finishing stages, making the process organized and predictable.
Creative Expansion and Advanced Inspiration
Prom buns can be expanded into more advanced styles by combining multiple techniques such as braiding, twisting, and layering. Adding structured volume or incorporating detailed sections creates more complex designs suitable for experienced users. Experimenting with asymmetry or mixed textures allows for unique variations that still remain elegant. These creative project extensions help develop styling skills while encouraging experimentation. Over time, beginners can evolve basic DIY tutorials into more advanced and personalized hairstyles that reflect individual creativity and modern design preferences.